
Removing window tint from a car can seem tricky, but it’s a task anyone can tackle with the right tools and steps. The best way to remove tint safely involves using heat to loosen the adhesive, followed by careful scraping and cleaning to avoid damage to the glass. This guide covers clear, easy methods for removing old or damaged tint without hassle.
Many people remove tint because it fades, bubbles, or simply doesn’t look right anymore. Whether you want a fresh start or your windows need to meet legal standards, this article explains how to get the job done cleanly and efficiently. Readers will find practical advice that covers everything from preparation to removing sticky residue.
This article also helps with common problems like fragile defroster lines or tough adhesive stains. With simple steps and recommended tools, readers will learn how to do the job themselves or know when it’s best to call a pro. It’s a full, reliable guide to restoring clear, tint-free windows.
Key Takeways
- Heat is key to loosening tint adhesive for easy removal.
- Careful scraping prevents damage to the glass and defroster lines.
- Proper cleaning after removal ensures no residue is left behind.
Understanding Window Tint
Window tint comes in many forms and serves different purposes. Knowing the types of tint, why it might be removed, and legal rules helps make the removal process clear and effective.
Types of Window Tint
There are several common types of window tint film. Dyed tint uses dye to block sunlight. It is affordable but may fade over time. Metalized tint contains tiny metal particles that deflect heat and UV rays. It can interfere with electronic signals, like GPS.
Carbon tint offers good heat rejection without affecting signals. It is durable and tends not to fade. Ceramic tint is the most advanced, blocking heat and UV rays effectively without reducing visibility or signal quality.
Each type sticks differently to glass, which affects how easily it can be removed. Knowing the tint type helps in choosing the right removal tools and method.
Reasons to Remove Tint
People remove window tint for many reasons. Sometimes the tint fades, peels, or bubbles, making the windows look bad or reducing visibility.
Others remove tint to improve visibility, especially if the film is too dark or doesn’t meet local rules. Some want to replace old tint with a better, more durable type like ceramic.
In some cases, tint removal is needed when selling a car, passing vehicle inspections, or fixing tint damage after accidents. Proper removal avoids damage like scratches or adhesive residue on the glass.
Legal Considerations
Window tint laws vary by region and can affect how dark or reflective the film can be. These laws focus on driver visibility and safety.
Too-dark tint on front side windows and the windshield is often illegal. Rear windows might allow darker tint, but this varies.
If a car’s tint does not follow local rules, the driver could face fines or be required to remove it. Understanding these laws before installing or removing tint prevents legal trouble and ensures the vehicle stays street-legal.
Preparation and Safety
Removing car window tint requires the right tools, careful safety measures, and protecting the vehicle’s interior. Being prepared helps avoid damage and ensures a smoother process.
Required Tools and Materials
Essential tools include a heat source like a hairdryer or heat gun to soften the adhesive. A sharp razor blade or utility knife is needed to lift the tint edges gently. Adhesive remover or soapy water helps clean residual glue after peeling.
| Tool/Material | Purpose | Notes |
|---|---|---|
| Heat gun / Hairdryer | Soften adhesive for easier peeling | Use low heat to avoid glass damage |
| Razor blade | Lift and peel tint | Handle carefully to prevent scratches |
| Adhesive remover | Remove sticky residue | Choose a non-abrasive formula |
| Soapy water | Clean glass after tint removal | Mild dish soap works well |
| Spray bottle | Apply soapy water or remover | Helps cover glass evenly |
| Microfiber cloth | Wipe and dry glass | Prevents streaks and scratches |
Having these tools ready before starting saves time and reduces the risk of errors.
Safety Precautions When Removing Tint
Working with sharp blades, heat, and chemical cleaners requires caution. Always wear protective gloves to avoid cuts and chemical irritation. Safety glasses protect the eyes from flying bits of adhesive or glass shards.
Work in a well-ventilated area, especially when using adhesive removers, to avoid inhaling fumes. Keep children and pets away during the process.
When applying heat, avoid overheating the glass or surrounding trim to prevent warping or cracking. Taking breaks to let surfaces cool down helps maintain safety.
Protecting Your Car Interior
The car’s interior can be damaged by chemicals or sharp tools. Cover seats and panels with old towels or plastic sheets before starting.
Use painter’s tape along window edges to prevent tools from scratching plastic or painted surfaces. Remove car electronics near the windows to stop any damage from liquids or heat.
Avoid spraying adhesive remover inside the door panel to prevent harming upholstery or electrical components. Careful protection helps keep the car clean and intact through the removal process.
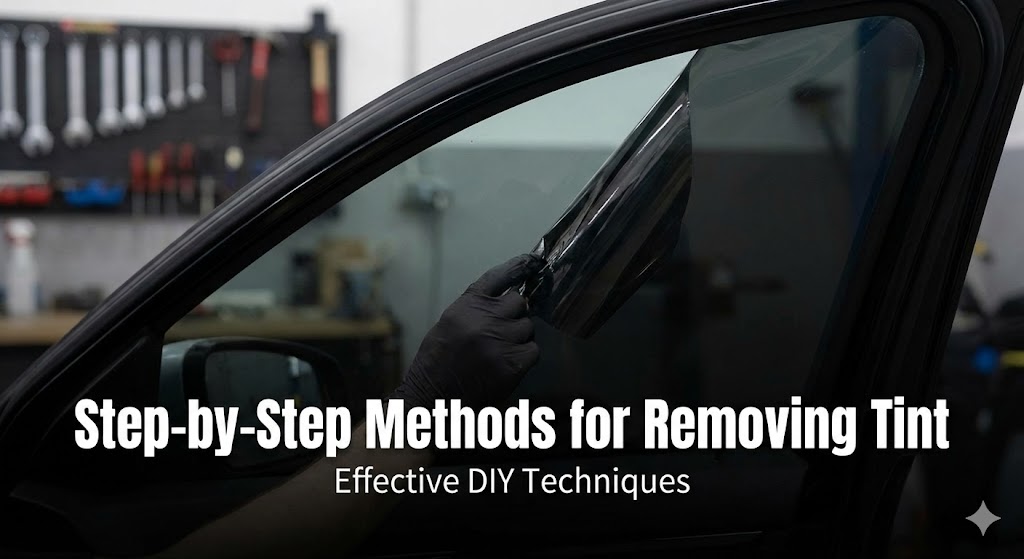
Step-by-Step Methods for Removing Tint
Removing tint requires specific tools and techniques depending on the tint type and condition. Using heat, soapy water, or ammonia are common approaches. After peeling the tint, any leftover adhesive must be cleaned carefully to avoid damage.
Removing Tint with Heat
Heat softens the adhesive holding the tint film to the glass. A heat gun or hairdryer works well to warm the window evenly. The user should keep the heat source moving to avoid overheating or cracking the glass.
Once warm, the tint can slowly be peeled from a corner. Pulling gently at a low angle helps keep the tint in one piece. If the tint resists, reheating may be needed. Patience is key to avoid ripping the film or damaging defroster lines.
Peeling Tint with Soapy Water
Soapy water loosens the adhesive bond, making tint easier to peel. First, spray a mixture of warm water and dish soap onto the window. Soaking the tint for several minutes allows water to seep between the adhesive and glass.
After soaking, start peeling the tint at an edge. Using a plastic razor blade can help lift tough areas. The water reduces stickiness, minimizing adhesive residue and tearing. This method is gentle, ideal for less stubborn tint.
Ammonia Method for Tint Removal
Ammonia breaks down glue effectively, especially with old or thick tint. Spray ammonia on the tint and cover the window with plastic wrap to trap heat and moisture. Let it sit for 30 to 60 minutes.
After time passes, the tint should become easier to peel. It is important to work in a well-ventilated space because ammonia fumes are strong. Wearing gloves and eye protection also prevents irritation. This method works best for heavier or older films that don’t come off easily.
Scraping Off Residual Adhesive
After tint removal, sticky glue often remains on the glass. A razor blade or scraper is the main tool to remove this residue. Hold the blade at a shallow angle and scrape gently to avoid glass damage.
Using an adhesive remover or rubbing alcohol on a cloth helps dissolve leftover glue. Wiping the window repeatedly will clear any haze or stickiness. Thorough cleaning ensures a clear, smooth surface ready for a new tint or normal use.
Cleaning and Finishing After Tint Removal
After removing window tint, the glass often has leftover glue and dirt. Proper cleaning ensures the surface is smooth, clear, and free of sticky residue. Taking the right steps helps avoid damage and improves visibility.
Removing Glue Residue
Glue residue sticks to the glass after peeling off tint. It can be soft or hard, depending on how long the tint was on the window. To remove it, use a commercial adhesive remover or household items like rubbing alcohol or a mixture of warm water and dish soap.
Apply the remover with a cloth or sponge. Let it sit for a few minutes to weaken the glue. Then, gently scrub in circular motions to lift the adhesive. Avoid harsh scraping tools that might scratch the glass.
If residue remains, repeat the process or try a plastic razor blade for careful scraping. Wipe the area clean with a damp cloth and dry it completely before moving to the next step.
Cleaning the Glass Surface
Once glue is gone, cleaning the entire glass ensures no streaks or dirt are left. Use a glass cleaner or a solution of vinegar and water applied with a microfiber cloth for best results.
Spray the cleaner evenly on the glass. Wipe in a vertical then horizontal pattern to avoid streaks. For stubborn spots, gently rub with a soft cloth or use a sponge dampened with soapy water.
Be sure to clean both inside and outside window surfaces. Dry the glass with a clean, lint-free cloth to restore full clarity. Proper cleaning improves visibility and maintains the window’s appearance.
Common Challenges and Solutions
Removing window tint can be tricky due to stubborn film and the risk of damaging the glass. Proper techniques and the right tools help avoid common problems and make the process smoother and safer.
Dealing with Stubborn Tint
Stubborn tint often resists peeling because of strong adhesive or long-term exposure to heat and sunlight. Applying heat with a hairdryer or fabric steamer softens the glue and makes it easier to lift the film. Patience is key—heating the window evenly for several minutes before peeling helps prevent tearing.
If the tint tears, using a razor blade carefully can help remove leftover pieces, but it should be done slowly to avoid scratching the glass. In some cases, soaking the tint with soapy water or a vinegar solution loosens the adhesive further. It’s important not to pull too hard since sudden force can cause the film to break up and make removal harder.
Preventing Glass Scratches
Glass scratches take away from the clarity and value of car windows. To avoid them, it’s crucial to use sharp, clean tools like new razor blades or plastic scrapers. Dull blades can cause scratches by dragging unevenly across the glass.
Wiping away adhesive residue with a soft cloth and an adhesive remover or rubbing alcohol helps prevent scratching during cleanup. Applying heat before scraping also reduces the risk by softening glue, letting it come off gently instead of scraping across a rough surface.
Protective gloves and careful, slow movements lower the chance of accidental slips that could mark the glass. Always test tools on a small window area first to judge safety and effectiveness.
Professional vs. DIY Tint Removal
Removing car window tint can be done by a professional or by the car owner. Each option affects cost, time, and the quality of the results. The choice depends on the tools available, skill level, and how quickly the tint needs to be removed.
Benefits of Professional Services
Professional tint removal uses specialized tools and techniques that reduce the risk of damaging the glass or window seals. Experts can remove old tint quickly and cleanly, even if the adhesive is stubborn or the tint has been on for years. This method lowers the chance of scratches or leftover glue.
Though professional services cost more, they save time. A professional can finish the job in a couple of hours, while DIY may take much longer. They also handle difficult spots that are hard to reach or sensitive. For drivers who want a guaranteed, neat finish, paying for the service is often worth the expense.
When to Seek Expert Help
Experts are recommended when the tint has been on for a long time or if the tint film is low quality. Old tint tends to break into small pieces during removal, making it hard to peel off completely on your own. Also, some windows have curved or complex designs that need careful handling.
If a person lacks the right heat tools or cleaning products, or fears damaging their car, professional help is safer. Legal rules on tint darkness or condition may require fast removal, making professional speed beneficial. Finally, those without patience or time to learn DIY steps find expert removal less stressful and more efficient.
Aftercare and Re-Tinting Options
After removing window tint, proper care of the glass is important to avoid damage and maintain visibility. When choosing new tint, understanding the types and quality helps ensure a better fit and longer-lasting results.
Maintaining Clean Windows
Once the tint is removed, the windows may have leftover adhesive. Using a glass cleaner with a soft cloth or a specialized adhesive remover helps clear any residue without scratching the surface. Avoid abrasive tools that can damage the glass.
Cleaning the windows regularly prevents dirt buildup, which can affect visibility. He or she should wipe the glass gently, using a non-ammonia cleaner to protect any existing films or coatings. It’s best to avoid harsh chemicals or razor blades.
Checking the edges of the windows for leftover glue can prevent bubbles or peeling if new tint will be applied later. Keeping the glass smooth and clean will make re-tinting easier and improve the finish.
Choosing New Window Tint
When selecting new tint, the main factors are material type, darkness level, and quality. Common tints include dyed film, metalized film, and ceramic film. Dyed tint is affordable but may fade over time. Metalized tint reflects heat well but can interfere with signals. Ceramic tint offers strong UV protection with no signal interference but is costlier.
It is important to pick a tint that complies with local laws on light transmission. Choosing the right darkness ensures safety and comfort without legal issues.
Professional installation is recommended for a smooth finish and durability. However, DIY kits can be used if one takes time and follows the instructions carefully. Higher-quality tint films tend to last longer and resist bubbling or peeling better.
FAQs
How long does it take to remove window tint?
The time needed depends on the size of the windows and the tint condition. It usually takes between 30 minutes to a few hours. Thicker or damaged tint may need more time.
Is it safe to remove tint at home?
Yes, it can be safe if done properly. Using heat like a steamer or hairdryer helps loosen the adhesive. Avoid sharp tools that might scratch the glass.
What tools are needed to remove window tint?
Common tools include a steamer or hairdryer, a razor blade or scraper, and adhesive remover like WD-40. Gloves and a clean cloth can help too.
Can removing tint damage car windows?
If done carefully, it rarely causes damage. However, rushing or using strong chemicals might harm the glass or window seals. Slow and gentle methods are best.
Should someone hire a professional to remove tint?
If the tint is old, bubble-covered, or hard to peel, a professional can ensure a clean job without damage. Hiring a shop may cost more but can save time and effort.
Will removing window tint void warranty or affect window function?
Usually, removing tint does not affect warranty or window operation. It’s important to use safe methods to avoid problems with glass or window mechanisms.
Is there any residue left after removing tint?
Yes, adhesive residue often stays on the glass. It can be cleaned with special solvents or household products like rubbing alcohol but may require some scrubbing.
Conclusion
Removing tint from car windows is a task that requires patience and care. Using heat, adhesive cleaners, or steam methods can make the process smoother and reduce the risk of damaging the glass.
It is important to gather the right tools before starting. These might include a heat gun or hairdryer, a razor blade, and adhesive remover. Taking safety precautions protects both the window and the person doing the work.
For difficult or older tint films, slow and careful peeling is key. Rushing can cause damage or leave sticky residue behind. If the tint glue remains, applying an adhesive cleaner and wiping it off gently helps restore the glass to a clear state.
If the tint removal feels too complicated or risky, consulting a professional is a good option. Experts have experience and tools to remove tint safely without harming the window or defrosters.
The time and effort spent on proper removal will result in better glass clarity and avoid extra repairs. Following recommended techniques and using suitable products ensures the tint comes off effectively and cleanly.