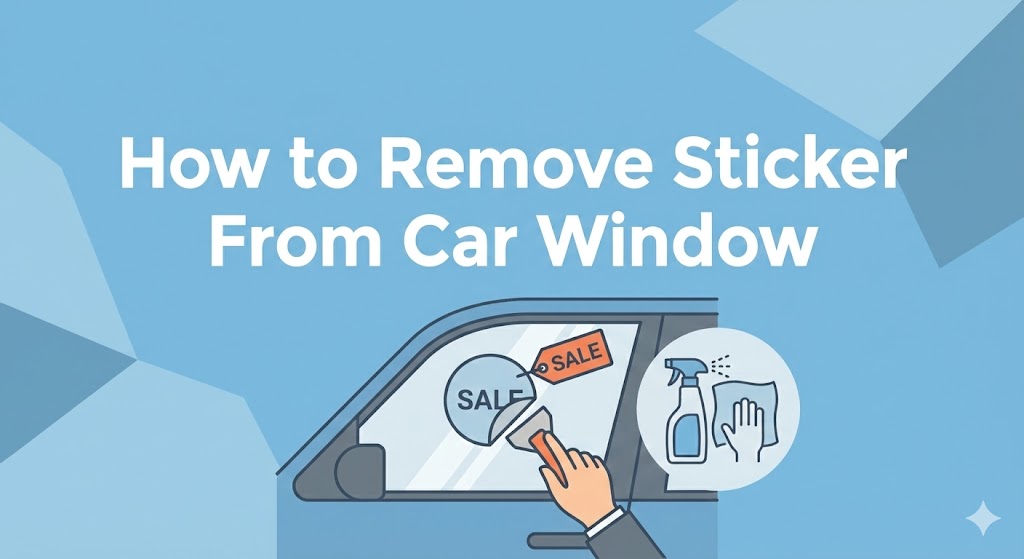
Removing a sticker from a car window can seem tricky, but the best way to do it is to soften the adhesive with heat and carefully peel the sticker off without damaging the glass. This simple approach makes the job easier and helps avoid scratches or leftover sticky residue. Knowing the right tools and steps can save time and keep the window looking clean.
This guide will teach readers how to safely and effectively remove stickers, from old decals to parking permits. It covers practical tips on loosening the adhesive, scraping gently, and cleaning up any stubborn residue. Whether someone is new to this task or looking to improve their skills, the article addresses common challenges and offers solutions.
By following clear methods, anyone can get a smooth, sticker-free window. The guide also explains when to use household items versus specialized products and how to protect car glass during the process. It’s a complete, easy-to-understand resource for maintaining a clear view through any car window.
Key Takeways
- Heat helps loosen sticker adhesive for easier removal.
- Use gentle tools to peel stickers without scratching glass.
- Clean leftover residue to restore a clear window surface.
Understanding Sticker Types
Different stickers have various materials and adhesives that affect how they can be removed from car windows. Knowing the type of sticker will help pick the best method to remove it without damaging the glass.
Paper Stickers
Paper stickers are often used for temporary purposes like parking permits or simple labels. They tend to be thin and fragile, so they can tear easily when peeling. The adhesive on paper stickers is usually water-based or weak, which means soaking them with warm water or a wet cloth can loosen them.
However, paper stickers may leave behind paper bits or sticky residue if removed too quickly. Patience is key; soaking the sticker for several minutes helps soften the glue. Use a plastic scraper instead of a metal one to avoid scratching the glass. Avoid strong chemicals since paper stickers absorb liquids and deteriorate, which makes removal messier.
Vinyl Stickers
Vinyl stickers are thicker and more durable than paper ones. They are common for decals or decorative designs. The adhesive on vinyl stickers is stronger, often a pressure-sensitive or permanent glue that bonds tightly to the glass.
Heat is an effective way to soften vinyl sticker glue. Using a hairdryer or heat gun on low settings warms the adhesive, making it easier to peel off in large pieces.
For stubborn spots, substances like rubbing alcohol or commercial adhesive removers break down the glue without damaging the window. Scraping with a plastic tool helps lift the edge.
Vinyl stickers generally come off cleaner than paper stickers but require more attention to prevent trace residue.
Adhesive Residue
After sticker removal, sticky glue residue often remains on the window. This residue can trap dirt and reduce visibility, so it should be cleaned thoroughly.
Common household items like rubbing alcohol, vinegar, or nail polish remover can dissolve adhesive residue. Apply the substance on a cloth and rub gently.
Commercial adhesive removers or products like WD-40 work well for tougher residues but should be tested on a small area first to avoid damage.
Avoid harsh scrubbing with rough tools, which may scratch the glass. Use soft cloths or plastic scrapers for residue removal. Cleaning the area afterward with glass cleaner ensures a clear, streak-free finish.
Preparing Your Workspace
Before removing a sticker from a car window, it is important to have the right tools, protect the glass, and start with a clean surface. These steps make the process safer and more effective.
Gathering Necessary Tools
The right tools help remove stickers smoothly without damaging the glass. Essential items include:
| Tool | Purpose |
|---|---|
| Plastic scraper | Lifts sticker edges gently |
| Adhesive remover | Softens sticky residue |
| Microfiber cloth | Cleans and polishes the surface |
| Rubbing alcohol | Removes stubborn glue |
| Warm water and soap | Prepares and loosens residue |
| Gloves | Protects hands from chemicals |
Using a plastic scraper instead of metal avoids scratching the glass. Adhesive removers or household items like rubbing alcohol help dissolve glue, making it easier to peel off the sticker. Gloves protect skin from irritation.
Ensuring Car Window Safety
Car windows can crack or scratch if treated roughly. It is crucial to avoid harsh tools like metal blades or sharp objects. These can damage the glass or the window’s tint.
Working in a shaded, clean area helps prevent sunlight from heating the glass. Heat can make adhesives stickier and harder to remove. The car should be parked on a flat surface with enough light to see the sticker clearly.
Tempering the window by using warm water rather than hot water ensures the glass does not face sudden temperature changes, which can cause cracks.
Cleaning the Window Surface
Before applying any remover or peeling the sticker, the window must be clean. Dirt or dust trapped under the sticker can scratch the glass during removal.
Start by washing the area with warm, soapy water. Use a soft cloth or sponge and rinse thoroughly. Dry the window with a clean microfiber cloth to avoid streaks.
If adhesive residue remains from previous stickers, use rubbing alcohol on a cloth to wipe it clean. This step prepares the surface for a smooth sticker removal process and prevents smudging or streaks.
Manual Sticker Removal Methods
Removing a sticker from a car window by hand requires patience and care. The goal is to lift or scrape the sticker without scratching or damaging the glass. Using fingers or simple tools can be effective if done correctly.
Peeling With Fingernails
Peeling a sticker off with fingernails works best when the sticker’s edge is already loose. The person should start by gently lifting one corner of the sticker. Using slow and steady motion, they can pull the sticker back at a low angle. Fast or rough pulling risks tearing the sticker, leaving behind sticky residue.
If the sticker is stubborn, warming the area slightly with a hairdryer softens the adhesive and makes peeling easier. It is important to avoid using sharp objects during this step to protect the glass. Patience is key; removing the sticker bit by bit helps prevent damage.
Using Plastic Scrapers
Plastic scrapers are useful tools designed to remove stickers without scratching glass. The user should hold the scraper at a shallow angle and slide its edge under the sticker. Applying gentle pressure helps lift the sticker away from the glass.
A plastic card, like an old credit card, can also work well as a scraper. Metal tools are not recommended because they can easily scratch or chip the window. If adhesive remains, repeating the scraping process or combining it with mild heat improves results. The scraper should be cleaned regularly during the task to avoid spreading residue.
Chemical Adhesive Removal Techniques
Chemical products can break down the sticky residue left by stickers on car windows. Using the right substances and methods avoids damage to the glass while efficiently removing adhesive.
Applying Rubbing Alcohol
Rubbing alcohol is a common household item that works well on adhesive residue. It dissolves the glue without harming the glass or paint.
How to use rubbing alcohol:
| Step | Description |
|---|---|
| 1. Prepare | Dampen a clean cloth with rubbing alcohol. |
| 2. Apply | Rub the cloth gently over the sticky area. |
| 3. Wait | Give the alcohol a few minutes to soak in. |
| 4. Wipe | Use a clean cloth to remove loosened residue. |
| 5. Repeat if needed | Repeat until all adhesive is gone. |
Avoid soaking large areas to prevent damage to window tint or seals. It works best on fresh or lightly stuck adhesive.
Utilizing Commercial Adhesive Removers
Commercial adhesive removers are specially made to tackle tough glue. These products contain chemicals that soften residue quickly and safely.
Key points for use:
- Choose a remover labeled safe for glass and automotive surfaces.
- Follow product instructions carefully.
- Apply remover with a soft cloth or sponge.
- Let it sit for the recommended time (usually a few minutes).
- Wipe away residue using a clean cloth.
- Rinse the window with water afterward to remove chemical traces.
Many removers handle stubborn or aged adhesives better than household products. They can save time but may cost more. Always test in a small area first to avoid damage.
Heat-Based Removal Approaches
Heat softens the adhesive under stickers, making them easier to peel off without leaving damage. Applying controlled warmth is key to loosening glue while protecting the glass surface.
Using a Hair Dryer
A hair dryer is a simple tool that heats the sticker evenly. Hold it 4 to 6 inches from the glass and move it in slow circles to warm the entire sticker area. This usually takes 2 to 4 minutes, depending on the hair dryer’s power and the size of the sticker.
As the heat loosens the adhesive, the edges of the sticker will start to lift. Use a plastic scraper or fingernail to gently peel the sticker. If it resists, apply more heat before trying again. Avoid using metal tools to prevent scratching the glass.
Applying Warm Soapy Water
Warm soapy water works when heat alone isn’t enough, especially on stickers exposed to weather or sun for a long time. Mix a few drops of dish soap with warm water. Soak a clean cloth in the solution and press it onto the sticker for 3 to 5 minutes.
The water helps break down the adhesive and softens the sticker backing. After soaking, gently lift the corner of the sticker with a fingernail. Rub the soapy cloth over any leftover adhesive to loosen it further. Rinse the area with clean water once the sticker is removed to clear any residue.
Cleaning Leftover Residue
Removing a sticker often leaves behind sticky residue that can be tough to clean. It is important to use the right tools and cleaning methods to avoid scratching the glass while fully clearing the adhesive. The process involves careful wiping and a final cleaning step to restore the window’s clarity.
Microfiber Cloth Wiping
A soft microfiber cloth is essential for removing leftover adhesive safely. Start by dampening the cloth with warm water or a mild cleaning solution specifically designed for car windows. Avoid abrasive materials that can scratch the glass.
Gently rub the residue in circular motions to soften and lift the sticky film. For stubborn spots, apply a small amount of isopropyl alcohol or a commercial adhesive remover to the cloth—not directly on the glass—and continue wiping. This prevents excess liquid from seeping into edges or seals.
Use clean sections of the cloth frequently to avoid spreading residue. Patience during this step reduces risk and improves results. The goal is to loosen the adhesive without damaging the glass or tint.
Final Window Cleaning
After the residue is removed, cleaning the window with a glass cleaner ensures clear, streak-free results. Spray the cleaner evenly and wipe it off with a fresh microfiber cloth or paper towel.
Move the cloth in horizontal or vertical strokes to prevent streaks. Check the glass under direct light to spot any remaining smudges or residue.
For best results, avoid cleaning in direct sunlight, which can cause cleaner to dry too fast and leave marks. This step completes the process, restoring the window’s smooth surface and transparency.
Protecting Car Windows During Removal
Proper care is essential to keep car windows safe when removing stickers. Using the right tools and materials prevents damage to the glass and maintains the window’s clarity. Attention to detail helps avoid scratches and chemical harm.
Preventing Glass Scratches
Avoid sharp or metal tools like knives or razor blades directly on the glass, as these can easily cause scratches. Instead, a plastic card (credit card or library card) works well for gently scraping off stickers without damaging the surface.
When scraping, apply light pressure and move slowly to separate the sticker edges. Reheating the sticker with a hairdryer softens the adhesive, making removal easier and reducing the need for forceful scraping.
Always clean the window with a soft cloth during and after removal to clear any small debris that might scratch the glass if rubbed later.
Avoiding Chemical Damage
Many common solvents remove sticker glue but can damage window tint or rubber seals around car windows. It is safer to test any chemical like rubbing alcohol or nail polish remover on a small area first.
Use mild solutions like a mix of warm water and dish soap before trying stronger chemicals. Household products like WD-40 can help dissolve adhesive without harsh effects but should still be applied carefully.
Avoid spraying solvents directly onto the window; instead, apply them to a cloth or cotton ball for controlled cleaning. This also protects surrounding surfaces.
When to Seek Professional Help
Removing stickers from car windows can be simple, but sometimes it becomes tricky. If the sticker is old and the adhesive is very sticky or hardened, it might not come off easily with home methods. In these cases, trying too hard can scratch or damage the glass.
When the sticker leaves behind thick residue that won’t come off with common tools or cleaners, professional help is a good option. Professionals have special products and tools to remove tough adhesives without harming the window. This can save time and reduce stress.
If the sticker has been on the window for a long time and started to discolor or leave marks, experts can often restore the glass to near-original condition. This is especially important if the car is new or if the owner plans to sell it.
People should also call a pro if they feel unsure about using chemicals like nail polish remover or WD-40. Incorrect use of these products can damage window tint or seals. Professionals know how to protect the car’s finish and glass while working.
Signs to seek professional help:
- Sticker adhesive is very old or thick
- Residue does not come off with usual methods
- Window tint or seals might be affected
- Risk of glass damage if removal is forced
- Time and patience for DIY removal are limited
Choosing professional assistance ensures the sticker is removed cleanly and safely.
Preventing Future Sticker Stains
To avoid sticker stains on car windows, it helps to use the right type of sticker. Choose stickers with a low-residue adhesive. These are designed to peel off cleanly without leaving sticky marks behind.
Before applying a sticker, the window should be clean and dry. Dirt or moisture can cause the adhesive to stick harder and leave residue. Wiping the glass with a mild cleaner can provide a smooth surface for the sticker to bond properly.
When placing a sticker, it is best to apply it carefully to reduce the chance of peeling or bubbling. If a sticker starts to lift at the edges, it can collect dirt and become harder to remove later.
If the sticker is temporary, remove it as soon as it is no longer needed. The longer a sticker stays on, the more likely it is to leave a stain or residue.
Using a protective layer like clear vinyl or a window protector over the sticker can also help. This barrier can prevent the adhesive from bonding directly to the glass.
Here is a quick list of tips for preventing sticker stains:
- Use low-residue or removable stickers
- Clean and dry the window before applying
- Apply stickers carefully to avoid lifting edges
- Remove temporary stickers promptly
- Consider a protective layer over the sticker
Following these steps makes it easier to keep car windows clean and free of sticky residue.
FAQs
Can stickers damage car windows?
Stickers themselves usually do not damage the glass. However, if removed incorrectly, they can leave adhesive residue or cause scratches. Using gentle methods helps protect the window.
What is the safest way to remove a sticker from a car window?
Most experts recommend peeling the sticker slowly and carefully. For stubborn stickers, using household items like rubbing alcohol, nail polish remover, or WD-40 can help dissolve the glue without harming the glass.
How do you get sticky residue off car windows?
Sticky residue can be wiped away with a cloth soaked in rubbing alcohol or a commercial adhesive remover. Avoid harsh scrubbing, which might scratch the glass. Patience is key.
Is it okay to use heat to remove stickers?
Warmth from a hair dryer or heat gun softens the glue and makes peeling easier. It should be done carefully to avoid overheating or damaging the window seal.
Can cold help remove stickers?
Yes. Applying an ice cube can harden the glue, making it brittle and easier to scrape off. This method works best for small stickers and delicate surfaces.
Are there tools that help with sticker removal?
Plastic scrapers or old credit cards are useful for lifting edges without scratching glass. Avoid metal tools, as they can cause damage.
| Method | Pros | Cons |
|---|---|---|
| Rubbing Alcohol | Safe and effective | May require multiple tries |
| Heat (Hair Dryer) | Softens glue | Risk of overheating |
| Ice Cube | Hardens glue | Less effective on large stickers |
| WD-40 | Dissolves adhesive | Requires thorough cleaning |
Conclusion
Removing stickers from a car window requires patience and the right approach. Using common household items like rubbing alcohol, nail polish remover, or soapy water can effectively loosen adhesive without harming the glass.
Applying heat with a hairdryer or heat gun helps soften stubborn decals, making them easier to peel off. Afterward, a plastic card can be used to gently scrape away any leftover residue without scratching the surface.
If adhesive remains, products like WD-40 or commercial adhesive removers work well to clear sticky spots. Always test these on a small area first to avoid damage.
Key tips for success:
- Work slowly and carefully to avoid glass damage
- Use heat to soften hardened glue
- Scrape gently with non-metal tools
- Clean the window afterward with glass cleaner for a clear finish
By choosing the right method and tools, anyone can remove stickers cleanly and safely from car windows. This helps maintain the car’s appearance and keeps the glass streak-free.