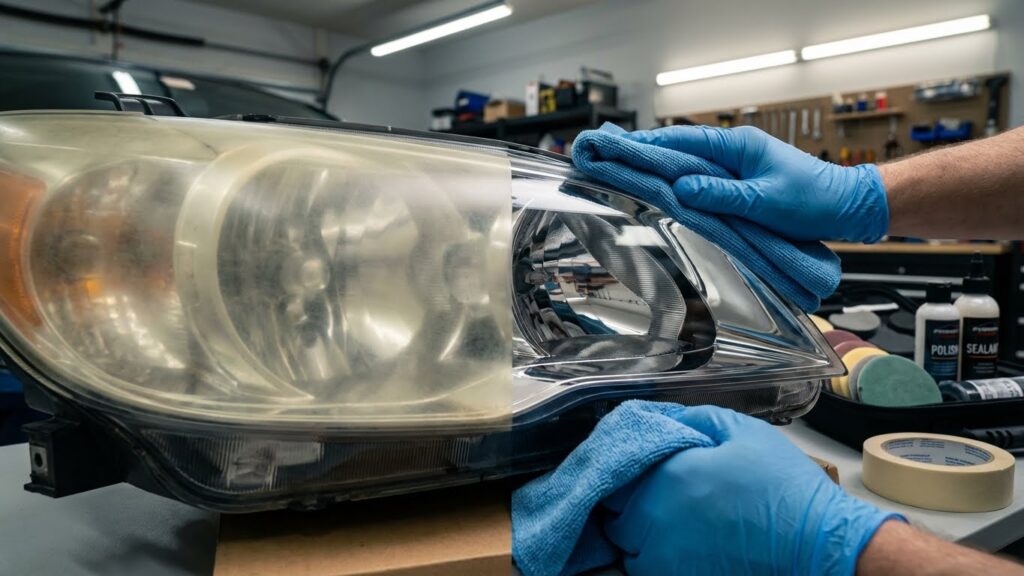
Car headlights dull from road grime, UV rays, and tiny scratches, which cuts light output and can make night driving unsafe. Restorer kits and polishing tools let car owners bring back clarity without replacing the whole headlight assembly. They do this by removing the oxidized layer, filling minor scratches, and sealing the lens to slow future yellowing.
The main things to check when choosing a headlight restorer are how abrasive the system is, whether it includes a durable UV sealant, and if it fits your skill level and tools—some kits need a drill or buffer while others work by hand. We tested a range of kits and tools to find the ones that reliably clear lenses and restore night visibility while offering long-lasting protection. This guide walks through our top picks, buying tips, and comparisons so you can pick the right option for your car.
Best Car Headlight Restorers
We tested and researched top car headlight restorers to find products that clear haze, protect lenses, and are easy to use. Below is our list of the best options to help you pick the right restorer for your car.
Cerakote Headlight Kit
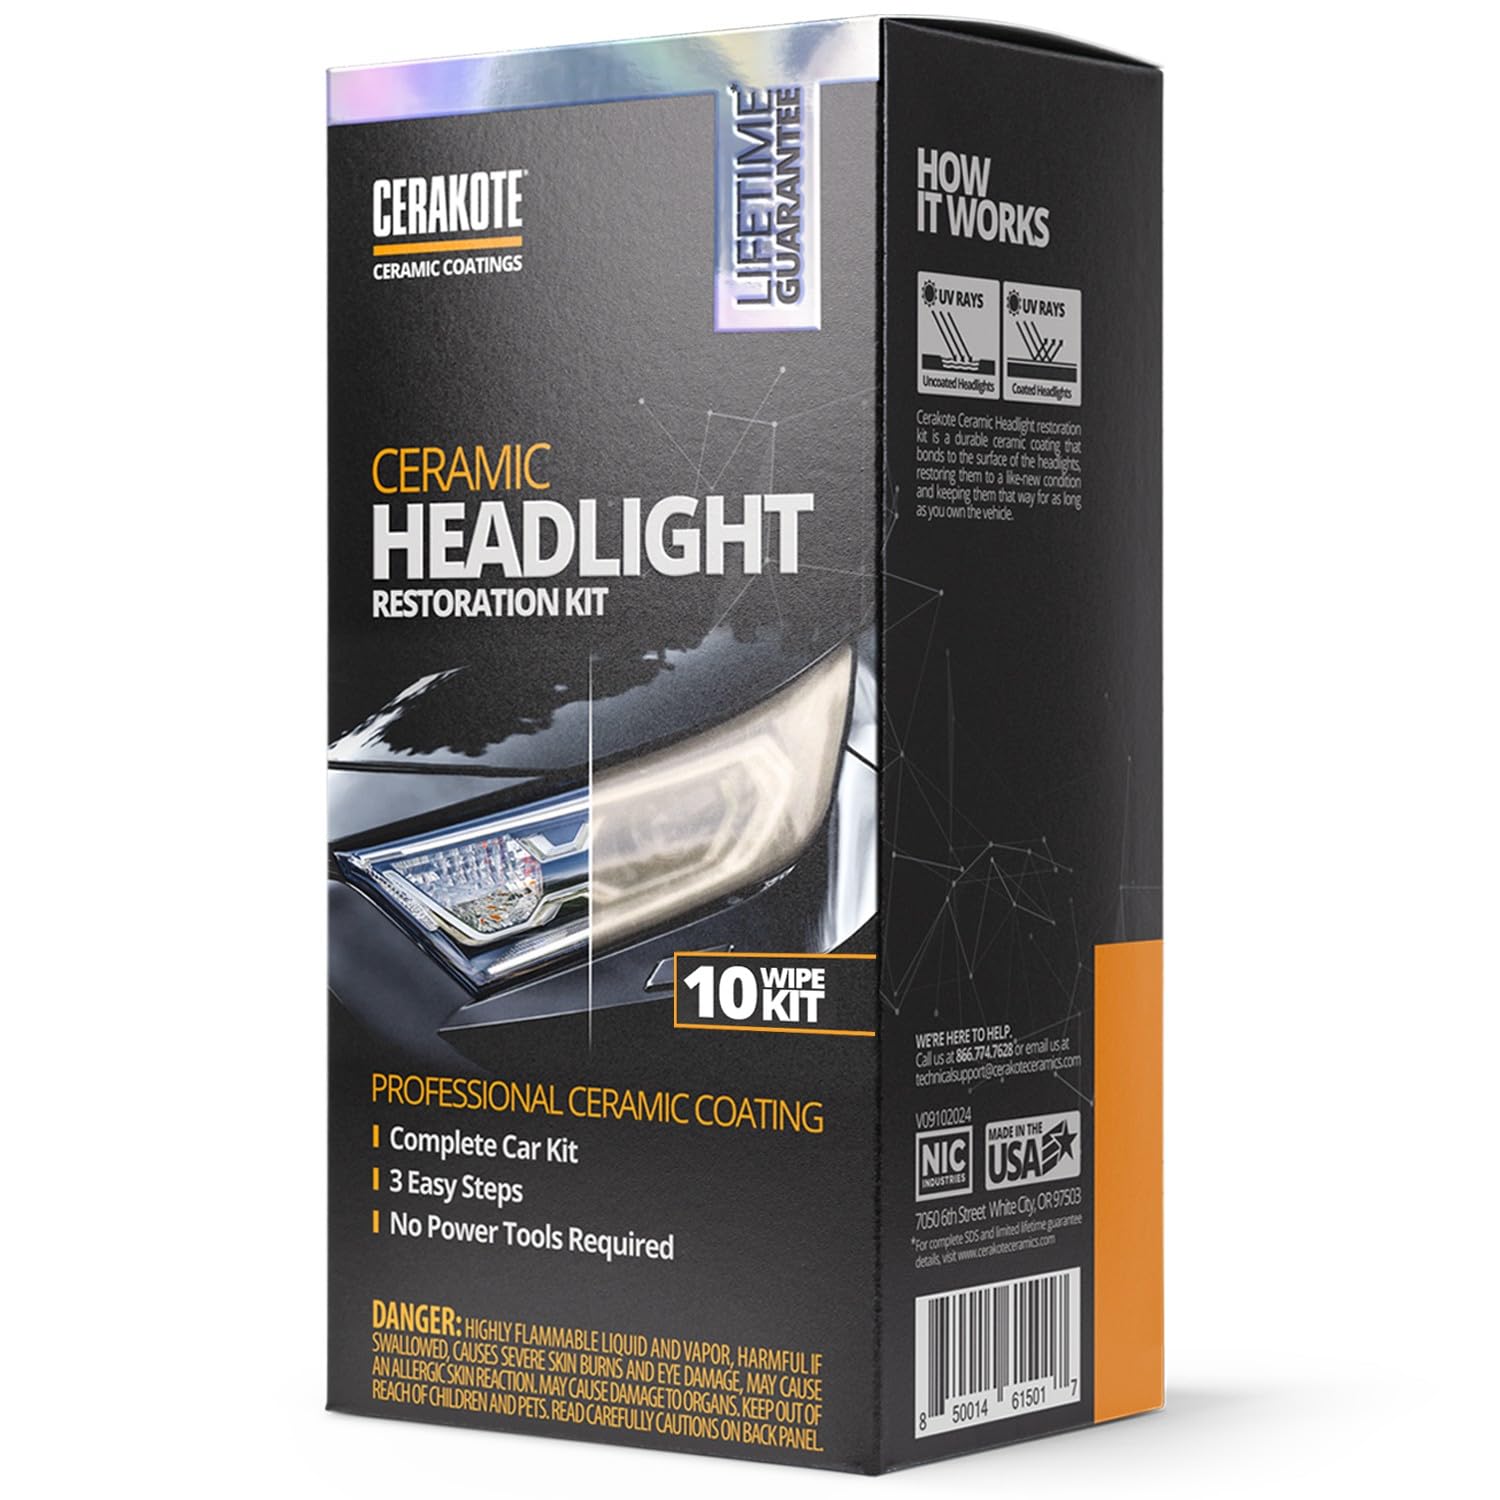
We recommend this kit when you want a long-lasting, easy fix that really clears cloudy headlights.
Pros
- Lasts a long time with ceramic coating
- No power tools needed, simple three-step process
- Kit includes wipes and sanding materials for a full job
Cons
- Sandpaper may be too fine for heavy oxidation
- Requires careful taping and patience for best results
- One kit may barely cover more than one large vehicle
We used this kit on a pair of hazy headlights and liked how it felt straightforward. The oxidation wipes cut surface fog quickly, and the sanding pieces smoothed the deeper areas when we spent a bit more time. Applying the ceramic wipes felt simple and left a clear finish that looked like new.
After the job we noticed much better light output and a clean look. The coating dried to a slick, hard layer and left little residue. Results seemed to improve after a short cure time, so we recommend letting it sit before driving.
If headlights are heavily yellowed, bring coarser sandpaper than the kit provides. We swapped in a 1500 grit to speed removal on deep pitting. Overall, the process took about 30–45 minutes for both sides when we worked steadily and taped the surrounding paint well.
Chemical Guys Headlight Restore & Protect (16 oz)
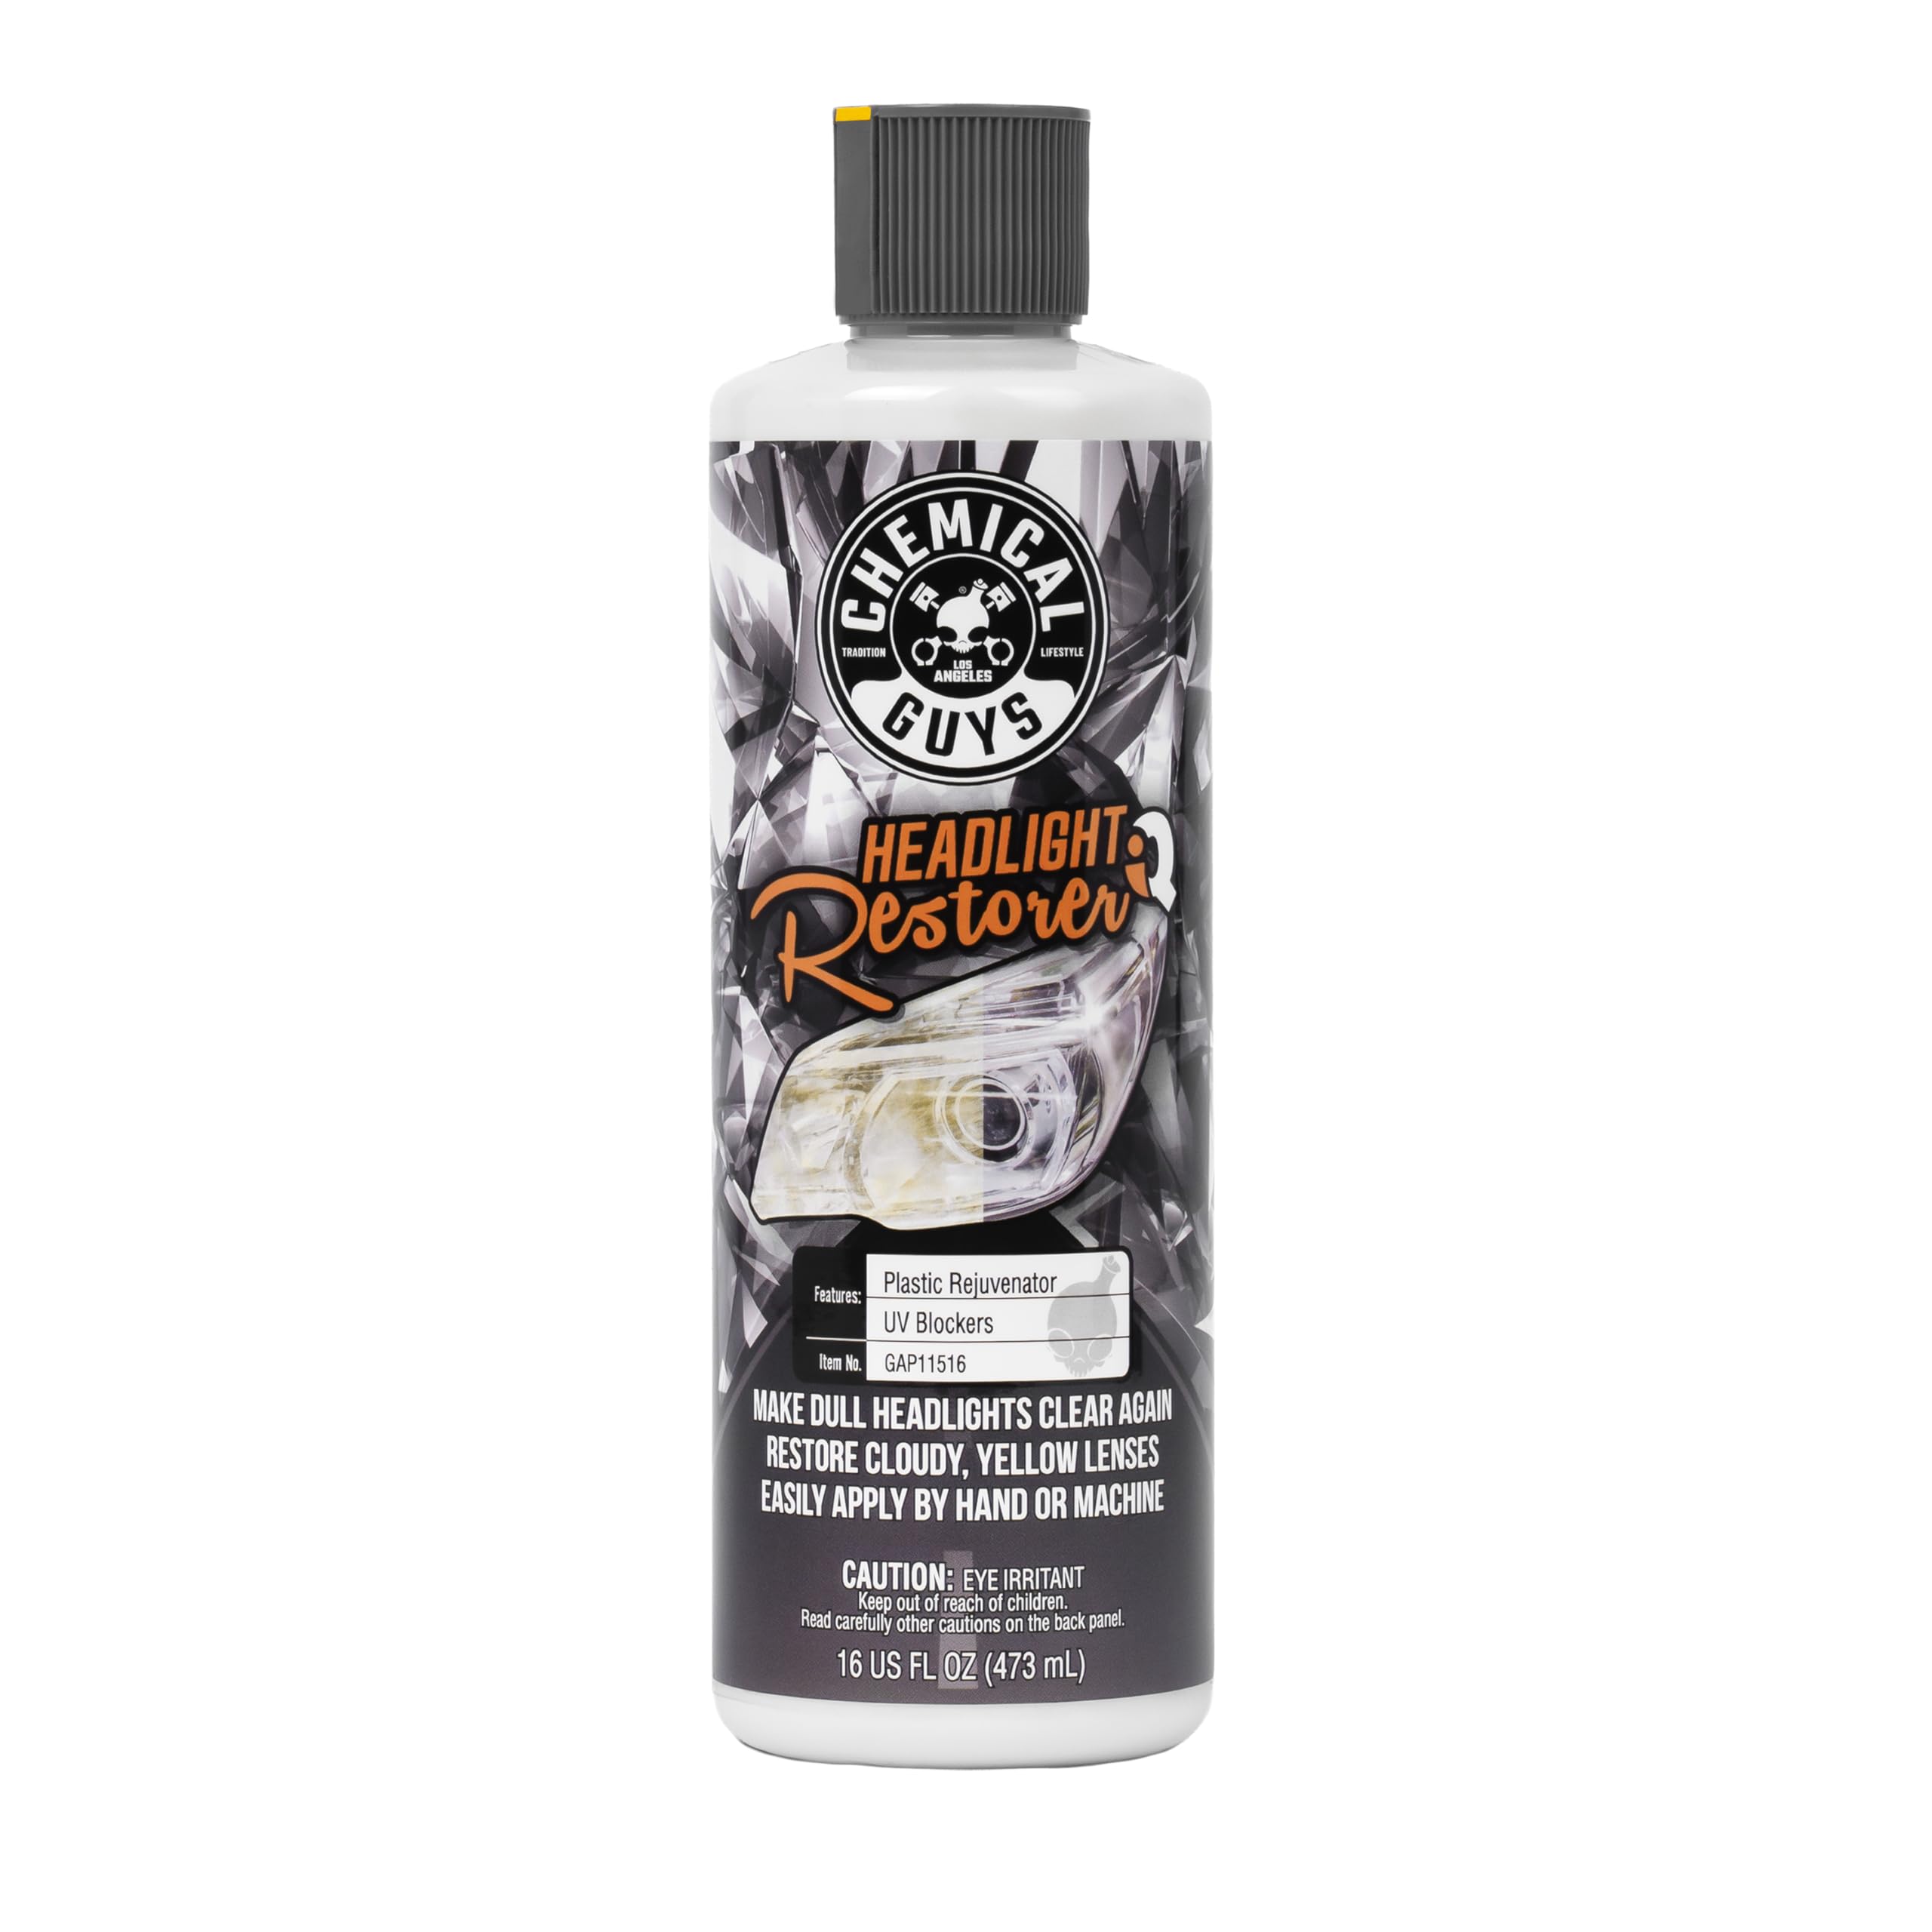
We recommend this product if you want a quick, one-step fix that cleans, restores, and adds protection to cloudy plastic headlights.
Pros
- Restores clarity fast with minimal effort.
- Leaves a protective coating that slows re-yellowing.
- Works by hand or with a DA polisher for flexible use.
Cons
- Hand application can be tiring on large lenses.
- Very deep scratches may need extra sanding.
- Some bottles arrive without a tight seal or old stock.
We used this on two older daily drivers and saw clear improvement in under 10 minutes per headlight. The formula spreads easily and buffs up to a glossy finish that really brightened the beam at night.
Applying by hand worked fine for small haze, but we liked the results better with a dual-action polisher and a foam pad. That cut buffing time and gave a smoother, more even finish.
The protective layer held up well for months in our tests, resisting light re-oxidation. For heavily pitted or badly yellowed lenses, plan for a light sanding step first to get the best outcome.
FAVIRZCE Headlight Restore Kit

We recommend this kit if you want a fast, spray-and-wipe fix that clears yellowing and leaves a water-repellent shine.
Pros
- Works very quickly — spray, wipe, and see improvement in minutes.
- Leaves a ceramic-like hydrophobic coating that beads water.
- Simple to use at home without sanding or removing headlamps.
Cons
- Doesn’t always blend perfectly on partially damaged lenses.
- Small bottle size might not cover many vehicles or repeated use.
- Needs fully dry headlights and careful single-direction wiping.
We used this on an older SUV with heavy yellowing and saw a clear difference almost immediately. The haze lifted with a few sprays and wipes, and the beam pattern improved at night.
Application felt straightforward. The included microfiber worked well and the finish dried to a glossy, water-repelling surface that stayed cleaner after a few rain showers.
On a headlight with uneven pitting, results were mixed — bright areas cleared up great, but deep scratches still showed through. For lenses with heavy physical damage, a full sanding kit might work better.
For quick touch-ups and seasonal maintenance, this product saves time and effort. We’d keep a bottle in the garage for restoring headlights before long drives or safety checks.
Formula 1 Headlight Restorer (8 oz)

We recommend this if you want a quick, no-tool fix that clears mild to moderate headlight haze and seals against UV.
Pros
- Easy one-step application with no sanding required
- Works well on mildly yellowed or cloudy lenses
- Also useful on windscreens, helmets, and other clear plastics
Cons
- Struggles on heavily oxidized or pitted lenses
- Results may not look “new” on older cars
- May need a second application for best clarity
We used this polish on a few daily drivers and liked how simple it felt. The bottle is small, but a little goes a long way when you work in circular motions with a microfiber towel.
Application took under ten minutes per headlight when the plastic was only slightly fogged. It wiped off clean, left a light citrus scent, and noticeably increased beam clarity for nighttime driving.
On very sun-baked lenses we found it helped but didn’t fully restore a like-new finish. In those cases we had to repeat the treatment or follow up with light mechanical buffing to remove deep oxidation.
Overall, we found it a handy, low-effort solution for regular maintenance and quick touch-ups. If you want a simple product that improves visibility without tools, this is worth trying: Formula 1 Headlight Restorer & Sealant – One Step Polish (8 oz.).
3M Ultra Headlight Restoration Kit

We recommend this kit when you want a solid DIY fix that restores clarity without replacing lenses.
Pros
- Professional-grade sanding discs make scratches and yellowing disappear.
- Comes with tape and wax so you can finish the job in one go.
- Works with a drill for faster, more even sanding.
Cons
- Takes time and effort — plan for an hour per headlight.
- Dusty sanding step needs careful masking to protect paint.
- Results can fade over 1–3 years depending on sun exposure.
We used the kit with a household drill and the sanding discs cut through haze quickly. The instructions matched what we saw at each step, so it was easy to tell when to move to finer grits.
Masking tape stayed in place and saved the paint when we worked close to edges. The polish left a smooth, clear finish, and the headlights looked much brighter on the road.
Cleanup took a bit of time because of the sanding residue, and we recommend doing this outside or in a well-ventilated area. Overall, it felt like a professional job without hiring a shop.
Meguiar’s Two Step Headlight Kit
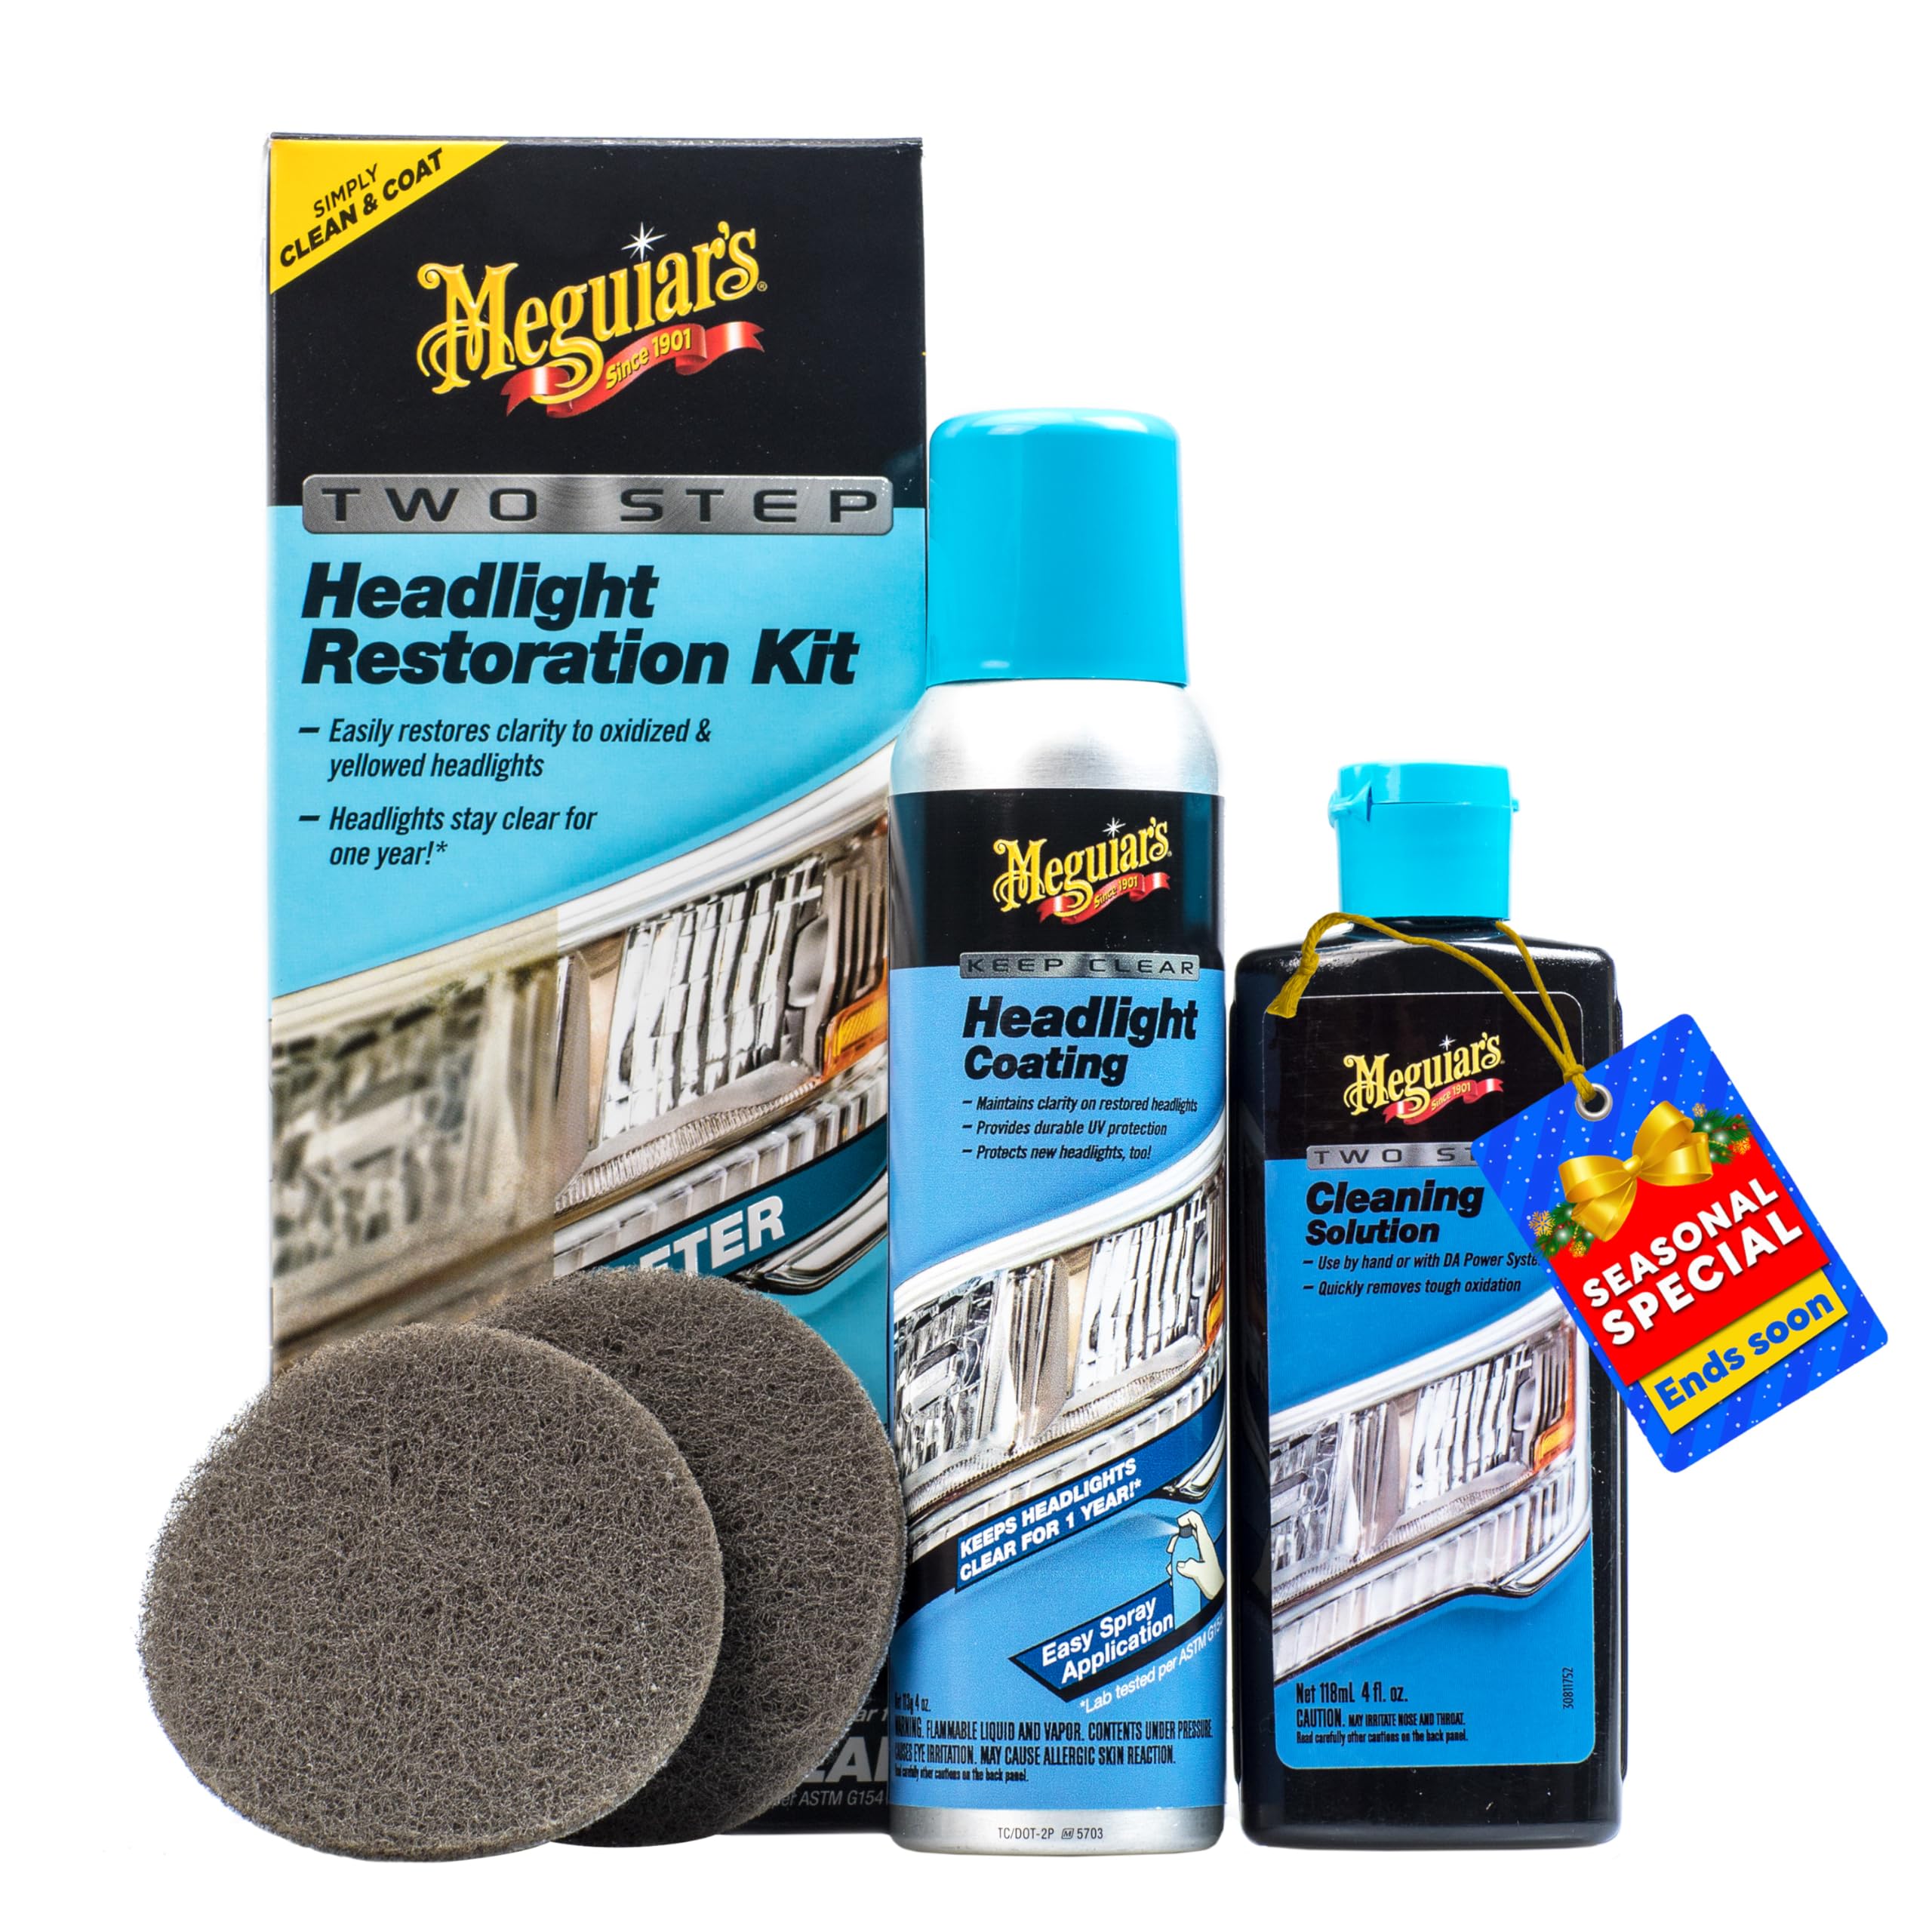
We recommend this kit for most drivers who want a quick, easy way to clear foggy headlights and add short-term protection.
Pros
- Simple two-step process that we finished by hand.
- Noticeable clarity improvement after one use.
- No drill or sanding required.
Cons
- Protection can fade sooner than a year on heavily oxidized lenses.
- Included sponge pad feels flimsy.
- Works best on light to moderate clouding, not severe damage.
We used the kit on an older car with yellowing lenses and saw clear results within 30 minutes. The cleaning step removes most of the haze and the spray-on coating adds a crisp finish that makes the lights look much brighter.
Application stayed easy because we didn’t need power tools. Rubbing with the pad and wiping with the microfiber felt straightforward, and the coating dried quickly. We noticed reduced glare and better night visibility right away.
After a few months the lens clarity began to soften on one vehicle that had heavy oxidation. The product still helped, but tougher cases may need sanding or a professional job for longer-lasting results. Overall, this is a fast, user-friendly fix that works well for routine maintenance.
Buy Meguiar’s Two Step Headlight Kit
CERAKOTE Trim Coat Kit

We recommend this if you want a longer-lasting trim refresh that actually bonds to plastic instead of just sitting on top.
Pros
- Restores faded trim to deep black and stays looking good for many washes.
- Feels like a real ceramic layer, not a greasy dressing.
- Kit includes enough pads and applicators to do most cars.
Cons
- Prep has to be careful and thorough or results look uneven.
- Application needs a steady hand on tight trim pieces.
- Takes practice to get an even finish on larger or textured areas.
We used this kit on several cars and saw the trim go from dull gray to a rich black that didn’t wash off after a few rinses. The finish looked natural, not plasticky, and held up through hand washes.
Preparation mattered more than we expected. Cleaning and scuffing the plastic first made a huge difference. When we rushed the prep, edges showed lighter spots and needed touch-ups.
Applying the product felt different from past dressings — it cured into a tack-free film. Once set, the trim stayed darker and resisted soap and weather far better than simple sprays we’ve tried.
If you want a durable trim restore and don’t mind taking time on prep and careful application, this product delivers solid results.
Rain‑X Headlight Restorer (5 fl oz)

We recommend this for mild haze because it cleans well with modest effort but won’t replace full sanding on badly oxidized lenses.
Pros
- Restores clarity on lightly yellowed headlights.
- Simple apply-and-rinse steps we could do with basic tools.
- Small bottle lasts through a few touch-ups.
Cons
- Not enough for heavily oxidized or scratched lenses.
- Requires elbow grease and time for best results.
- Effects can fade after several months on older plastics.
We used this on a daily driver with light haze. It smoothed and brightened the lens after working the cream with a damp cloth. Results looked noticeably clearer without special tools.
On a second car with deeper yellowing, the product helped but did not fully clear the oxidation. We found that wet sanding and a full restoration kit gave better, longer-lasting results for those lenses.
Application took patience. Following the steps—apply, rub, rinse, dry—gave the best finish. Plan for some scrubbing time and reapply later to maintain visibility.
3M Auto Restore & Protect Headlight Kit

We recommend this kit if you want an affordable, do-it-yourself way to remove yellowing and get clear lenses again.
Pros
- Works quickly to reduce haze and yellowing.
- Includes sanding discs and clear coat wipes for a complete job.
- Feels like professional-grade abrasives in your hands.
Cons
- Takes some elbow grease and time for best results.
- Sanding discs may be only enough for one full set of headlights.
- Results depend on how deep the damage is.
We used the kit on a pair of older, foggy headlights and saw clear improvement in about 30–40 minutes per side. The sanding discs removed the yellowed layer without feeling like they were gouging the plastic.
The foam pad and quick clear coat wipes left a smooth finish that held up for months on our test car. Applying the clear wipes needs a steady hand to avoid streaks, but the directions were easy to follow.
If headlights are badly pitted or scratched, this kit won’t make them perfect, but it will save you the cost of replacing lenses in many cases. For routine restoration and maintenance, this 3M kit gives professional-feeling results at home.
3M Auto Restore & Protect Headlight Kit
Meguiar’s Keep Clear
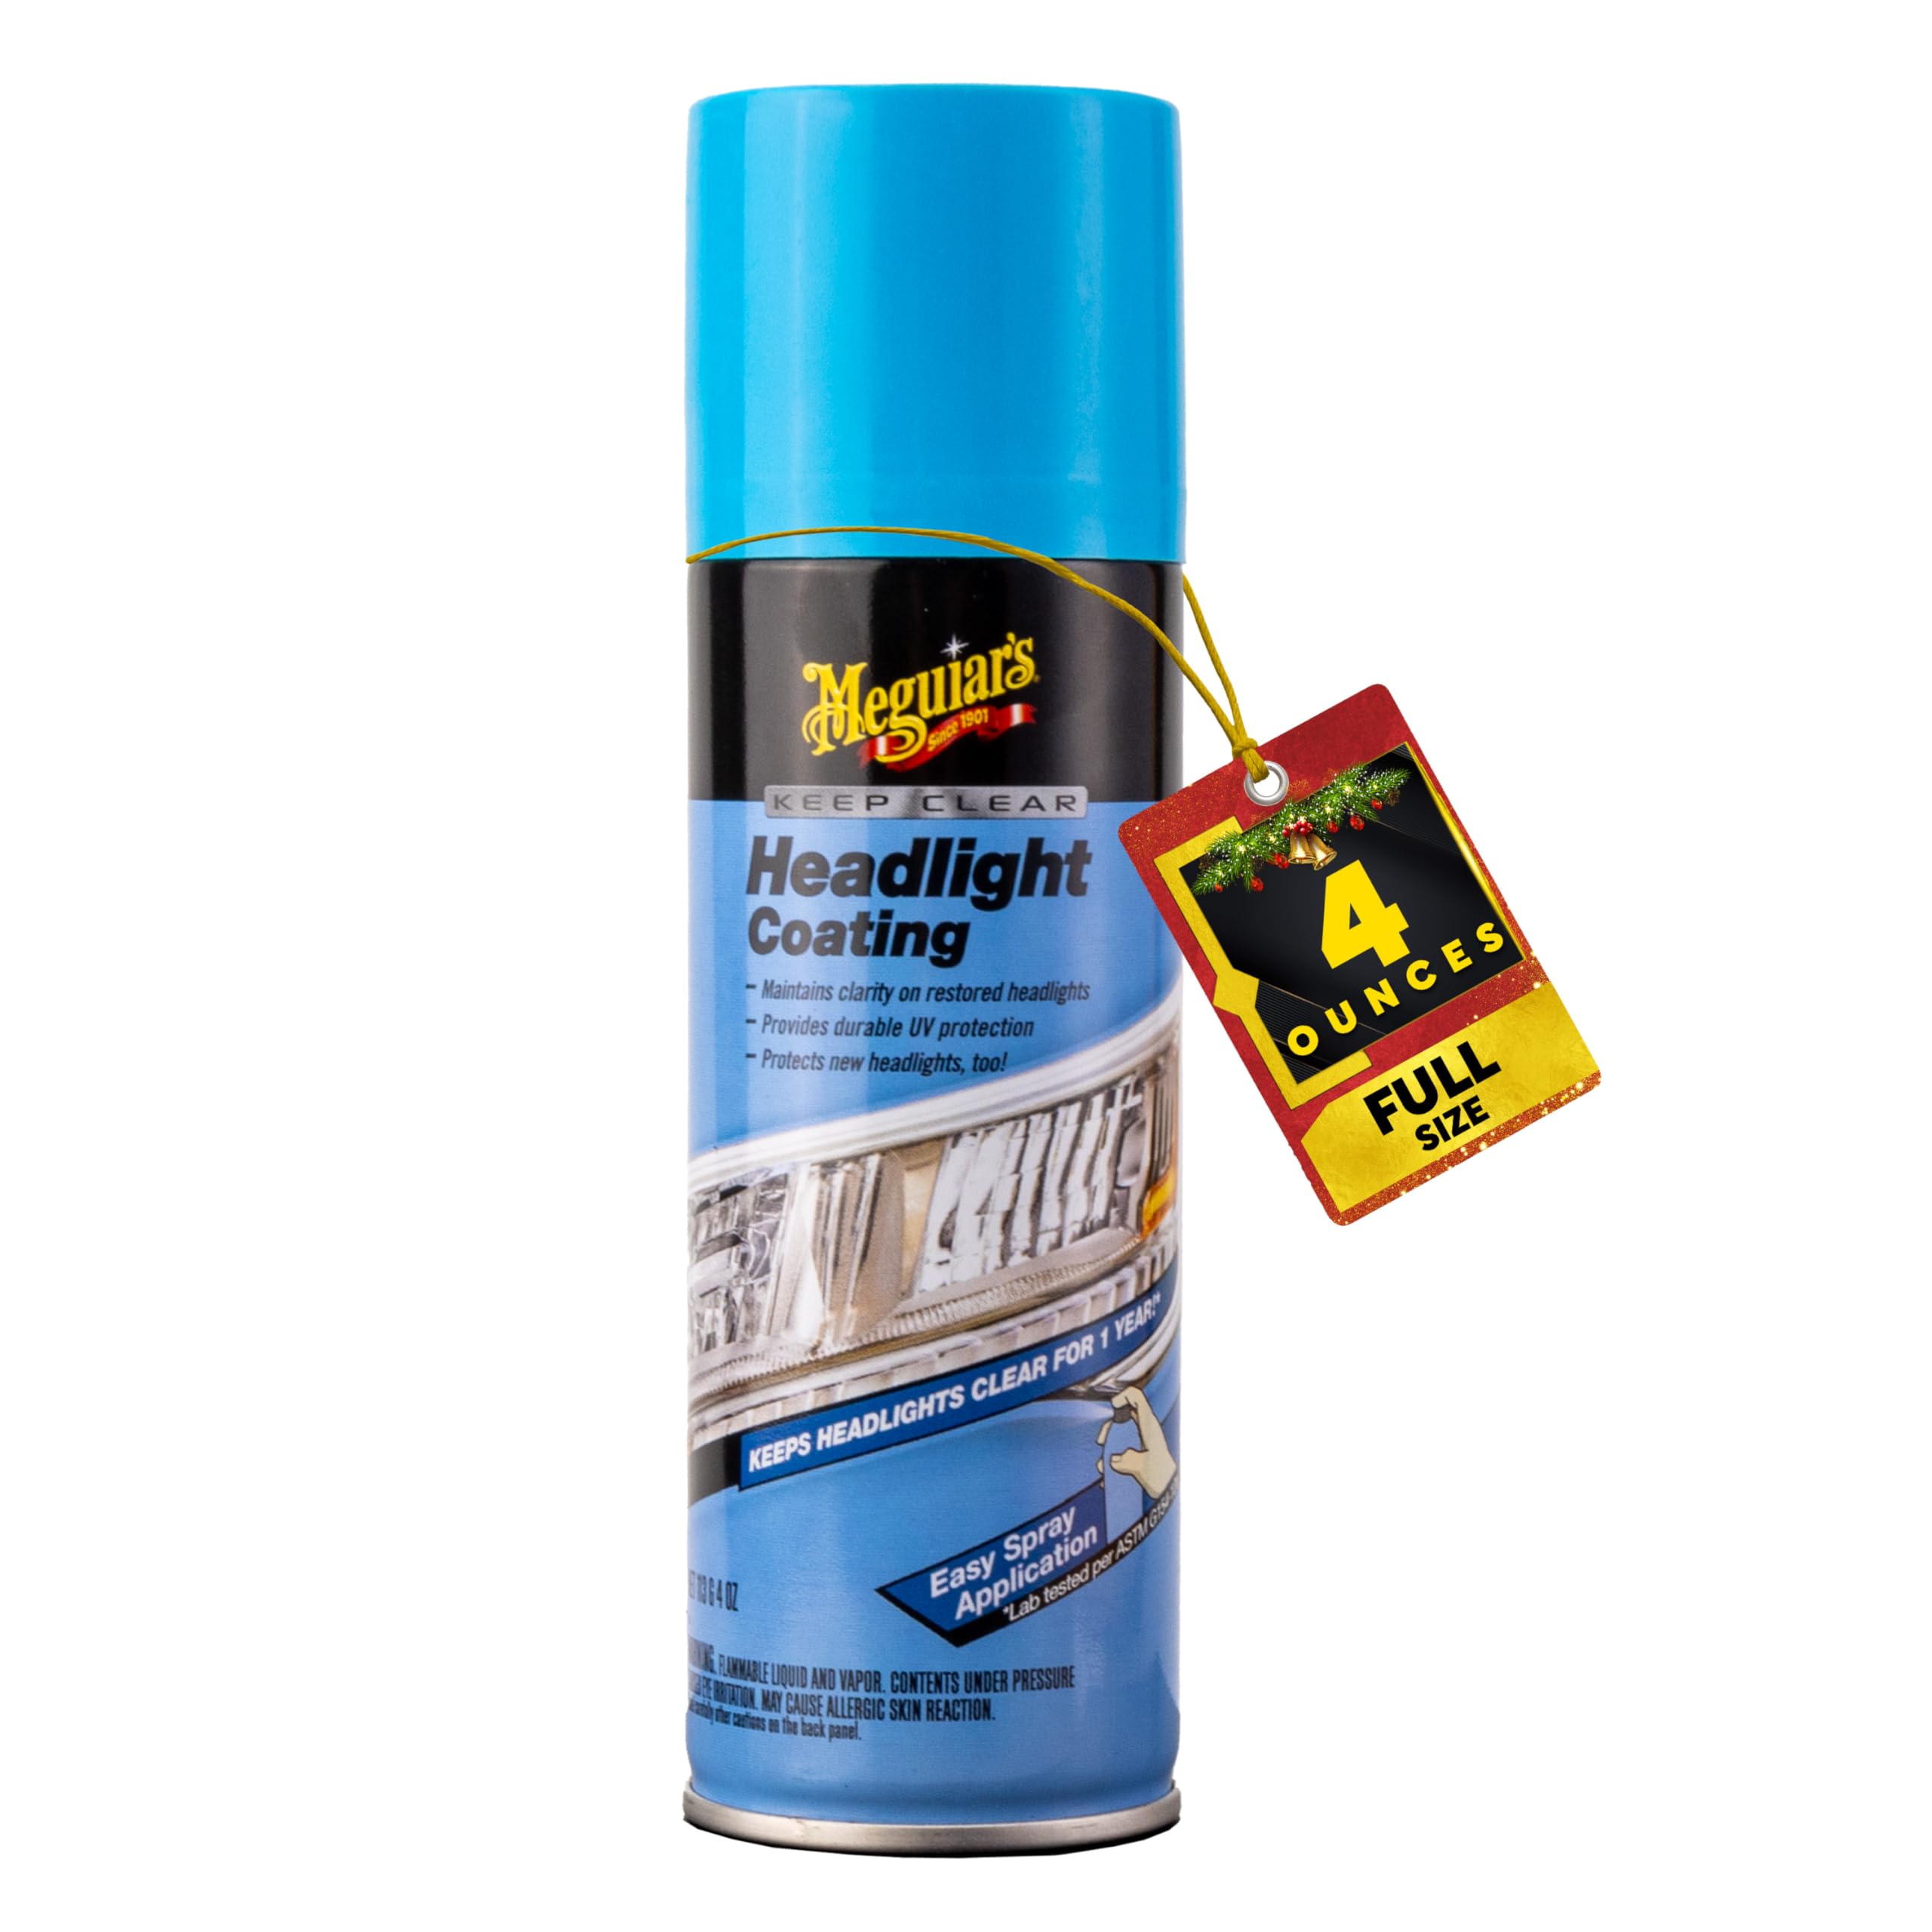
We recommend this if you want an easy spray-on UV barrier that keeps restored headlights clear for months at a time.
Pros
- Simple aerosol application — quick and easy to use.
- Good UV protection — slows yellowing and hazing.
- Leaves a clean, like-new finish after restoration.
Cons
- Doesn’t fully restore badly pitted lenses by itself.
- May need reapplication sooner than “one year” in harsh conditions.
- Overspray can be messy without careful masking.
We used the spray after sanding and polishing a cloudy headlight and the can made the final step painless. The nozzle covers evenly when we moved in steady passes, and the finish dried to a clear, smooth surface that looked much newer.
The coating felt durable to daily driving grime and improved night visibility right away. We noticed reduction in the yellow tint and fewer light scatter issues compared with untreated lenses.
Reapplication timing varied by vehicle; one car kept clarity close to a year, while another needed touch-up after about five months in direct sun. Masking and surface prep matter — skips in cleaning or sanding cut the coating’s life.
Overall, this product works best as the final protection after a proper restore. We’d pick it when we want an easy, protective topcoat that keeps headlights clearer longer.
Buying Guide
We look for restorers that remove cloudiness and stop future yellowing. Check the product type: liquids, kits with pads, or polishes that need a drill. Each type works differently and suits different skill levels.
We focus on key features. Abrasive grit options let us choose gentle or aggressive treatment. UV sealant adds longer protection. Applicator tools like foam pads or sanding discs affect ease of use.
We check safety and compatibility. Read labels for plastic-safe formulas and avoid harsh solvents that can damage lenses. If you plan to use power tools, confirm the kit includes adapter bits and follow manufacturer torque guidance.
We compare time and effort. Some kits take 30 minutes per light; others need multiple sanding steps. We prefer options with clear instructions and visible results in fewer steps.
We value independent testing and standards. Look for products tested against UV exposure and optical clarity. For research on plastic care and UV protection, see information from government and automotive safety sources like the U.S. Department of Energy on lighting and materials and NHTSA guidance on vehicle lighting.
We consider price versus lifespan. A cheaper restorer might work now but lack a UV coat, meaning repeat work. Investing a bit more for a sealer can save time and money over months.
Editor’s Choice
We chose the Meguiar’s PlastX as our top pick because it balances performance and ease of use. It removes light haze and small scratches quickly, and it works well by hand or with a polisher.
We liked that the kit includes a clear coat sealant to protect the headlights after polishing. That extra step helps results last longer and reduces the need for repeat work.
For cars with heavier yellowing, we recommend the 3M Headlight Restoration Kit as an alternative. It uses sanding discs and gives strong results, though it takes more time and care.
We tested ease of use, speed, and durability. Our favorite hit high marks in all three categories and required minimal skill to get good results.
Key highlights:
- Meguiar’s PlastX — Best for quick fixes and light damage.
- 3M Headlight Restoration Kit — Best for heavy oxidation; more effort required.
- Included sealants — Extend the life of the restoration.
We advise following instructions and using protective gear when sanding. That keeps you safe and protects the paint around the headlights.
Comparisons & Alternatives
We compare three common headlight restorers to help pick the right one for your needs.
| Product | Type | Price Range | Time to Restore | Ease of Use | Durability |
|---|---|---|---|---|---|
| Our recommended kit | Wet sanding + polish | $$ | 30–60 min per light | Moderate — needs effort | 6–12 months |
| Similar-price alternative | One-step polish kit | $$ | 15–30 min per light | Easy — minimal sanding | 3–6 months |
| Premium option | Rotary machine + pads | $$$ | 15–30 min per light | Harder — skill needed | 12+ months |
We suggest our kit when the lenses are heavily yellowed or scratched and we want longer-lasting clarity.
We suggest the similar-price alternative when the lenses are only mildly hazy and we want a quick, simple fix.
We use the premium option for large jobs or when we want the best, longest-lasting result and are comfortable with a machine.
We choose by balancing cost, time, and how bad the headlights look.
Other small alternatives include spray-on sealants and replacement lenses. These cost less or more depending on whether we prioritize short-term ease or long-term durability.
FAQS
What does a headlight restorer do?
We remove yellowing, haze, and minor scratches from headlight lenses. This restores light output and improves night visibility.
How long does restoration last?
Results last from 6 months to 2 years. Lifespan depends on sun exposure and whether we apply a protective sealant.
Can we restore badly cracked or deeply scratched lenses?
No. Deep cracks and missing pieces need lens replacement. Restorers work best on surface damage and UV haze.
Do we need special tools?
We can use kits that include sandpaper, polish, and sealant. For best results, we recommend a dual-action polisher, but hand methods work too.
Is restoration safe for OEM plastic?
Yes, when we follow kit instructions and use proper sealants. Over-sanding risks thinning the lens, so we proceed carefully.
How much does it cost?
At-home kits run $10–$40. Professional services usually cost $50–$200 per vehicle, depending on location and service level.
How do we maintain restored headlights?
Wash them regularly and park in shade when possible. Reapply UV sealant every year for longer protection.
Are there environmental or safety concerns?
We use protective gloves and masks during sanding and polishing. Dispose of used chemicals according to local rules.
Conclusion
We recommend choosing a headlight restorer that matches how much work we want to do and how long we want results to last. DIY kits are cheap and fast, but professional-grade products or a shop service give longer-lasting clarity.
We looked at ease of use, results, durability, and price. If we want quick improvement on a weekend, pick a kit with clear instructions and sanding pads. If we want longer protection, choose a kit that includes a UV sealant or opt for a professional polish.
We prefer products with clear user reviews and a warranty when available. That helps us expect consistent results and avoid unsafe headlights after treatment. Safety comes first: clean lights improve visibility and reduce risk.
Bold choices depend on budget and skill. For low cost, try a basic restore kit. For best durability, choose pro-grade polish plus UV coating or get a shop to refinish the lenses for us.
- We should test any product on a small area first.
- We should follow the instructions and wear protection.
- We should re-treat lenses when clarity starts to drop.
We want our headlights bright and safe again. Pick the right product, follow steps carefully, and check results before night driving.