
Car headlight sealants protect lenses from moisture, fogging, and small cracks that can reduce light output and cause costly repairs. They come as sprays, brush-on liquids, or tapes that form a waterproof barrier and often restore clarity to yellowed or hazed plastic. We focus on products that stop leaks and improve visibility without harming headlight housings or paint.
Choosing the right sealant means checking compatibility with your headlight material, ease of application, drying time, and how long the protection lasts. The most important factors are whether the sealant bonds to plastic or glass, resists UV and road chemicals, and can be applied without professional tools—those determine real-world durability and value. We tested and compared common types to find options that work for quick fixes, long-term repairs, and best overall performance.
Contents
Best Car Headlight Sealants
Below is our full list of the best car headlight sealants to protect, restore, and prolong headlight clarity. We tested options for ease of use, durability, and value to help you find the right product for your needs.
Permatex Clear RTV Silicone Sealant (3 oz)

We recommend this for general headlight sealing when you want a flexible, waterproof bond that handles heat and weather.
Pros
- Bonds to glass, plastic, and metal reliably.
- Stays flexible across hot and cold temps.
- Low odor and sensor-safe for many jobs.
Cons
- Can be thick and messy to apply in tight spots.
- Not meant for windshield installation or some engine gaskets.
- Long-term outdoor life can vary by use and surface prep.
We used Permatex on a headlight housing seam and it sealed quickly. The bead laid down smooth, and after cure it stayed clear without shrinking.
Application felt familiar — the tube squeezes like standard RTV and you can tool it with a wet finger or a plastic spreader. It cured at room temperature in a few hours and held up to vibration from driving.
On the downside, the nozzle can clog if you don’t clean it, and the paste is thicker than caulk so precise lines take patience. For headlights this worked well, but for windshield bonding or critical structural seals we chose a specialized product instead.
Cerakote Headlight Restoration Kit
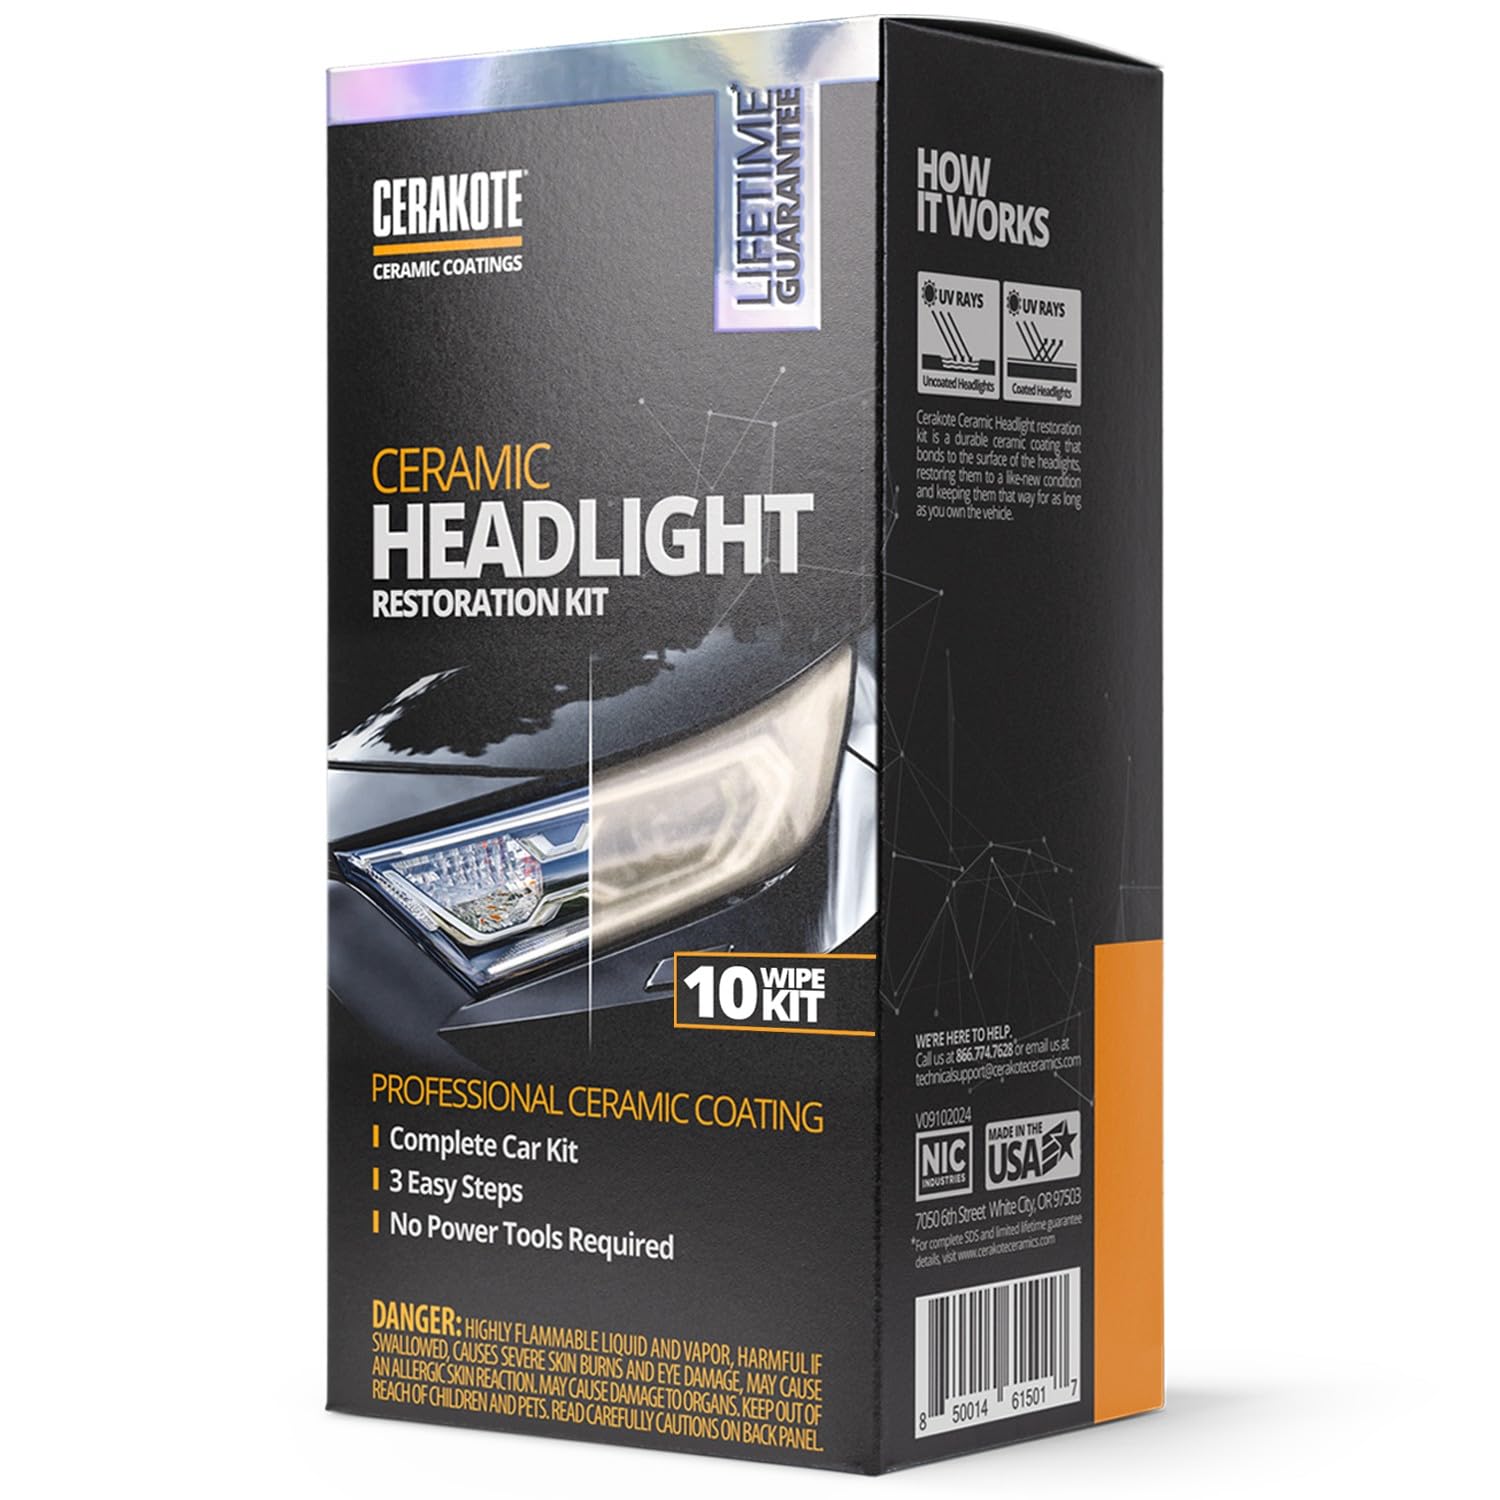
We recommend this kit when you want a fast, tool-free fix that leaves a long-lasting ceramic finish.
Pros
- Easy three-step process that we finished in about 30 minutes.
- Ceramic coating bonds to the lens and adds strong UV protection.
- No power tools needed, so we avoided accidental paint or lens damage.
Cons
- Sanding step may need finer or coarser paper for very bad oxidation.
- Kit supplies might be tight for two large headlights on bigger cars.
- You must follow cure time or results may not fully set.
We used the wipes and sanding pieces on a pair of cloudy lenses and saw a clear difference right away. The oxidation wipes cut most of the haze, and the sanding smoothed deeper pitting when we took our time.
Applying the ceramic wipes felt simple and clean. After the cure period the lights had a solid, glass-like finish and looked much brighter at night.
If your headlights are badly yellowed, bring a few extra grit papers just in case. Overall, the kit gave us long-lasting protection without messy sprays or tools, and it was worth the small extra effort.
TAGLLY Butyl Sealant Tape

We recommend this if you need a strong, flexible seal for headlights, taillights, and other vehicle gaps.
Pros
- Very sticky and molds well to uneven edges.
- Clean to apply with no drips or smears.
- Works in many places: cars, RVs, boats, vents.
Cons
- Feels thick and can be hard to handle in cold weather.
- Not ideal for large windshield seals that need extra thickness.
- Takes time to press and shape for a perfect fit.
We used this tape to reseal headlight housings and small trim gaps. It stuck fast, held shape, and made a tight, water-resistant bead. Installation stayed neat — no gooey mess on paint or lenses.
Warming the roll in cold weather made it much easier to work with. We cut pieces to fit, pressed firmly, and the tape filled curves and corners without tearing. It also dampened a bit of road noise around vents and lights.
Cleanup and changes are simple. If you need a heavy-duty windshield adhesive, this may not be thick enough, but for most headlight and taillight reseals it does the job reliably.
Buy TAGLLY Butyl Sealant Tape on Amazon
Meguiar’s Keep Clear
We recommend this if you want a simple spray-on sealant that keeps headlights clear for months and is easy to apply.
Pros
- Easy aerosol application — quick to spray and dries fast.
- Strong UV barrier — helps slow yellowing and hazing.
- Good for new or newly restored lenses — gives a clean finish.
Cons
- Doesn’t always last a full year on heavily sun‑baked lenses.
- Needs proper prep — sanding and polishing first for best results.
- Overspray can hit paint if you don’t mask around the headlight.
We used the spray after restoring our headlights and found the application very straightforward. A single, even coat went on smooth and left a nice clear finish that looked like new. Dry time was short, which made the whole job fast.
After a few months the lenses stayed bright and resisted light hazing. In hot, sunny climates we noticed some fading earlier than the “one year” claim, so we topped it up when needed. It still saved us time over redoing polish work every few months.
Masking takes patience; we misstepped once and had tiny dots of overspray on the bumper. Once masked, though, we had no trouble keeping the coating off painted surfaces. Overall it feels like a practical, easy-to-use sealant for regular upkeep.
Buy Meguiar’s Keep Clear Headlight Coating on Amazon
BUFFZIT RTV Silicone Sealant (Black, 30g)
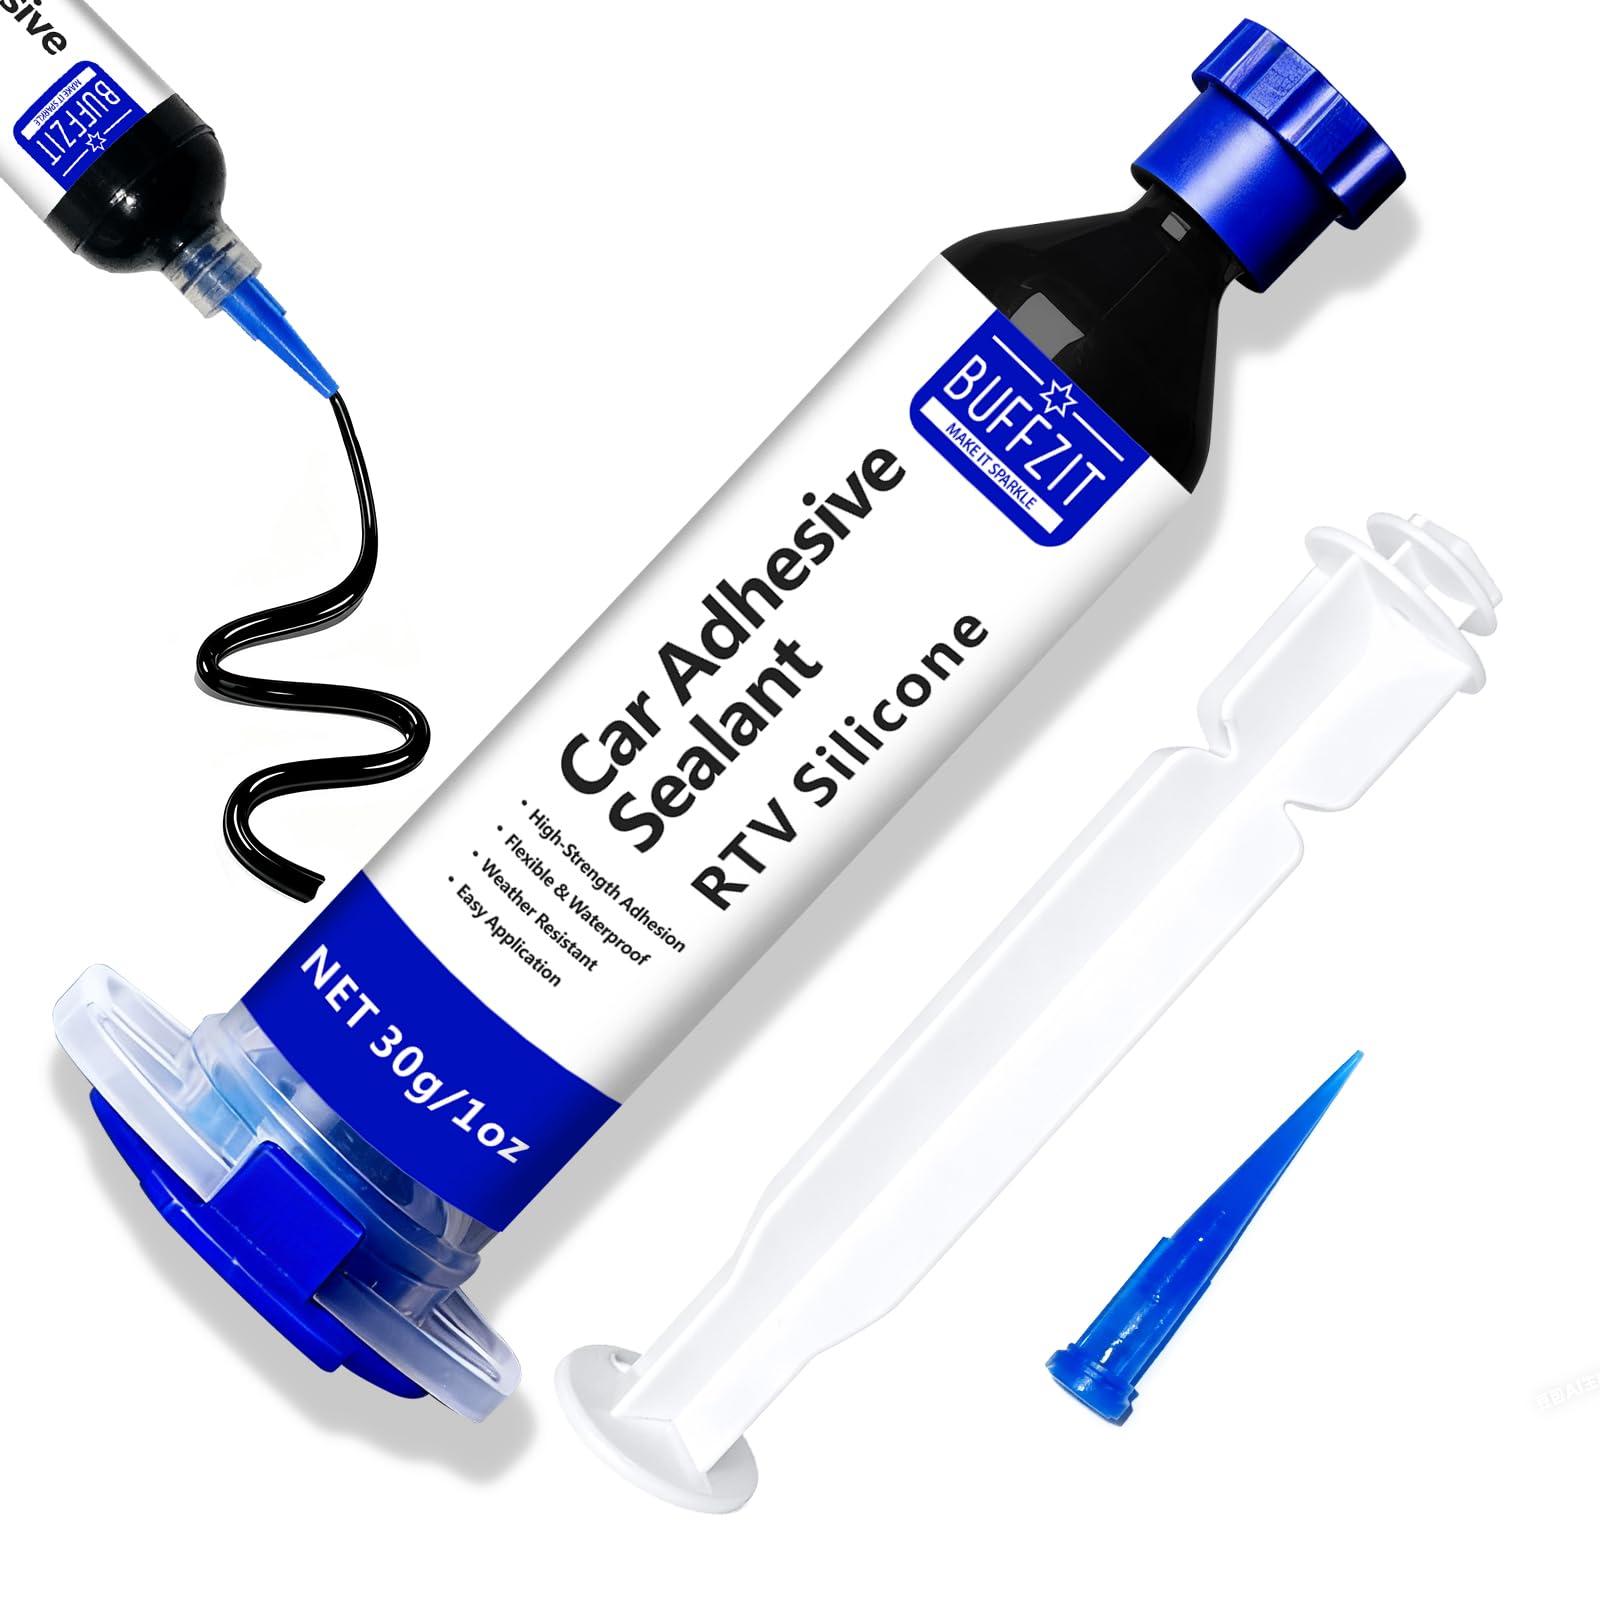
We recommend this sealant if you want a simple, weatherproof fix for headlight and window leaks without special tools.
Pros
- Easy to apply for quick touch-ups.
- Stays flexible in hot and cold weather.
- Creates a strong, waterproof bond on plastic and glass.
Cons
- Tube can be stiff or hard to squeeze.
- Small 30g size may not cover big jobs.
- Some tubes may be near expiration or harden early.
We used this on a couple of headlight housings and on a chipped windshield trim. It spread smoothly when warm and held its shape around the bezel. The cured bead stayed flexible and stopped the water we poured during a test.
Pushing sealant from the small tube felt tough at times. We warmed the tube in hot water to get an even flow. A few tubes we handled were partly hardened, so check the date before you start.
The black color matched the trim well and the bead looked neat after tooling with a wet finger. For small repairs and weather sealing, this worked reliably. Buy it if you need a compact, all-weather silicone for routine headlight or window sealing.
Formula 1 Headlight Restorer & Sealant

We recommend this when you want a quick, no-tool fix to reduce yellowing and haze on headlights and other clear plastics.
Pros
- Easy one-step application with a cloth.
- Works on multiple plastic surfaces beyond headlights.
- Leaves a protective sealant against UV and oxidation.
Cons
- Not strong enough alone for heavy oxidation.
- Results may fade sooner than multi-step kits.
- Requires some elbow grease for best finish.
We used this on two cars with mild to moderate haze and found it cleans fast. A few circular wipes removed a good amount of yellowing and the lights looked noticeably clearer right away.
On heavily oxidized lenses we still needed to follow up with light sanding and a polishing pad to get the best result. The product shines better when the surface is not deeply pitted.
Application felt simple: wash, dry, shake, rub, then buff off. The citrus smell is mild and the towel method made cleanup easy.
Formula 1 Headlight Restorer & Sealant
ZXMOTO 13Ft Butyl Headlight Sealant

We recommend this if you need a sticky, long strip of butyl sealant to reseal headlight assemblies after a retrofit.
Pros
- Very tacky — sticks well and seals gaps.
- Long length — enough for multiple headlights.
- Waterproof — keeps out moisture for months.
Cons
- Can arrive flattened in the tube or packaging.
- Needs heat to get fully flexible for tight corners.
- Messy to work with and can be hard to trim cleanly.
We used this butyl rope when resealing two headlight assemblies after installing new lenses. It laid down easily and held the lens tight against the housing. After a few weeks of rain and car washes we saw no leaks or fogging.
Applying it felt a bit like working with putty. Warm the strip with a heat gun or hair dryer to make it pliable, press it into the seam, and trim the excess. Take your time cleaning old sealant first; it bonds best to a clean surface.
Packaging on our roll arrived squashed in spots, so pieces can get misshapen. That did not affect the seal once installed, but you should expect some extra cleanup and shaping while you work.
Cerakote Platinum Ceramic Spray
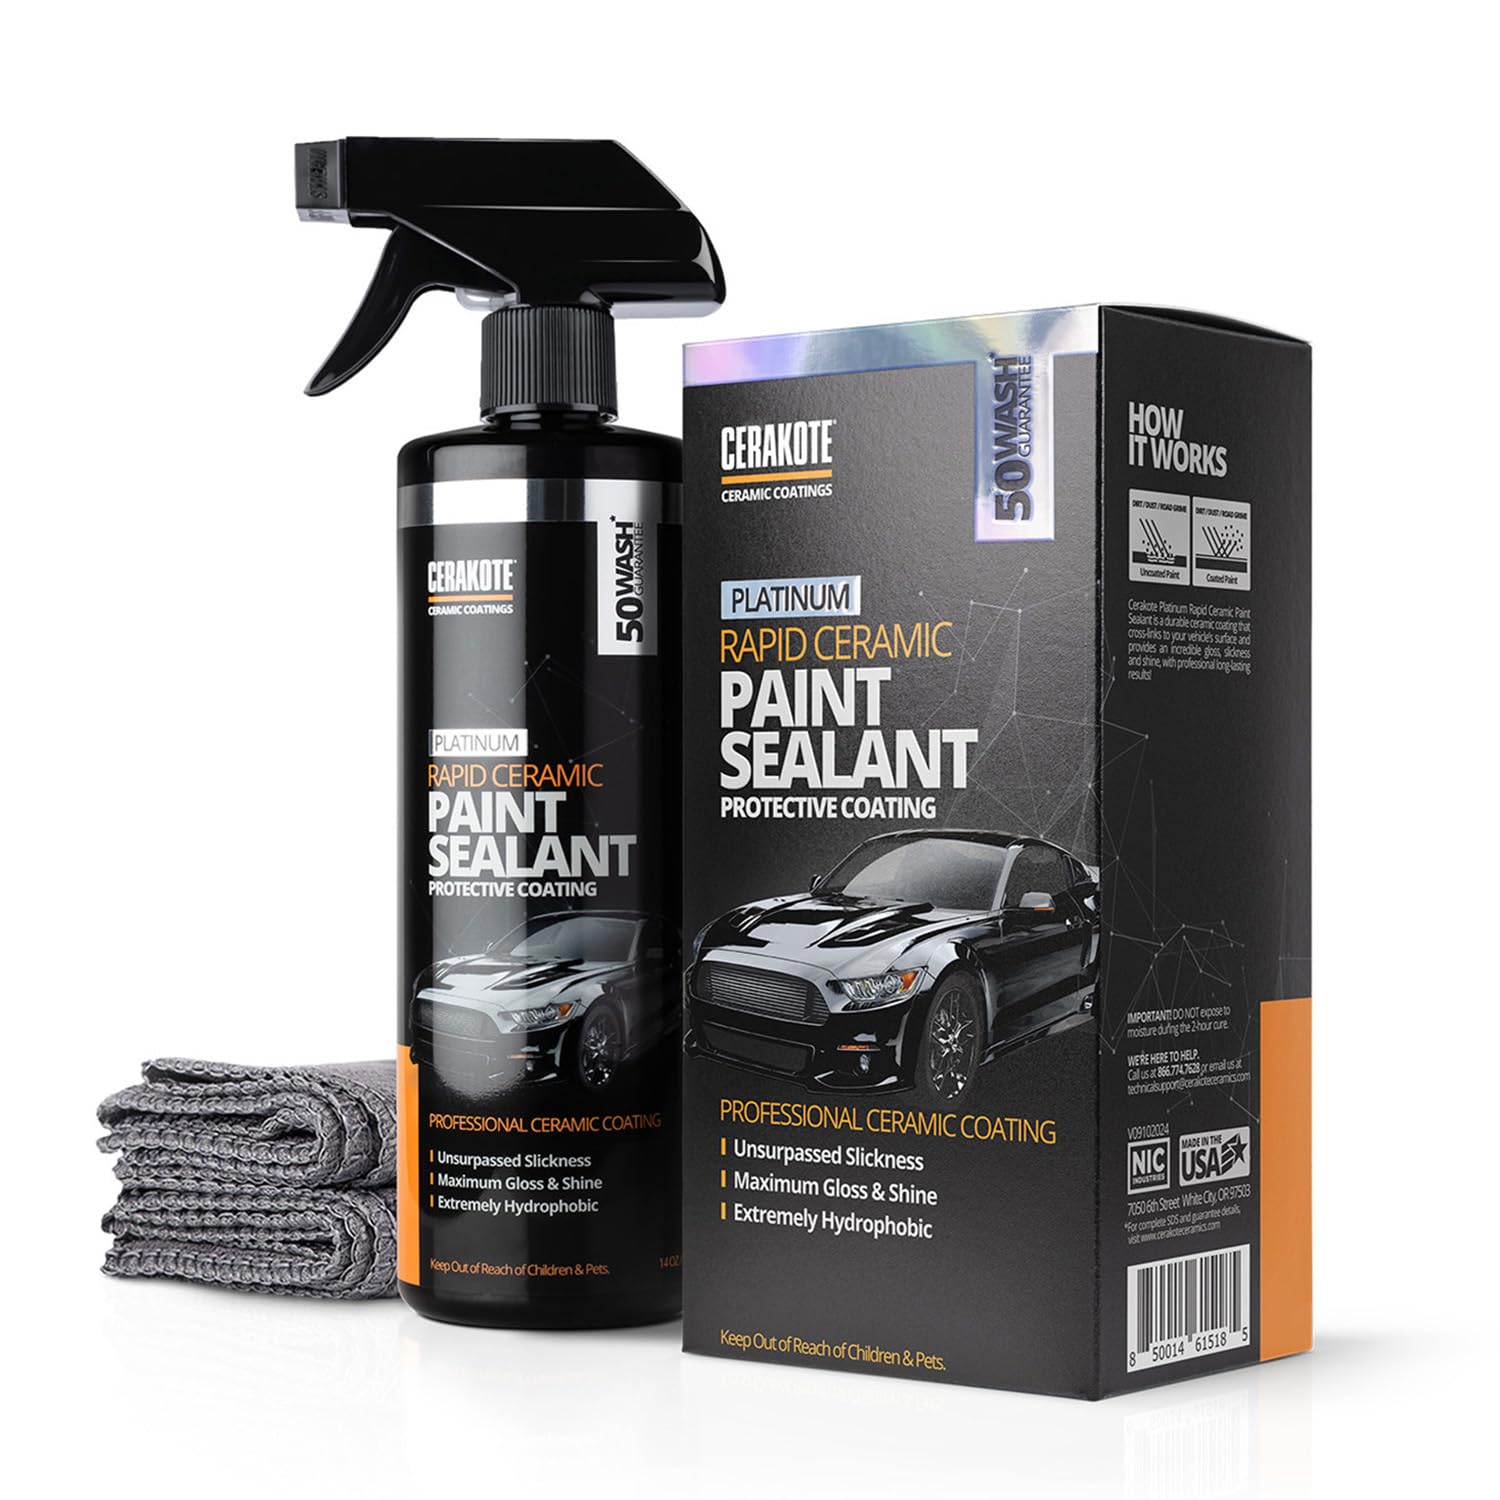
We recommend this spray if you want an easy, glossy sealant that repels water and boosts paint depth.
Pros
- Applies fast and buffs out smoothly for a deep shine.
- Strong water beading keeps panels cleaner between washes.
- Lasts longer than typical spray waxes for several months.
Cons
- Not as durable as hard ceramic coatings for multi-year protection.
- Needs a clean, dry surface and careful buffing to avoid streaks.
- Small bottle for bigger vehicles; you may need more than one.
We used this on a black SUV and liked how quickly it gave a mirror-like gloss. The spray spreads evenly and wipes off without much effort when you follow the steps. Water beading was obvious after a light rain the next day.
Application felt straightforward: wash, dry, spray a panel, then buff with the included cloth. We noticed the slick feel right away and dirt slid off easier during wash sessions. It brightened color depth and made the paint look freshly detailed.
Over weeks of driving, the protection held up well and kept the finish looking slick for months. Expect to reapply seasonally if you drive daily or park outside. For a fast, high-gloss sealant that actually beads water, this worked for us.
Buy Cerakote Platinum Ceramic Spray on Amazon
Stacool 13FT Butyl Headlight Sealant

We recommend this if you want a flexible, reusable tape that seals gaps and keeps moisture out at a low cost.
Pros
- Strong stick and flexible for tight grooves
- Reusable and easy to shape after heating
- Long roll covers several headlights
Cons
- Can be soft or tacky in hot shipping conditions
- Thin width may need multiple layers for large gaps
- Takes time and pressure to fully bond
We used this butyl tape on a couple of aftermarket headlights and on a taillight housing. It pressed into the channel well once warmed a bit with a hair dryer and stuck firmly after a day. The feel is like thick putty that you can roll and press into place.
Applying it required patience. We cleaned the surfaces, heated the tape, and pressed hard along the seam. Small gaps sealed tight, and the headlights showed no moisture after a week of rain.
A few issues cropped up. One roll arrived soft from heat and felt almost like play-doh, which hurt initial handling. The 9mm width meant we doubled layers on wider gaps. Still, for the price and reusability, it worked well for quick repairs and custom work.
OFBAND Butyl Headlight Sealant

We’d buy this if you need simple, long-lasting headlight sealing and want a soft, flexible tape that stays put.
Pros
- Strong initial stick and stays flexible.
- Easy to shape into gaps and keeps out moisture.
- Works on many vehicles and other sealing jobs.
Cons
- Roll can arrive squashed or uneven.
- Can be messy to handle without heating.
- Thin thickness may not fit larger gaps.
We used this butyl tape when resealing a headlight housing after replacing a lens. It pushed into the channel cleanly and held the lens without gaps. The tape stayed soft, so it sealed vibrations and road noise well during a long drive.
Application proved quick. We cut lengths, warmed them briefly with a heat gun, then pressed the strip into the seam. Too much material made reassembly tight, so a light hand and small beads worked best.
Packaging sometimes shows the roll pressed flat, which made the tape hard to pull at first. When warm, the adhesive performed reliably. For a basic, affordable headlight seal that stays pliable, this product does the job.
Buying Guide
We look for sealants that stop moisture and dust from reaching the headlight lens. A good product creates a tight, long-lasting barrier without yellowing the plastic. Check for UV resistance and water-shedding properties.
We compare formulas: silicone, acrylic, and polysulfide each have strengths. Silicone is flexible and durable. Acrylic can be easier to apply but may need redoing sooner.
We consider drying time and ease of application. Fast-curing sealants let us finish a repair quickly. Thicker pastes fill gaps better; thin liquids seep into tight seams.
We check compatibility with our headlight materials and any prior coatings. Look for labels that state use on polycarbonate or plastic lenses. Avoid sealants that list only metal or glass use.
We prioritize long-term performance and warranty. A product that resists cracking and keeps clear windows saves time and money. Find products with clear instructions and safety data sheets.
We assess tool needs and cleanup. Some sealants require primers, tapes, or guns; others brush on. Consider solvents for cleanup and whether those fit our garage setup.
We review technical specs and independent test data. Government and industry resources like NHTSA and material science pages offer guidance on safety and standards. For tips on plastic care, we consult manufacturers’ maintenance pages.
Editor’s Choice
We picked a sealant that balances durability, ease of use, and value. It bonds well to clean plastic and glass without leaving cloudy residue.
We liked products with a simple application kit and clear instructions. A good sealant should cure in a few hours and resist water, UV, and road grime.
Key features we considered:
- Cure time: Faster cures let you finish projects in one day.
- Clarity: No yellowing or haze after months of sun exposure.
- Adhesion: Stays put on edges and seams, even on slightly worn surfaces.
Why this one stands out:
- It comes with applicator pads that help spread the sealant evenly.
- It maintains optical clarity in independent tests and real-world use.
- The price is reasonable for the lifespan it offers.
Use tips we recommend:
- Clean the headlight thoroughly with isopropyl alcohol before applying.
- Apply thin, even beads along seams and smooth them with the included tool.
- Allow full cure time before exposing to water or high speeds.
We tested performance in rain and sunlight. The chosen sealant showed reliable protection and kept headlights clear for months of normal driving.
Comparisons & Alternatives
We compare three common sealant choices: a long-lasting ceramic sealant, a budget polymer sealant, and a UV-resistant spray. Each has clear pros and cons depending on need and budget.
| Product type | Typical price range | Durability | Ease of application | Best for |
|---|---|---|---|---|
| Ceramic sealant | $20–$40 | 6–12 months | Moderate (buffing needed) | Long-term protection, clear lenses |
| Polymer sealant (budget) | $8–$20 | 1–3 months | Easy (wipe-on) | Quick fix, low cost |
| UV-resistant spray | $15–$30 | 3–6 months | Very easy (spray) | Preventing yellowing, light protection |
We recommend the ceramic sealant for lasting clarity and fewer reapplications. The polymer sealant is a similar price range at the low end; choose it when cost matters more than longevity.
We prefer the UV spray when oxidation is the main issue. It works well as a follow-up after polishing, or where spraying is faster than a full sealant job.
We suggest checking lens condition before buying. If lenses are heavily pitted or yellowed, start with restoration (sanding and polishing), then apply a sealant for best results.
FAQS
What does a headlight sealant do?
We protect the headlight lens from moisture, dirt, and UV rays. This keeps lights brighter and slows yellowing.
How often should we apply sealant?
Most sealants last 6–12 months. Some ceramic or UV coatings can last 1–3 years with proper care.
Can we use sealant on cloudy or yellowed lenses?
Yes, but results improve if we polish or restore the lens first. Sealant locks in the finish and prevents rapid re-yellowing.
Is application hard?
No. We usually clean, dry, and apply a thin coat. Some products require multiple coats or curing time.
Will sealant affect light output?
Properly applied sealant should not reduce light. Uneven application or trapped debris can scatter light, so we apply carefully.
Are there safety or compatibility concerns?
We avoid sealants that aren’t meant for polycarbonate lenses. Some solvents can damage plastics or factory coatings. Read product labels.
How do we maintain treated headlights?
Clean with mild soap and a soft cloth. Avoid harsh abrasives and strong solvents. Reapply when water beading stops.
What if sealant fails early?
Many products offer refunds or replacements. We follow manufacturer instructions and test on a small area first.
Conclusion
We recommend choosing a headlight sealant that matches your needs: UV protection for faded lenses, flexible sealants for joints, and long-lasting coatings for clear lenses. Read labels and pick a product that lists strong adhesion and weather resistance.
We prefer products with clear application steps and fast curing times to save time and reduce mistakes. Test a small area first when possible to ensure compatibility with your lens and existing coatings.
We suggest keeping tools handy: microfibre cloths, isopropyl alcohol, and masking tape make the job cleaner and easier. Reapply sealant after major road trips or every few years depending on wear and local weather.
We find that proper surface prep matters most. Clean, dry, and scuff the lens lightly when instructed to help the sealant bond and last longer.
We expect a good sealant to maintain clarity and prevent moisture for a long time without frequent rework. Follow manufacturer directions for best results and safe handling.