
Headlight restoration kits and products help remove cloudiness, yellowing, and scratches from plastic headlight lenses so lights shine brighter and look newer. These products range from simple wipe-on polishes and spray kits to multi-step sanding-and-polish systems and DIY kits that include pads, compounds, and UV sealants. We focus on solutions that improve light output, protect lenses from future damage, and are safe for common plastic headlight materials.
The most important thing to look for is whether a product both removes oxidation and includes a UV-resistant sealant or clear coat to slow re-yellowing—many quick fixes improve clarity briefly but fail without protection. Other key factors are ease of use, how much surface prep and sanding the kit requires, and whether the compounds or pads risk scratching the lens. We tested and compared kits that balance lasting results, safety for plastic lenses, and ease of use to recommend the best options for different needs.
Contents
Best Headlight Restoration Kits
We tested several headlight restoration kits and picked the ones that give the clearest, longest-lasting results. Our list focuses on ease of use, safety for clear coat finishes, and visible improvement in light output.
Cerakote Headlight Restoration Kit
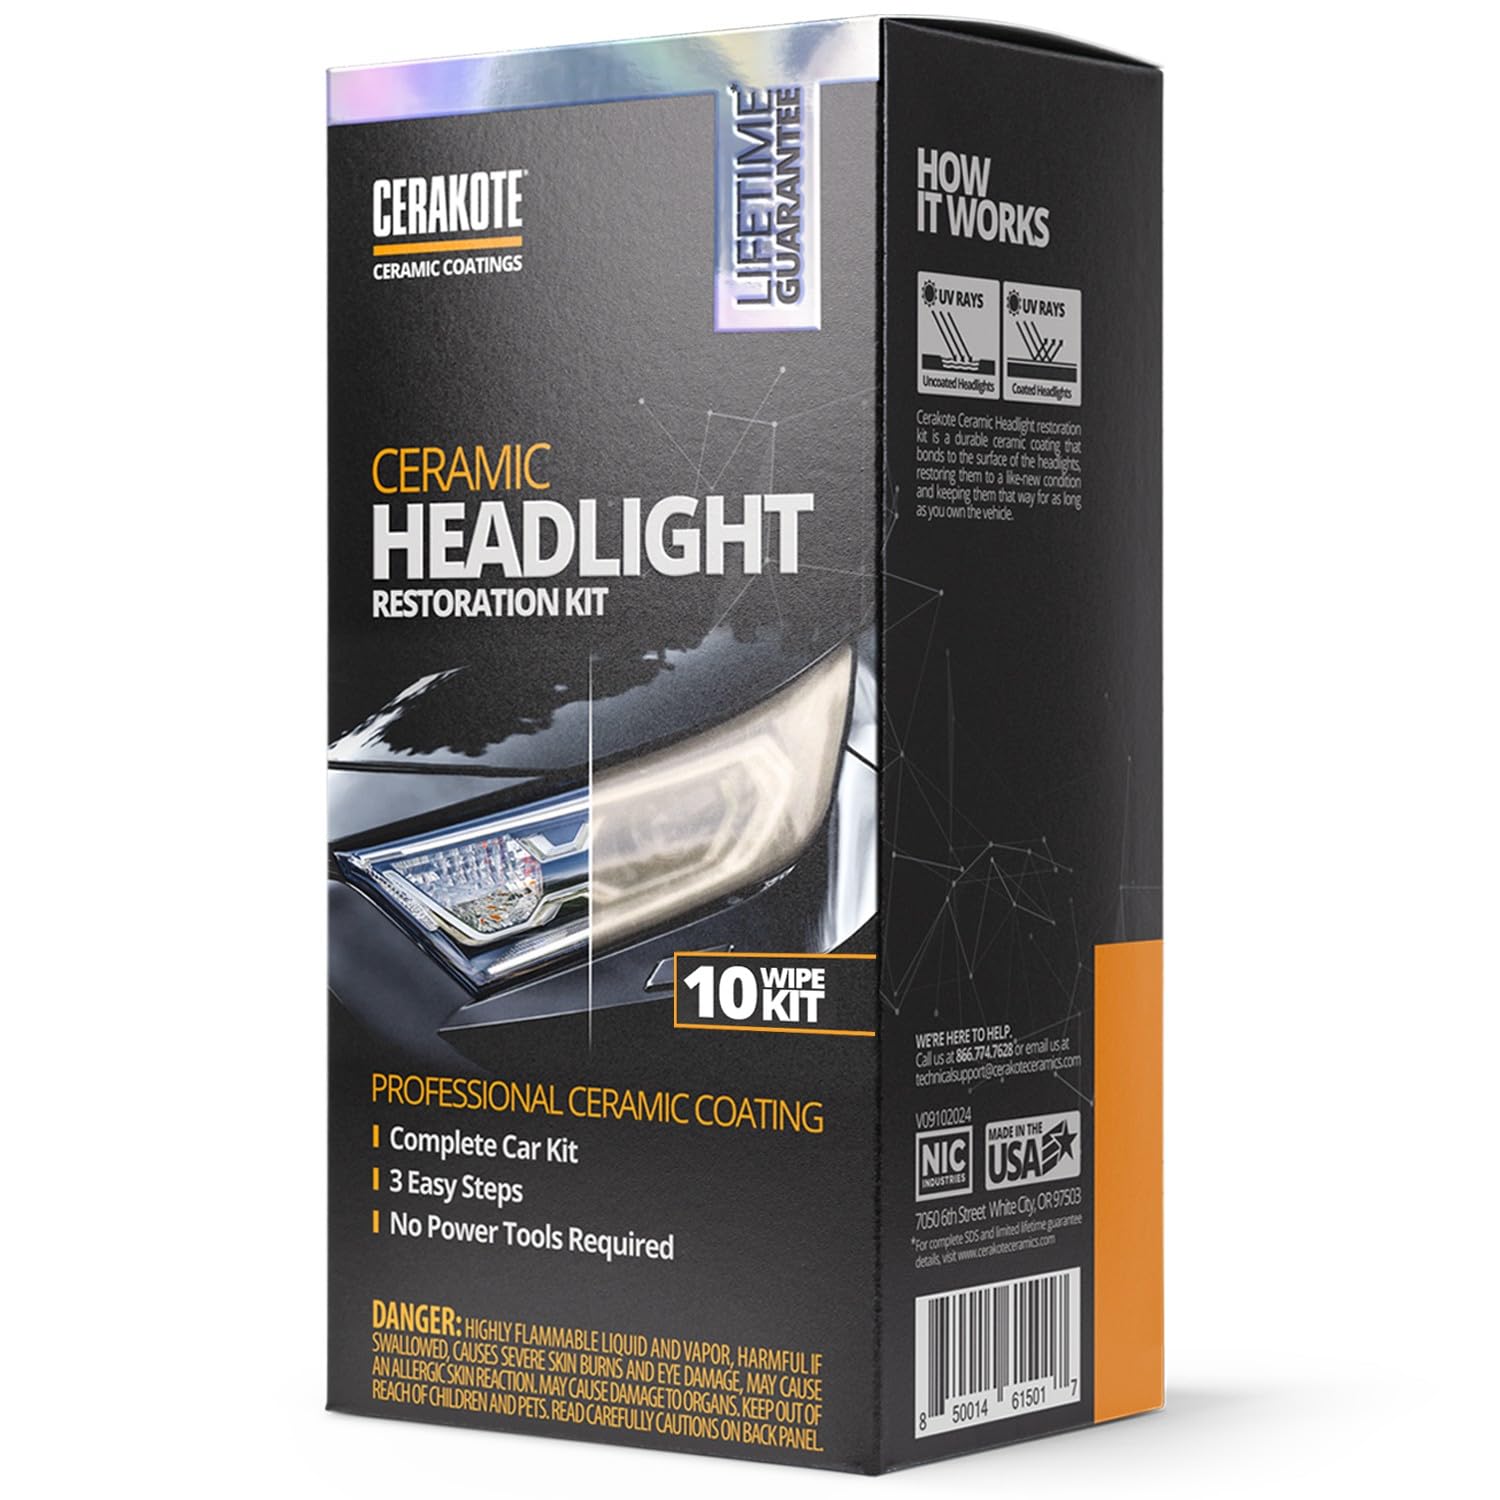
We recommend this kit when you want a long-lasting fix that needs no power tools and takes about 30 minutes.
Pros
- Ceramic coat that bonds and gives long-term UV protection.
- Simple three-step process with everything included.
- No power tools needed, so low risk to paint or lens.
Cons
- Sanding can need extra grits for very bad oxidation.
- Small kit size may cover only one car if headlights are heavily damaged.
- Requires careful masking and curing time for best results.
We used the wipes and sanding pieces on two cars and saw clear improvement. The step-one wipes remove the fog and the sanding helps with deep yellowing. The ceramic wipe left a smooth hard finish that felt durable.
Applying the kit felt straightforward if you take your time. Masking the bumper and using extra sandpaper when needed made the job cleaner. The process really only took about half an hour per headlight once we got the rhythm.
Results looked close to new, and the coated surface had a noticeably shinier, clearer view. Time will tell on the promised “last as long as you own the vehicle,” but the treated lenses show good resistance to UV after a few weeks.
3M Ultra Headlight Restoration Kit

We recommend this kit when you want a durable, DIY fix that removes heavy yellowing without replacing lenses.
Pros
- Works quickly with a drill and sanding discs.
- Includes tape and polish so we finished the job without extra buys.
- Gives a long-lasting clear finish when applied carefully.
Cons
- Takes time and some elbow grease for best results.
- Can damage paint if masking is sloppy.
- Results depend on how worn the lens is and how carefully we follow steps.
We used the sanding discs with a drill and it stripped the cloudy layer fast. The instructions guided us step-by-step, and the 3000-grit finishing disc left a smooth surface ready for the clear coat.
Masking tape in the kit saved us from scrubbing car paint. The polish and protectant felt professional and helped the lenses stay clearer for months after we finished.
This kit isn’t instant; a thorough job took an hour or two per headlight. Still, the outcome looked close to new and cost much less than replacing lenses, so we found the effort worth it.
FAVIRZCE Headlight Restore Kit

We recommend this kit if you want a fast, spray-and-wipe way to clear cloudy headlights without sanding.
Pros
- Works very quickly — we saw visible improvement in minutes.
- Leaves a water-repellent glossy finish that holds up to road grime.
- Simple spray-and-wipe process; no disassembly or power tools needed.
Cons
- May not fully fix deep, uneven damage or spots left by prior partial cleaning.
- Small bottle size means multiple coats or several cars could use extra product.
- Results depend on a dry, clean surface and steady wiping technique.
We used the FAVIRZCE spray on a pair of older lenses and got near-instant clarity. The haze and yellowing lifted with a few wipes, and the included microfiber made buffing easy. Nighttime visibility felt noticeably better after the job.
The ceramic-like coating it leaves behind really sheds water and light dirt. After a week of drizzle and highway driving, the lenses stayed glossier than untreated ones. Application felt safer and faster than sanding kits we’ve tried.
On the downside, a few edges with deep scratches didn’t vanish. We found it best for overall yellowing and light oxidation, not heavy structural damage. If you expect flawless, like-new plastic with heavy pitting, plan for more intensive repair.
Overall, the kit saved us time and gave a durable finish for routine restoration. For drivers who want quick, visible improvement and a protective topcoat, this is a practical option.
Buy FAVIRZCE Headlight Restore Kit
Chemical Guys Headlight Restore & Protect
We recommend this product if you want a quick, all-in-one way to clear cloudy headlights and add short-term protection.
Pros
- Cleans and restores in one step
- Leaves a protective coating that lasts longer than a quick polish
- Easy to apply by hand or with a dual-action polisher
Cons
- Not a permanent fix for heavily oxidized lenses
- Works best with some elbow grease or a machine for best results
- Bottle and seal quality vary between purchases
We used this on a couple of older cars and saw the haze lift fast. The paste spreads smoothly, buffs out to a clear finish, and cuts light surface scratches better than simple cleaners.
Application by hand took about 10–15 minutes per headlight on average. Using a DA polisher made the job faster and smoother, and the clarity lasted through several months of sun exposure.
The protective layer held up to normal road grime but will need reapplication after a while if you park outside a lot. Overall, this felt like a solid, time-saving option for routine headlight restoration.
Chemical Guys Headlight Restore & Protect
Sylvania Headlight Restoration Kit
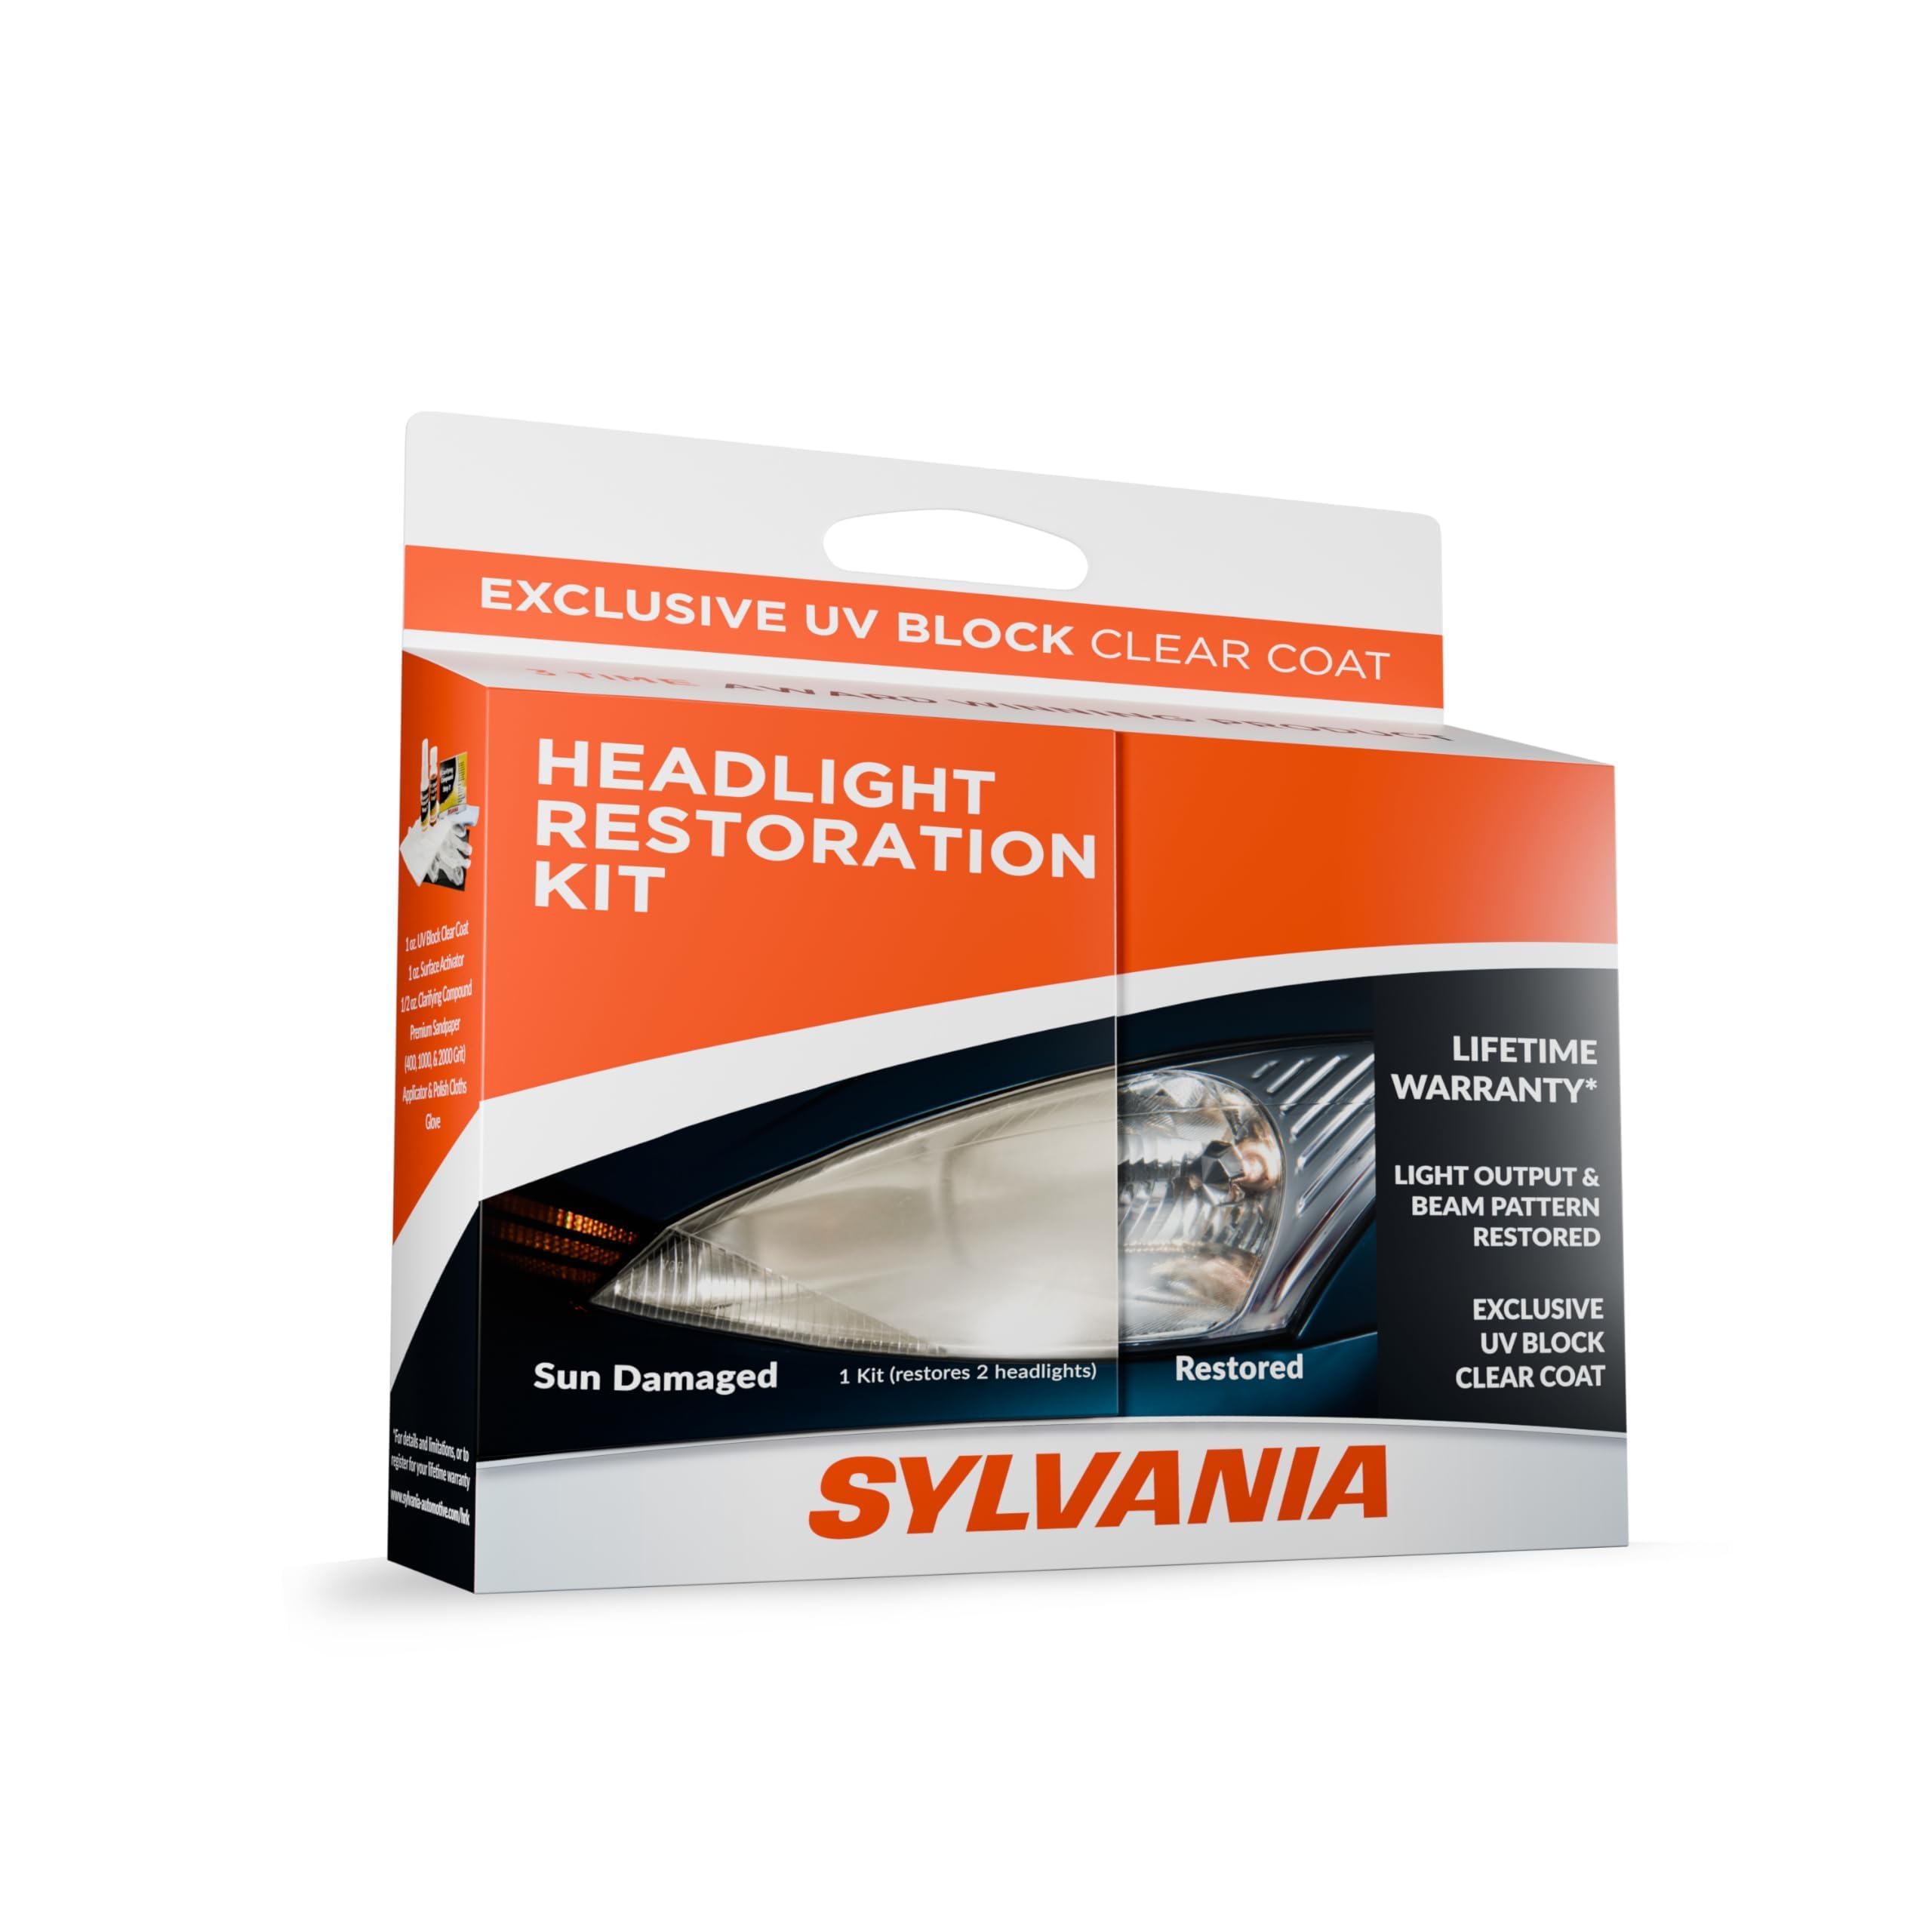
We recommend this kit if you want an easy DIY fix that restores clarity and adds a UV coating to slow re-yellowing.
Pros
- Simple three-step process that we completed without special tools.
- Includes UV clear coat that helps headlights stay clearer longer.
- Works well on heavily hazed lenses when you put in the elbow grease.
Cons
- Takes effort and time; the sanding step is physical work.
- Clear coat needs careful application or it can streak.
- Intended for two lenses, so it may not cover more cars.
We used the kit on an older car with yellowed lenses. The instructions guided us through activation, sanding, and coating. Results looked much clearer and light output improved at night.
Sanding took the most time and attention. We had to keep even pressure and rinse often to avoid scratches. After the clarifying compound the lenses already looked brighter.
Applying the UV coating felt a bit tricky at first. Once we followed the pour-and-spread steps, the finish dried clear and seemed to resist sun haze for months. Overall, this kit felt like a practical, cost-effective solution for DIY headlight restoration.
YJW Headlight Restoration Fluid (2025)

We recommend this if you want a quick, paint-safe way to clear mildly cloudy headlights without sanding.
Pros
- Fast application — spray and wipe, no sanding needed.
- Works on plastic and glass lenses, so one bottle fits many cars.
- Leaves a protective film that can delay re-yellowing for months.
Cons
- Not as effective on very old or heavily pitted lenses.
- Overspray can hit paint; tape-off is necessary.
- Some finish flaws show up on close inspection and may need rework.
We used the bottle on two cars with light to moderate haze. The spray cut through yellowing in under 15 minutes when we followed the instructions and wiped firmly with a microfiber towel.
On a newer headlight the result looked much better from normal driving distance. The light output felt noticeably stronger at night, and application really only takes a few wipes.
An older, badly oxidized lens didn’t come back to like-new; the kit left surface flaws that sanding and polishing would likely fix. We also had to protect nearby paint from overspray, since it can land on trim.
Overall, this kit works well for quick touch-ups and regular maintenance. We would use it between deeper restorations or when you need a fast improvement without tools.
Ciirvoe Headlight Restoration Kit

This kit is worth buying if you want a quick DIY fix that clears yellowing and adds a protective shine.
Pros
- Fast results that make a visible difference in minutes.
- Includes everything we needed for a simple one-person job.
- Leaves a protective coating that held up through winter conditions.
Cons
- Works best on light to moderate haze — heavy oxidation may need sanding.
- A few users report mixed results; consistency varies by lens condition.
- Bottle size and applicator feel small for big jobs.
We used this kit on two cars with cloudy plastic lenses and saw clear improvement. The spray and microfiber method cut through yellowing faster than we expected. It felt like a one-person task from start to finish.
Application felt straightforward: shake, spray, wipe, and buff. The included cloth did a good job and the polish left a bright, glossy finish. On one headlight the result looked nearly new; on the worst lens the improvement was clearly visible but not perfect.
After a few months of road salt and rain the treated lights stayed much clearer than untreated ones. That protective layer seems to help against re-yellowing. For heavy damage, plan to add sanding or a multi-step kit, but for routine refreshes this was fast and effective.
Toretark Headlight Restoration Kit

We recommend this kit if you want a quick, tool-free way to make headlights look much clearer without sanding.
Pros
- Restores clarity fast with a spray-and-wipe process.
- No sanding or power tools needed, so it’s easy for beginners.
- Includes a protective ceramic-like coating that lasts weeks.
Cons
- Protection is temporary compared with pro-grade ceramic jobs.
- Requires careful, one-direction application to work best.
- May not remove deep pitting or heavy scratches, just seals them.
We used this kit on two older cars and liked how fast it worked. A few sprays and wipes removed the milky haze and made the lenses look much clearer. The odd smell faded quickly and cleanup was simple.
Applying the protective agent took some patience. We followed the one-direction rule and found it spreads thin and even, but sloppy strokes left streaks. The coated finish felt harder than a dressing and held up to light rain for weeks.
If your headlights have deep gouges, this won’t replace sanding or lens replacement. For faded, yellowed, or mildly oxidized lenses, the kit saved us time and looked impressive for daily driving. Check it out: Toretark Headlight Restoration Kit.
3M Auto Restore & Protect Headlight Kit

We recommend this kit if you want a solid DIY restore that removes yellowing and saves you the cost of lens replacement.
Pros
- Works quickly to remove haze
- Includes sanding discs and clear coat wipes
- Easy to follow directions for a one-person job
Cons
- May need a drill or extra effort for tough haze
- Supplies are just enough for one or two uses
- Results depend on how badly the lenses are worn
We used the kit on two cars with cloudy lenses and felt the abrasive discs do the heavy lifting. The sanding steps took most of the time, then the clear coat wipes sealed the finish. It really brightened the beams and improved night visibility.
Applying pressure and going slow made the difference for us; rushing left light scratches in one spot. The foam pad and hook-and-loop discs worked well with a drill, but hand-sanding also cleaned moderate yellowing. For very deep pitting, this kit helped but didn’t make lenses perfect.
Cleanup was simple and the included glove kept our hands clean. One set covered both headlights on a smaller car, but a large or heavily damaged headlight might need extra discs. Overall, this felt like a professional-grade kit we could use at home without paying for shop labor.
LOYOTICE Headlight Restoration Kit

We recommend this kit if you want a quick, no-fuss way to brighten mildly cloudy headlights without sanding or extra tools.
Pros
- Easy spray-and-wipe process that saved us time.
- Works well on light oxidation and haze.
- No extra equipment needed; comes ready to use.
Cons
- Not ideal for deep yellowing or cracked lenses.
- Coating durability varies with road and weather conditions.
- Bottle size is small for multiple cars or heavy restoration.
We used the spray on two older cars and saw clear improvement in under ten minutes for each headlight. The fluid spreads evenly and the microfiber towel removed haze without effort.
Application felt simple: shake, spray, and buff. One pass cut glare and brightened the beams enough to notice safer night visibility.
For headlights with heavy clouding we still recommend a sanding kit first, then this product as a finishing coat. This worked best for us as a fast touch-up or maintenance step.
Grab the kit on Amazon: LOYOTICE Headlight Restoration Kit.
Buying Guide
We look for products that match the level of damage on the headlights. Light yellowing can be fixed with a mild polish kit, while deep oxidation needs a sanding kit or professional-grade restoration. Check the product description for recommended damage levels.
We check included tools and materials. Kits that include sandpaper, polish, pads, and a UV sealant give the most complete results. If the kit lacks a UV protectant, plan to buy one separately.
We compare ease of use and required equipment. Some kits work by hand; others need a drill or orbital polisher. Choose based on our skill level and whether we already own power tools.
We evaluate abrasives and polish type. Look for multiple grit levels of sandpaper and a non-abrasive finishing polish. This helps us remove damage then restore clarity without excess scratching.
We consider longevity and protection. A good UV sealant or ceramic coating extends clarity. Check how long the manufacturer claims protection lasts and prefer products with clear application instructions.
We read safety info and user reviews. Safety data sheets and clear instructions reduce risk. Reviews help us judge real-world results and ease of use.
We verify compatibility and cost. Make sure the kit fits our headlight material and size. Balance price, included items, and expected lifespan to pick the best value.
We use trusted sources for technique and safety. For guidance on automotive paint and polishing safety, consult the EPA or a state automotive extension page for best practices and waste disposal.
Editor’s Choice
We pick a sanding-and-seal kit as our top choice because it balances cost, effort, and lasting results. These kits include sandpaper, polish, and a UV sealant so we remove haze and protect lenses in one process.
We prefer kits with multiple grit levels (e.g., 400 → 2000) and a clear UV finish. That combo lets us remove deep oxidation and then restore clarity without needing a professional buffer.
For tools, we recommend a drill-mounted pad or a hand block depending on the job size. A drill speeds the work and gives smoother results, while hand sanding works well for small spots and tight curves.
We look for kits that state UV protection longevity (6–24 months) and include clear instructions. If a kit lacks sealant, we add a separate UV protectant to keep headlights clear longer.
We include an inexpensive polishing compound for final shine. It removes fine scratches left by sanding and improves light output. We always finish with the sealant to slow re-yellowing and extend the repair.
Comparisons & Alternatives
We compare three common headlight restoration options so you can pick the best fit for your needs.
| Method | Cost | Time | Durability | Pros | Cons |
|---|---|---|---|---|---|
| DIY sand-and-polish kit | $15–$40 | 30–90 min | 6–12 months | Inexpensive; good results if careful | Needs elbow grease; risk of uneven finish |
| Professional restoration | $80–$200 | 1–2 hours | 1–3 years | Best finish; faster; warranty sometimes offered | Most expensive; requires booking |
| Replacement headlight assembly | $100–$600+ | 1–3 hours | Lifetime of new lens | Permanent solution; restores optics fully | Costly; may require coding or alignment |
We include a similar-price alternative to DIY kits: a good-quality polishing compound and microfiber kit. It costs about the same and can match kit results if we use proper sanding steps.
Choose a DIY kit when we want a low-cost fix and have time to work carefully. Choose the polishing compound alternative if we prefer more control over products and technique.
We pick professional restoration when we want a near-new finish quickly and can pay more. We replace the assembly when the lens is cracked, mounting is damaged, or restoration can’t clear severe yellowing.
FAQS
Q: How long does a headlight restoration last?
We usually see results that last 6–12 months for DIY kits. Professional services can extend that to 1–3 years depending on sealant and driving conditions.
Q: Can we restore very yellow or cracked lenses?
Severe yellowing can be improved but deep cracks need lens replacement. Scratches and fogging respond well to sanding and polishing.
Q: Is it safe to do this ourselves?
Yes, if we follow instructions and use proper safety gear like gloves and eye protection. Masking tape protects paint during sanding.
Q: What supplies do we need?
A basic kit includes sandpaper (various grits), polish, and a UV sealant. We can also use toothpaste in a pinch, but it offers shorter protection.
Q: How do we prevent the problem from returning quickly?
Applying a UV-protective clear coat or sealant is key. Parking in shade and washing headlights regularly helps too.
Q: Will restoration improve headlight brightness?
Yes, cleaning and polishing usually restore light output noticeably. For best results, we should align beams after major work.
Q: How much does professional service cost?
Professional jobs often range from $50 to $200 per vehicle. Prices vary by location and whether a lifetime sealant is included.
Q: Can we use power tools?
We can use an orbital sander or drill with a polishing pad for faster results. We must keep speeds moderate to avoid excess heat.
Conclusion
We can restore headlights safely and effectively by choosing the right method for the level of haze. Simple cleaning and polishing work well for light cloudiness, while sanding plus polish or a kit suits heavy yellowing.
We should take our time and follow steps carefully. Proper masking, gradual grit progression, and even pressure prevent damage.
We recommend testing a small area first. That helps us confirm the method and product before doing the whole lens.
Maintenance keeps results longer. A UV sealant or wax every few months will slow re-yellowing and keep light output high.
If lenses are cracked, bowed, or have internal fogging, replacement may be the better option. We should weigh cost and safety when deciding.
Tools and supplies are inexpensive compared with improved visibility and safety. With basic care, we can restore clarity and keep our headlights working well for years.