
Car headlights dim and yellow over time from UV light, dirt, and road chemicals, which lowers visibility and makes a car look older. A car headlight polishing kit restores clarity by sanding, polishing, and protecting the lens so light shines through more effectively. These kits range from simple hand-polish kits to multi-step systems with sanding discs, polishing compounds, and UV sealants.
The key things to watch when buying a kit are the number of steps, the abrasives’ grit range, and whether the kit includes a reliable UV protectant. A kit with progressive grits plus a durable UV sealant gives the best balance of restoration and long-term protection. We tested and compared several kits to find ones that actually clear lenses, resist re-yellowing, and are easy enough for most DIYers to use, so you can pick the right option in the next section.
Contents
Best Car Headlight Polishing Kits
Below is our full list of the best car headlight polishing kits. We tested options for ease of use, results, and value, so you can choose a kit that restores clarity and improves night driving safety.
Cerakote Headlight Kit
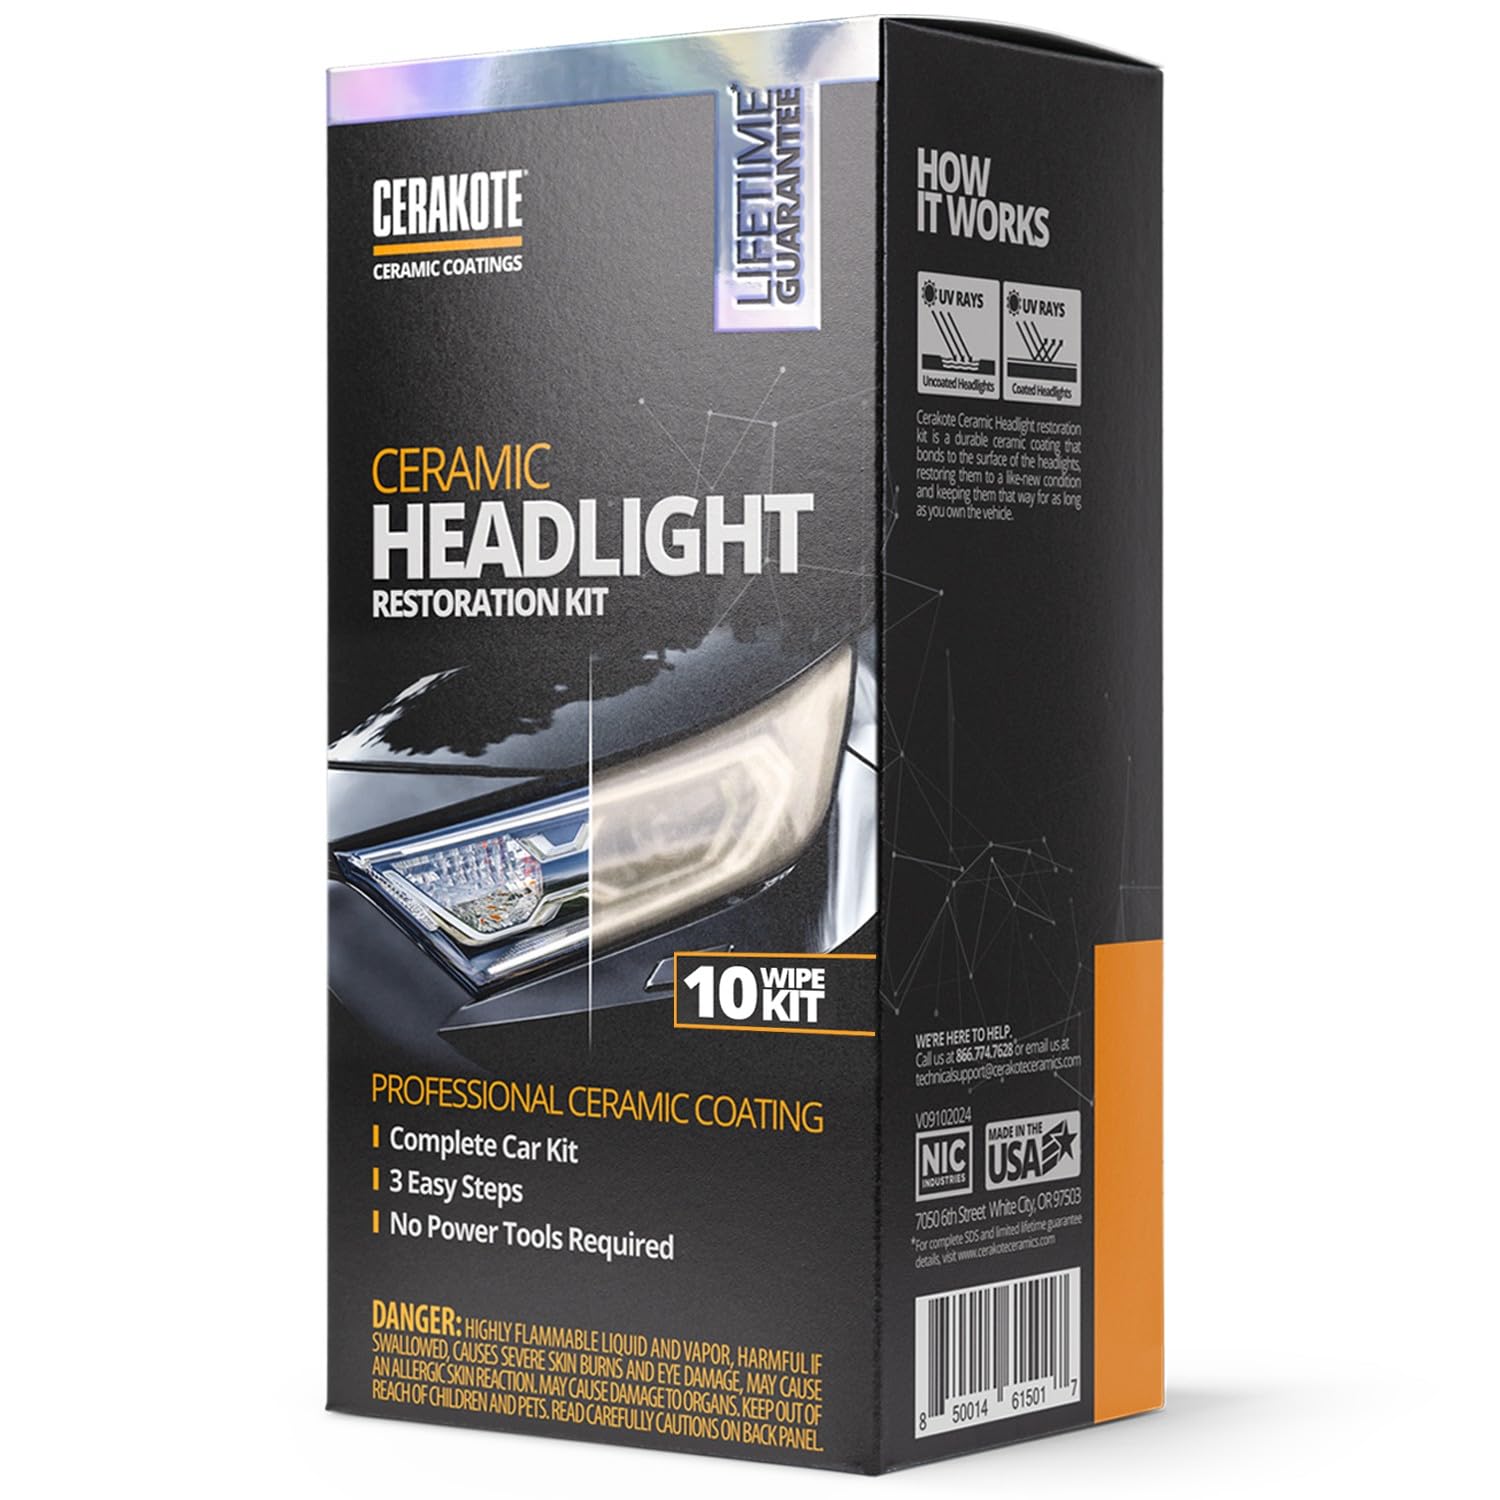
We recommend this kit if you want a simple, no-tools method that really restores clarity and adds long-lasting UV protection.
Pros
- Easy three-step process that we finished in about 30 minutes.
- Ceramic coating feels durable and promises long-term UV protection.
- No power tools or extra supplies required for basic jobs.
Cons
- Sanding kit can be light on aggressive grits for very rough oxidation.
- Kit size may only cover one large pair of headlights fully.
- Results depend on careful prep and technique to avoid streaks.
We used the wipes and sanding pieces exactly as directed and saw a clear improvement right away. The oxidation remover wipes lift yellowing well and the sanding stage smooths deeper haze when you take your time.
Applying the ceramic wipes felt straightforward and left a slick, clear finish. The coating dried fast and gave the lenses a noticeably brighter look. We liked that there was no need to plug in a drill or buy extra gear.
On tougher, badly pitted lenses we switched to a coarser sandpaper on our own to get a cleaner surface before coating. If your headlights are heavily damaged, plan for extra sanding or a second kit for full coverage.
Overall, the kit saves time and avoids trips to a shop. Follow the steps, tape around the lamp, and let the coating cure; done right, the headlights look much better and should resist UV fading for years.
3M Headlight Restoration Kit

We recommend this kit when you want a durable, drill‑assisted restore that avoids buying new lenses.
Pros
- Restores clarity fast with drill sanding.
- Includes tape, pads, and polish so we didn’t need extra tools.
- Feels like professional abrasives—results last longer than scrubbers.
Cons
- Takes time and patience to sand evenly.
- Risk of sanding paint if masking is sloppy.
- Needs a drill for best results — hand work is slower.
We used the 3M kit on two older cars and saw a clear difference after the sanding and polish steps. The Trizact discs cut through yellowing without leaving scratches if you follow the grit order.
Masking tape and the pad holder made it easier to avoid paint, but we still moved slowly around edges. The finish looked almost new once we applied the clear protectant and buffed it out.
This kit cost us less than replacing lenses and felt like a proper repair rather than a quick fix. Expect to spend an hour or two per headlight, and bring a drill for the smoothest, fastest work.
3M Restore & Protect Headlight Kit

We recommend this kit if you want a solid DIY fix that often restores clarity and saves money versus replacement.
Pros
- Professional-grade abrasives that cut yellowing quickly.
- Includes clear coat wipes so results last longer.
- Easy to use by hand or with a drill attachment.
Cons
- Sanding can take time on badly pitted lenses.
- Discs provided may only cover one pair on very large headlights.
- Results depend on careful technique; mistakes show.
We used the kit on an older commuter with cloudy lenses and saw real improvement in about 30–45 minutes. The Trizact sanding discs remove the haze without feeling too aggressive, and the foam pad makes the polishing step feel controlled.
Applying the clear coat wipes afterward made a noticeable difference in gloss and seemed to slow re-yellowing during our short-term follow-up. If you skip the clear coat, the finish looked good at first but dulled faster.
This kit won’t replace badly cracked or deeply scratched lenses, and you need patience to follow the sanding steps evenly. For most plastic lenses, though, it’s a cost-effective, hands-on solution we’d use again.
ROYWOO Headlight Repair Kit

We recommend this kit if you want a cost‑effective way to restore cloudy headlights and are willing to follow the wet sanding steps carefully.
Pros
- Restores clarity well and often makes headlights look much brighter.
- Includes enough liquid and tools for several jobs.
- Works on many vehicle lights, not just car headlights.
Cons
- Wet sanding takes time and patience to get right.
- Some steps need careful timing (no touching cured surface for hours).
- Sandpaper wears out fast and should not be reused.
We used the kit on a pair of older headlights and saw noticeable improvement after one session. The repair liquid spread smoothly and the final coating left a clear finish that boosted light output.
Sanding felt like the main effort. We kept the surface wet, worked through the grits, and replaced paper when it clogged. That routine removed yellowing and most scratches, but it took focus to avoid uneven spots.
The atomizer and liquid heated quickly and applied evenly, which saved time versus DIY polish alone. After curing, the lenses stayed clearer for weeks in our local conditions, though we avoided hard contact for the recommended hours to prevent marks.
BFXM 38‑Piece Headlight Restoration Kit

We recommend this kit for DIYers who want a low-cost way to clear cloudy headlights, but plan on spending time learning the steps and working carefully.
Pros
- Lots of discs and pads so you can do multiple jobs.
- Velcro-backed pads swap fast on a drill.
- Good waterproof sandpaper holds up when wet sanding.
Cons
- No clear printed instructions in the box.
- Results vary and may not restore like new.
- You need a drill and some patience for best results.
We used this kit on two cars with different headlight damage. The variety of grits lets us start coarse and move to fine without buying extras. The Velcro system made switching discs quick while working with water.
Wet sanding worked as expected; the discs stayed stuck and cut the haze. Using the polishing pad at the end did add shine, but the final clarity depended on how carefully we sanded. It helped headlights look much better, though not perfectly new.
A major snag: the pack includes no clear step‑by‑step sheet. We researched the order of grits and the wet‑sanding method before starting. If you already know basic sanding technique, this kit gives good value and supplies to finish the job.
POLIWELL Headlight Kit

We recommend this kit if you want a DIY fix that removes heavy yellowing and gives clear headlights when you take your time.
Pros
- Restores badly yellowed lenses with sanding and polishing.
- Comes with drill attachment and enough pads for about two headlights.
- Simple three-step process that produces visible improvement.
Cons
- The wipe-on clear coat can leave streaks or look uneven.
- Results depend on careful sanding and patience.
- UV protection longevity is uncertain; may need re-sealing later.
We used the sanding discs and drill adapter to work through heavy haze. The coarse-to-fine sequence (P1000 to P5000) made the lens surface feel smooth, and the polishing stage brought back a clear shine. It took time, but the before-and-after was obvious.
Masking tape and the soft interface pad helped prevent scuffs on surrounding paint. The spray bottle and foam pads made cleanup easy. The drill attachment made sanding faster than doing it by hand, but speed can cause swirl marks if you rush.
The supplied clear coat did seal the lens but left some wipe marks on our first try, so we would consider a spray clear coat if you want a perfectly smooth finish. Overall, this kit is a strong value for DIYers who will follow the steps and work carefully.
Pmbqifay Headlight Restoration Kit

We think this kit is worth buying if you want clear headlights fast and save money versus replacement.
Pros
- Restores clarity well when sanded and applied carefully.
- Comes with almost everything needed, including repair liquid and power cords.
- Repairs dry hard and resists yellowing for a while.
Cons
- Prep sanding takes time and patience to get right.
- Repair liquid can drip and damage paint if not careful.
- Electric atomizer needs cautious handling and setup.
We sanded two headlights with this kit and saw a big visual change. Sanding removed the haze, and the atomized repair liquid formed a smooth, glossy topcoat. Lights looked much brighter at night.
The kit felt complete. The sandpapers, emery board, tape, and 200 ml liquid covered both headlights with extra left over. The carrying case kept parts organized during the job.
Using the atomizer took a little practice. We had one small drip that required light sanding and re-coating. Follow the instructions, tape surrounding paint, and allow full drying time for the best result.
Overall, we recommend this for DIYers who can take time to prep and follow steps carefully. It saved us the cost of replacement and left headlights clear and functional.
Pomsare 133‑Piece Headlight Polishing Kit

We recommend this kit if you want a full set of wet/dry grits and buffing pads to restore headlights and small surfaces without buying multiple products.
Pros
- Wide range of grits lets us move cleanly from heavy sanding to fine polishing.
- Hook-and-loop pads install fast and hold well, even during wet sanding.
- Good value — lots of discs and reusable pads for many projects.
Cons
- Too heavy for small rotary tools; use a drill with enough power.
- Some backing pads feel soft and can wobble at high speed.
- Learning curve to avoid skipping grits for best results.
We used this kit on two cars and a set of alloy wheels. The range from 60 to 10,000 grit made it easy to strip heavy haze, smooth the lens, then polish to a clear finish. The wool and foam buffs cleaned up fine swirl marks after the high-grit sanding.
Installation took seconds with the upgraded hook-and-loop plates. They stuck firmly and stayed on through wet sanding. Be sure to use a proper powered drill — a small rotary tool struggled and heated up on the heavier pads.
Expect to spend time moving through grits; rushing will leave light lines. The pads wash and reuse well, which stretched the kit across several jobs. Overall, this felt like a practical, budget-friendly choice for DIY headlight restoration and light detail work.
Sylvania Headlight Restoration Kit
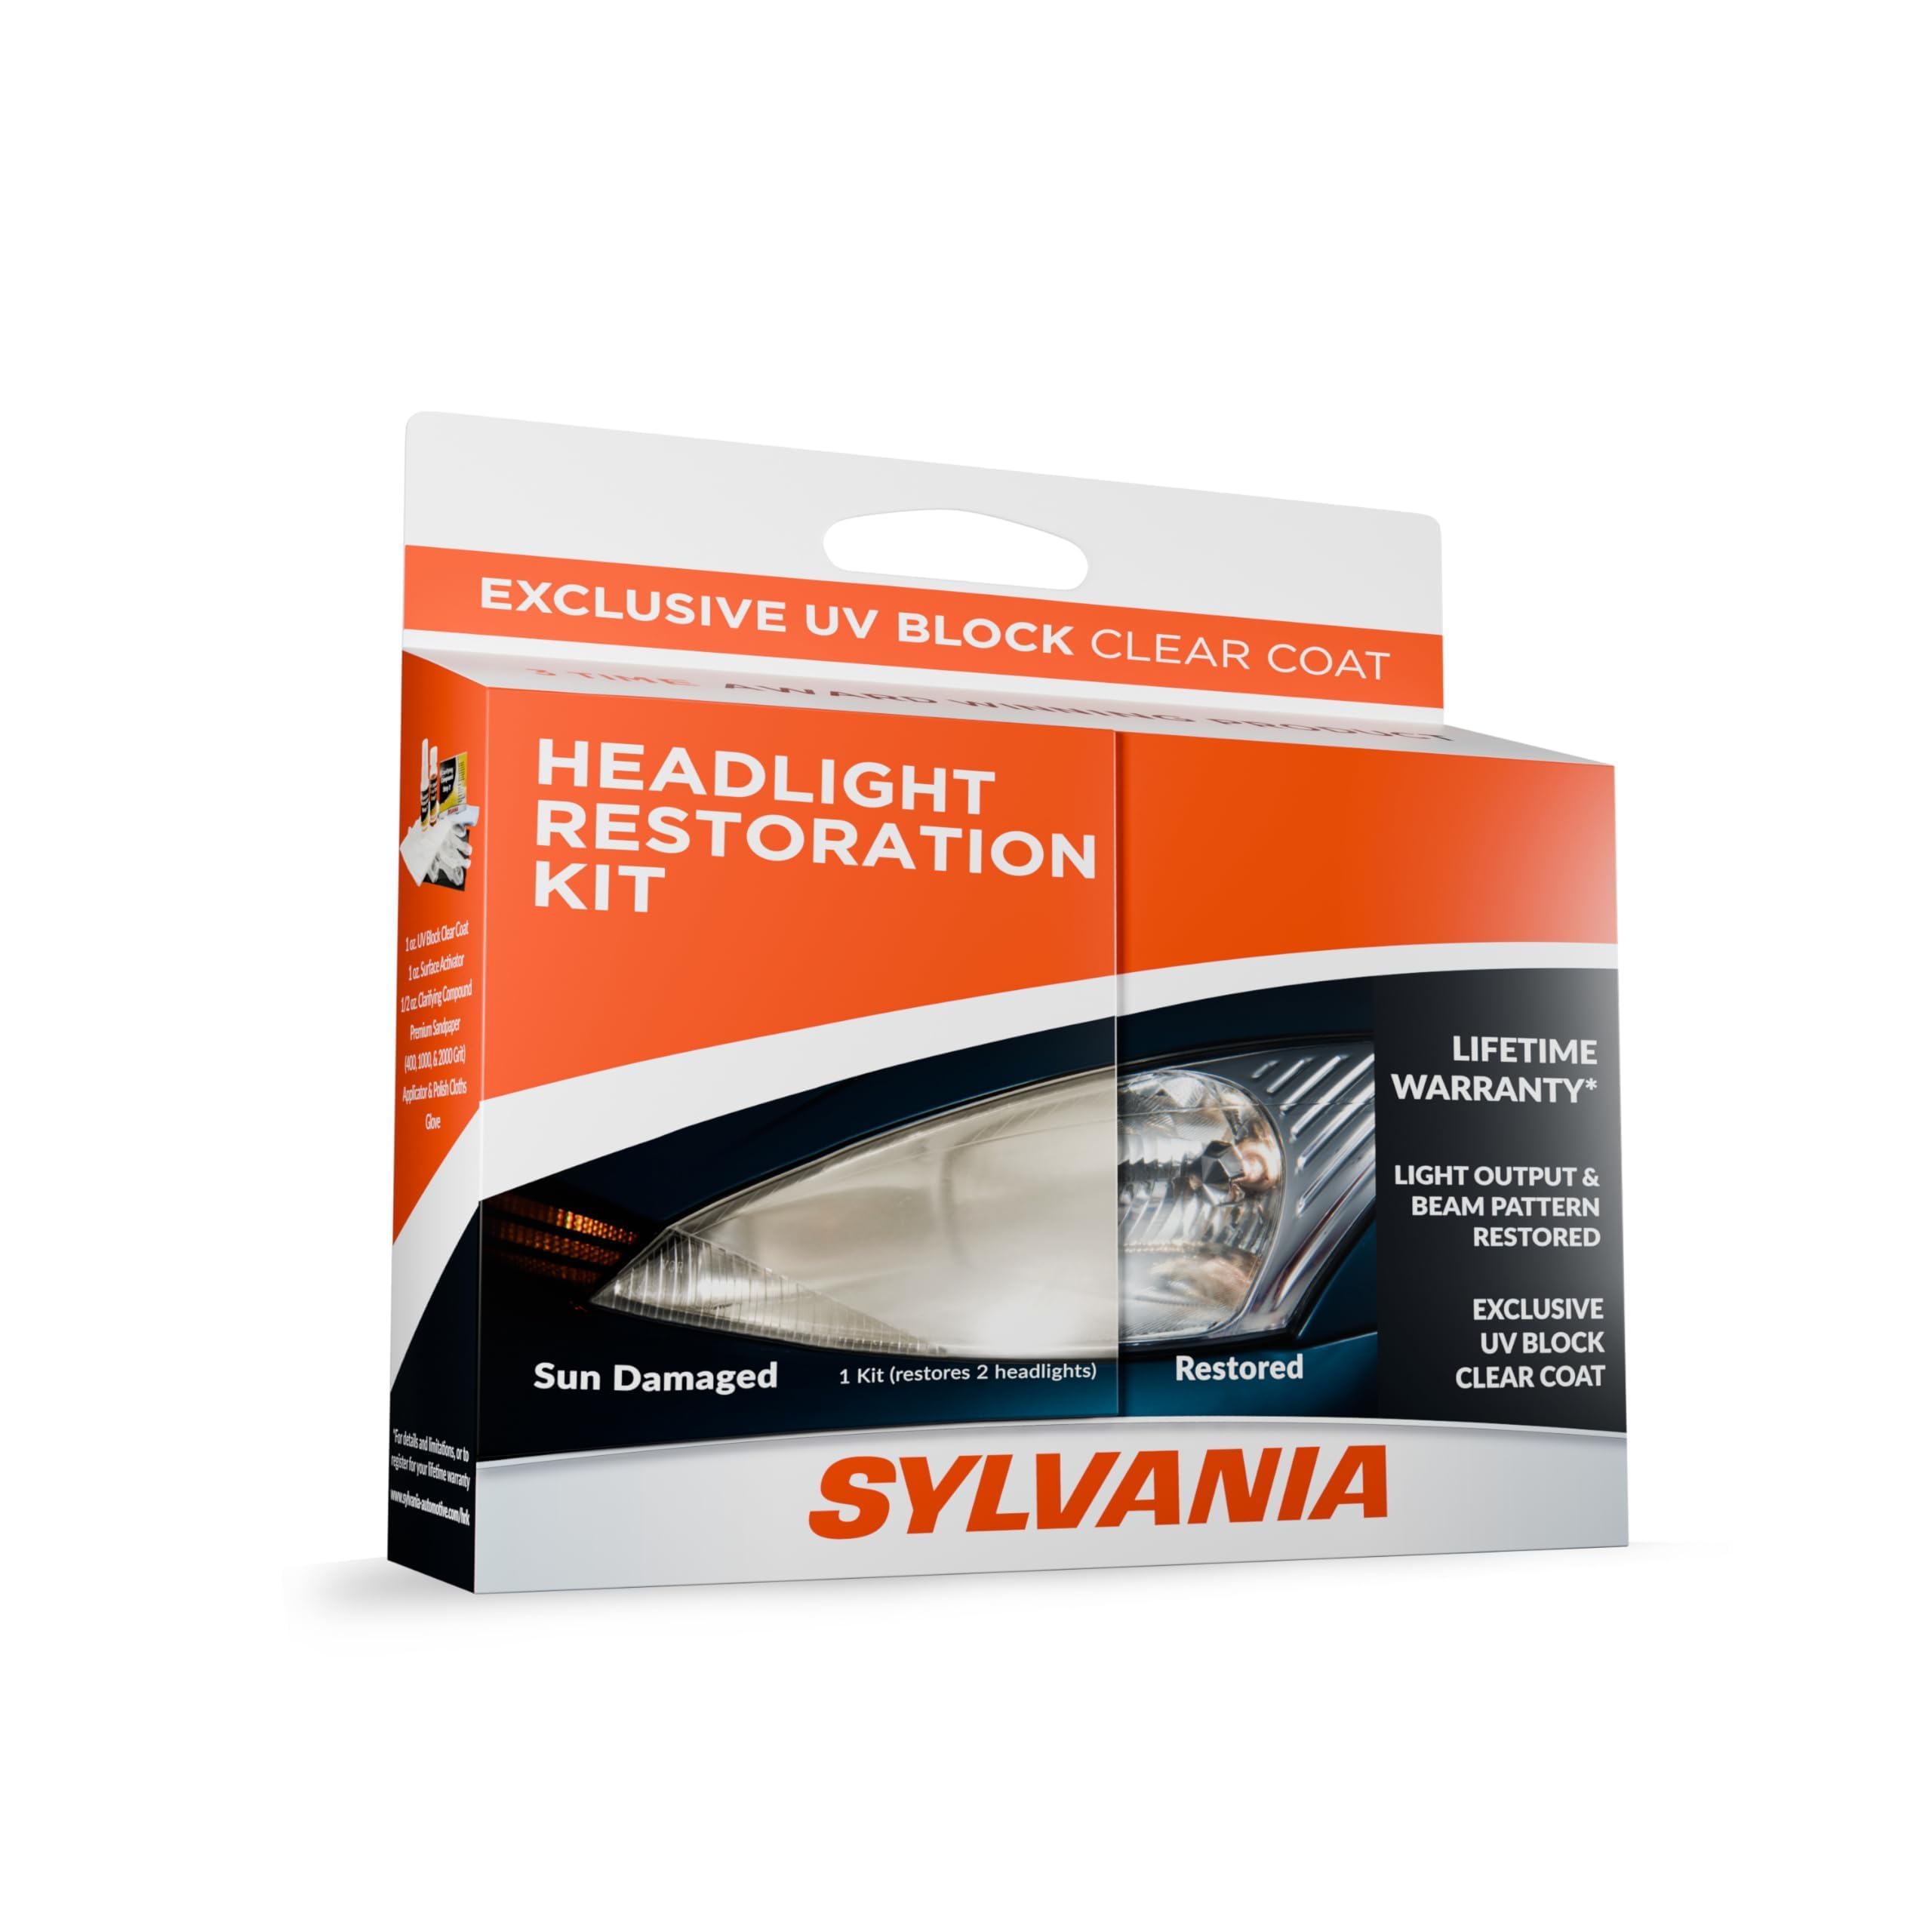
We recommend this kit if you want a simple, affordable way to clear cloudy headlights and add UV protection.
Pros
- Easy step-by-step process that we finished without power tools.
- Restores brightness noticeably and improves night visibility.
- Comes with UV clear coat to help slow re-yellowing.
Cons
- Takes elbow grease and time for best results.
- Clear coat needs careful, even application to avoid streaks.
- May not last as long as a professional restore on heavily damaged lenses.
We used the kit on an older car with yellowed lenses and saw real change after the sanding and compound steps. The instructions were clear and the sanding progression felt logical. Results looked much better right away.
Applying the UV clear coat felt a bit tricky. We had to be patient and use light, even passes. A small mistake left a slight uneven sheen until it cured, so go slow.
Overall, this felt like a solid DIY fix that saves money over professional service. It brightened our headlights and made night driving easier, though heavy damage might need more work or a repeat treatment.
FAVIRZCE Headlight Restore Kit

We recommend this kit if you want a fast, no-sanding way to clear yellowed headlights and add a water‑repellent finish.
Pros
- Works fast — spray and wipe clears haze in minutes.
- Leaves a durable ceramic-like, hydrophobic coating.
- Easy to use at home with included microfiber towel.
Cons
- May not fully fix heavily pitted or deeply scratched lenses.
- Needs dry headlights and single-direction wipes for best results.
- Faint inconsistencies on partly clear areas can remain.
We used the bottle on an older SUV with cloudy lenses and saw a clear change in under 10 minutes. The spray dissolved yellowing quickly and the microfiber picked up residue without much scrubbing.
Application felt simple and tidy. Spraying, then wiping in one direction produced an even gloss. The hydrophobic finish beads water on the lens the next morning, which helped keep them cleaner on short trips.
A few spots with deep scratches didn’t vanish, so we wouldn’t call this a replacement for sanding or lens replacement. Still, for most yellowing and light oxidation this kit saved us time and money.
We liked how the product handled both plastic and glass lenses on different vehicles. If you need a quick, noticeable improvement and a short DIY job, this is an effective choice.
Buy FAVIRZCE Headlight Restore Kit
Buying Guide
We look for kits that match our skill level and time commitment. Beginner kits with clear instructions and fewer steps work best for DIYers. More advanced kits give better results but require more skill and patience.
We check the abrasives and polish included. Sanding pads or papers from coarse to fine help remove heavy haze. A quality polish or sealant protects the lens after sanding.
We consider the tools and power source. Hand-applied kits are cheaper and fine for small jobs. Kits with a drill or pad speed tool save time and give more even results.
We pay attention to protective items. Gloves, masking tape, and microfiber cloths reduce risk of damage and keep the job clean. A UV-resistant sealant matters for long-term clarity.
We value clear instructions and safety guidance. Good kits explain each step, drying times, and how to avoid over-sanding. We also look for warranty or support options.
We compare cost versus expected results. A mid-range kit often balances price and performance. For frequently treated cars, investing in a higher-quality sealant saves money over time.
We read authoritative resources for technique and safety. For best practices on surface prep and UV protection, we consult sources like the U.S. Department of Energy on light transmission and care, and automotive safety guidelines from national transportation agencies.
Editor’s Choice
We picked the kit that balances ease, results, and value. It works well on cloudy lenses and fits most cars.
This kit includes three grits of sandpaper, a polishing compound, and a buffing pad. The instructions are clear, and the pad attaches to a standard drill for faster work.
We liked that the compound removes yellowing without leaving haze. It also restores light output noticeably on both plastic and glass lenses.
Key features:
- Three sanding grits for staged restoration
- Polish and pad included for final clarity
- Drill-compatible for quicker results
We tested durability after treatment. The finish held up to light rain and car washes when we applied the protective sealant included in the kit.
Price is fair for the parts provided and the results. This makes it a strong choice for DIYers who want reliable, long-lasting improvement without professional help.
Comparisons & Alternatives
We compare a typical car headlight polishing kit with other options so you can pick what fits your needs.
| Option | Cost | Effort | Results | Longevity |
|---|---|---|---|---|
| Headlight polishing kit (our focus) | $15–$40 | Moderate — 30–90 min | Clears yellowing and haze; restores brightness | 6–18 months with sealant |
| Professional restoration | $80–$200 | Low for you; pros do the work | Best cosmetic and optical results | 1–3 years depending on seal |
| Replacement headlight assembly | $150–$600+ | High cost and time | Like-new or better; fixes internal damage | Years; permanent fix |
| DIY sanding + clear coat (cheaper kit) | $10–$30 | High skill and time | Good if done well; risk of swirl marks | 6–12 months; depends on clear coat |
We recommend the polishing kit when you want good results at a low to mid price and are willing to spend an hour to do the job ourselves.
Choose professional service if we want the best, longest-lasting finish and don’t want to do the work.
Pick replacement assemblies only when lenses are cracked, warped, or internal moisture ruins function.
A similar-priced alternative is a budget sanding kit ($10–$30). We choose the polishing kit over the budget kit when we prefer easier steps and included sealant; choose the budget kit if we want to save money and are confident with sanding.
FAQS
How often should we polish headlights?
We recommend polishing once a year for most cars. If headlights fog faster, we suggest checking every 6 months.
Will a polishing kit remove deep cracks?
No. Kits remove haze and light scratches. For deep cracks or broken lenses, we advise replacing the headlight assembly.
How long does the result last?
Results usually last 6–12 months with normal driving. Protective sealant in some kits can extend that to 12–24 months.
Is a drill required?
Not always. Many kits include hand sanding and polishing pads. A drill or rotary tool can speed the job and give more even results.
Do kits include UV protection?
Some kits include a UV sealant; others do not. We suggest choosing a kit with UV protection to slow re-yellowing.
Can we damage headlights by polishing?
Yes, if we sand too much or use the wrong polish. We must follow kit instructions and use the right grit progression.
What tools and supplies do we need?
Most kits include sandpaper, polish, pads, and sealant. We might still need tape, microfiber cloths, and water.
How do we prepare the car?
Clean the headlight and tape surrounding paint. Work in shade and avoid direct sun for best results.
Conclusion
We found that a good headlight polishing kit saves money and improves night visibility. Using the right pads and compounds makes the job safer and faster.
We recommend kits with clear instructions and multiple grits. Power tools can speed work, but hand sanding is safer for beginners.
We remind readers to protect surrounding paint with tape. Small mistakes can cause scratches; patience matters more than force.
We suggest reapplying a UV sealant after polishing. That helps keep headlights clear for months.
We believe regular maintenance prevents heavy yellowing. Light cleaning every few months keeps beams strong and legal.
Quick checklist
- Read the instructions fully.
- Use proper safety gear.
- Start with lower grit, finish finer.
- Apply UV protectant when done.
We expect these steps to help most car owners restore clarity and maintain headlights with minimal cost and effort.