
Find the Best Car Stereo Compatibility Checker Today shows you how to pick and use a car stereo compatibility checker. You will learn how to gather vehicle details, use online checkers, verify wiring and fit, and troubleshoot common issues.
Contents
- 1 Key Takeaways
- 2 Introduction: What you’ll learn
- 3 Step 1: Gather vehicle and stereo info
- 4 Step 2: Choose the right car stereo compatibility checker
- 5 Step 3: Use the checker — step-by-step
- 6 Step 4: Verify physical fit and depth
- 7 Step 5: Verify wiring and electrical compatibility
- 8 Step 6: Match features and integration
- 9 Step 7: Buy parts and prepare for installation
- 10 Step 8: Install and test
- 11 Troubleshooting
- 12 Practical tips and real examples
- 13 When to get professional help
- 14 Conclusion
- 15 Author
Key Takeaways
- Know your vehicle: Gather make, model, year, and trim before using a car stereo compatibility checker.
- Use trusted tools: Try manufacturer checkers and reputable third-party sites to verify fit and wiring.
- Check physical fit: Measure dash opening and verify mount type with the car stereo compatibility checker results.
- Confirm wiring and features: Ensure harnesses, CAN bus, steering controls, and camera inputs are supported.
- Consider accessories: Dash kits, wiring harness adapters, and antenna adapters often solve fit issues.
- Test before final install: Use the car stereo compatibility checker to guide a test fit and wiring test.
Introduction: What you’ll learn
This guide shows you how to use a car stereo compatibility checker to pick the right head unit for your car. You will learn to collect the right info. You will learn which checkers to trust. You will learn how to verify fit, wiring, and features. You will learn common fixes and troubleshooting. By the end, you will know how to choose a stereo that fits and works right.
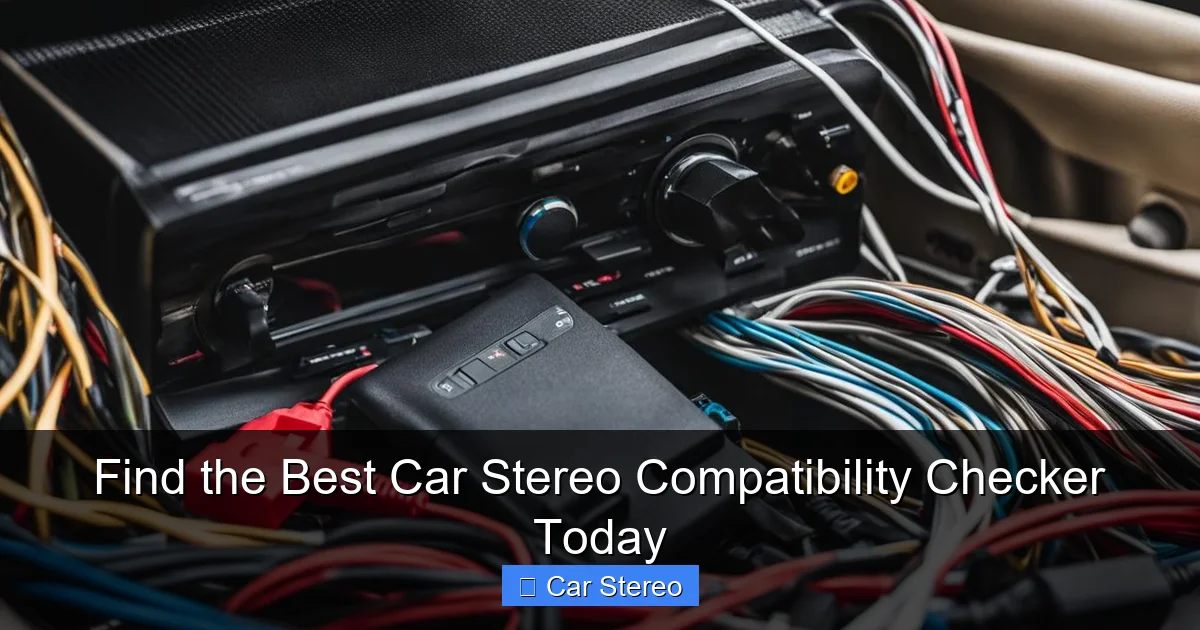
Step 1: Gather vehicle and stereo info
Good results start with good info. Before using a car stereo compatibility checker, collect details about your car and the stereo you want. This step saves time and prevents mistakes.

Visual guide about Find the Best Car Stereo Compatibility Checker Today
Image source: blog.electronicexpress.com
1.1 Find vehicle details
- Make, model, and year. These are essential.
- Trim level. Some trims have different dash or wiring.
- Factory radio size and type. Know if your car has a single-DIN or double-DIN opening.
- Factory features. Note if your car has navigation, backup camera, or factory amp.
1.2 Note current connections
- Look at the back of the current stereo if possible.
- Identify the wiring harness type and connectors.
- Note any special modules, like a CAN bus interface.
1.3 Decide on desired stereo
Choose several stereo options. Look at fits, features, and brands. Having options helps when the car stereo compatibility checker flags a problem.
Step 2: Choose the right car stereo compatibility checker
Not all checkers are the same. Some focus on fit. Others focus on wiring or features. Use a mix. Cross-check results for best accuracy.
Visual guide about Find the Best Car Stereo Compatibility Checker Today
Image source: descriptive.audio
2.1 Manufacturer compatibility tools
Many major brands offer checkers. These often match their own models. They are good for feature and wiring checks. Examples: Sony, Pioneer, Kenwood, Alpine. Manufacturer checkers will list model numbers and sometimes show harness accessories.
2.2 Retailer checkers
Large online car audio retailers have tools. They match stereos to vehicles. These sites often include dash kit and wiring harness suggestions. They are helpful for finding all needed parts in one place.
2.3 Community and forum resources
Car forums and enthusiast sites can show real installs. Search for your vehicle and head unit. You can see photos and notes. These real-world reports help validate checker results.
2.4 Mobile apps and universal checkers
Some apps scan VIN and list compatible stereos. These can be handy in the shop or at a retailer. Use apps from known brands or large retailers for accuracy.
Step 3: Use the checker — step-by-step
Now you will use a car stereo compatibility checker. Follow these steps for accurate results.

Visual guide about Find the Best Car Stereo Compatibility Checker Today
Image source: blog.electronicexpress.com
3.1 Enter vehicle info
Select make, model, and year. Enter trim if the checker asks. Use VIN if available. VIN gives the most precise match.
3.2 Select the stereo model
Type the stereo model or browse by feature. The checker will compare fit, wiring, and features. If unsure, enter multiple models to compare.
3.3 Review fit results
The checker will tell you if the stereo fits the dash. It may list DIN size, bezel shape, and depth. It may recommend a dash kit. Note any warnings about trim or modifications.
3.4 Review wiring compatibility
Check the wiring harness match. The tool should list harness adapters, steering wheel control adapters, and antenna adapters. It may warn if a factory amp or choke is present.
3.5 Check feature support
Verify features. Does the head unit support backup camera, factory microphone, or factory amplifier? Does it work with your steering wheel controls? The checker should list supported features and any required modules.
3.6 Note accessories and parts
Write down required dash kits, adapters, and harnesses. Many checkers link directly to needed parts. Add these to your parts list for purchase.
Step 4: Verify physical fit and depth
A checker can be wrong on depth or trim. Always confirm the physical fit before final purchase.
4.1 Measure the dash opening
Use a tape measure. Check width, height, and mounting depth. Some stereos are deeper than factory units. Measure room behind the dash for wiring and HVAC ducts.
4.2 Check mounting brackets and cage
Confirm if the stereo uses a sleeve cage or bracket. A car stereo compatibility checker often lists the mount type. Make sure the dash kit matches that mount type.
4.3 Look for dashboard obstacles
Watch for vents, airbags, or info screens behind the dash. These can interfere with installation. A simple visual check can prevent surprises.
Step 5: Verify wiring and electrical compatibility
Wiring is the most common issue. A car stereo compatibility checker helps. But you must still double-check wiring and power needs.
5.1 Confirm harness and pinout
Compare the head unit pinout with your vehicle harness. The checker should suggest a wiring harness adapter. Match colors and functions. If pinouts differ, plan for custom wiring.
5.2 Check for factory amplifiers
If your car has a factory amp, the head unit may not drive speakers directly. The checker should note this. You may need an amp integration module or a new amplifier.
5.3 Consider CAN bus and data systems
Modern cars use CAN bus networks. This can affect steering wheel controls and HVAC displays. The checker should suggest a CAN interface. If not, search for a compatible module.
5.4 Evaluate power requirements
Some stereos need more current than the factory system provides. Confirm power ratings. If adding an amp, confirm the battery and alternator can handle the load.
Step 6: Match features and integration
Make sure the head unit gives the features you need. A car stereo compatibility checker shows feature matches. But you must know what to test.
6.1 Backup camera and parking sensors
Check if the head unit supports your factory camera. If using an aftermarket camera, ensure inputs match. Some checkers list camera adapter parts.
6.2 Steering wheel controls
Verify steering wheel control compatibility. The checker will often recommend a control interface. Confirm the interface supports your vehicle year and model.
6.3 Factory navigation and displays
If your car uses a factory nav screen, adding a new head unit may remove that display. Use the checker to see if a retainment module exists. Some cars need a special module to keep factory features.
6.4 Phone and audio features
Check Bluetooth, Apple CarPlay, Android Auto, and audio codecs. If the checker shows these features as supported, verify with the stereo specs.
Step 7: Buy parts and prepare for installation
After the checker confirms fit and wiring, buy the head unit and parts. Include all adapters, dash kits, and retainers suggested by the checker.
7.1 Double-check part numbers
Match part numbers from the checker to seller listings. Retail images can be misleading. Confirm that the dash kit and harness are for your exact model year and trim.
7.2 Keep extras for testing
Buy extra wire connectors and shrink tubing. You may need additional spacer brackets or screws. A few extra parts reduce delays during install.
Step 8: Install and test
Follow these steps for a smooth install. If you are unsure, consider professional installation. The car stereo compatibility checker helps, but a trained installer can handle tricky cars.
8.1 Do a bench test
Before final mounting, connect power and speaker leads on a bench. Test the head unit for power, display, and sound. This saves time if the unit is faulty.
8.2 Use the harness adapter
Connect the wiring harness adapter between the car harness and the head unit. This keeps factory wiring intact. It also makes it easy to return to stock if needed.
8.3 Connect antennas and cameras
Use the antenna adapter if needed. Connect camera inputs and test the camera feed. Ensure the head unit recognizes the camera on reverse signal.
8.4 Test all functions
Turn on the car and test radio, Bluetooth, CarPlay/Android Auto, steering controls, and any connected camera. Test speaker output across all channels.
Troubleshooting
Even with a car stereo compatibility checker, issues can occur. Here are common problems and fixes.
Trouble 1: Head unit powers on but no sound
- Check speaker connections and fuse. Make sure speaker wires are connected to the correct pins.
- If factory amp is present, use an amp integration adapter or run new speaker wires to the amp inputs.
- Verify the head unit is set to the correct speaker outputs in settings.
Trouble 2: Steering wheel controls don’t work
- Confirm the control interface is installed and wired correctly.
- Check if the interface needs programming for your vehicle model.
- Some interfaces require a specific harness wire to be connected for ignition sensing.
Trouble 3: Backup camera not showing
- Confirm reverse trigger wire is connected to the head unit and to the vehicle reverse light circuit.
- Check video cable continuity. A broken RCA can stop the feed.
- Test the camera directly on a display to rule out camera issues.
Trouble 4: Head unit won’t fit the dash
- Check dash kit orientation. Some kits require trimming or spacers.
- Measure again for hidden obstructions like brackets or braces behind the dash.
- Use a shallow mount head unit if depth is the issue.
Trouble 5: Radio reception poor after install
- Use the proper antenna adapter and ensure solid connection. A loose adapter can reduce signal.
- Check ground connections and shielding of audio cables to avoid interference.
- Inspect the antenna mast and amplifier if your vehicle has an external amplifier.
Practical tips and real examples
Here are tips from real installs. Use them to avoid common mistakes.
Tip 1: VIN gives the best checker results
When possible, enter the VIN in the car stereo compatibility checker. It reveals factory options and exact trim details. This reduces guesswork.
Tip 2: Keep the factory harness intact
Using a harness adapter keeps factory connections. It makes future swaps easy. It also reduces cutting and soldering in the vehicle.
Tip 3: Buy mount kits and harnesses together
Retailers often bundle the head unit with the needed kit and harness. This saves a return trip and cuts errors.
Example: 2015 Toyota Camry and a double-DIN unit
A 2015 Camry may have climate controls above the radio. A car stereo compatibility checker may show a double-DIN head unit will fit but require a special dash kit. The checker also may recommend a steering wheel control interface. Follow the checker’s accessories list and confirm depth before buying.
Example: 2018 Ford F-150 with factory amp
A Ford with a factory amplifier may not allow direct speaker connection. The checklist from a car stereo compatibility checker may show the need for an amp integration module. That module keeps the factory amp and restores sound levels.
When to get professional help
Some installs are simple. Others are not. Get a pro if:
- The car has a factory nav or complex displays.
- There is a factory amplifier or Bose/mark-levinson etc. audio system.
- The dash requires cutting or structural changes.
- You lack tools for wiring and testing.
A pro can save time and protect vehicle electronics.
Conclusion
A car stereo compatibility checker is a powerful tool. Use it to match head units to your car. Gather vehicle details first. Use trusted checkers and cross-check results. Verify physical fit and wiring. Buy the recommended dash kits and harnesses. Test the unit before final mounting. If problems occur, use the troubleshooting steps above or hire a pro. With the right steps, you can upgrade your audio with confidence. Use a car stereo compatibility checker on every project. It will save you time and money.
🎥 Related Video: DO's & DON'Ts – Picking a Car Audio Radio Head Unit
📺 CarAudioFabrication
When choosing a car audio head unit (aka stereo or radio) in 2020 what are some “Do’s” and some “Don’ts” to make sure we …