
Find Your Car Stereo Fuse Location Fast and Easily shows you how to locate the car stereo fuse location, test the fuse, and replace it safely. Simple steps, clear photos, and practical tips make this guide great for beginners and car owners.
Contents
- 1 Key Takeaways
- 2 Introduction
- 3 Step 1: Gather Tools and Safety Tips
- 4 Step 2: Where to Look for the Fuse Box
- 5 Step 3: Use the Owner’s Manual and Fuse Diagram
- 6 Step 4: Find the Car Stereo Fuse Location — Step-by-Step
- 7 Step 5: How to Test the Fuse
- 8 Step 6: Replace a Blown Fuse
- 9 Step 7: Check Inline Fuses and Amplifier Fuses
- 10 Practical Tips and Examples
- 11 Troubleshooting: When the Fuse Isn’t the Problem
- 12 When to Call a Professional
- 13 Maintenance and Prevention Tips
- 14 Conclusion
- 15 Author
Key Takeaways
- Point 1: The car stereo fuse location varies by make and model; check the owner’s manual or fuse box diagram first.
- Point 2: Common fuse boxes are under the dash, in the glove box, in the trunk, or in the engine bay.
- Point 3: Visual checks often spot a blown fuse, but a multimeter gives a sure result.
- Point 4: Always replace a blown fuse with the same amperage to avoid damage.
- Point 5: Inline and amplifier fuses also protect car stereos; don’t forget to check those.
- Point 6: If fuses keep blowing, seek a pro—repeated failures mean a wiring or short issue.
Introduction
This guide helps you find the car stereo fuse location quickly. You will learn where fuses commonly hide, how to check them, and how to replace a blown fuse. The steps are simple. The language is plain. This guide is for anyone who wants to fix a dead radio or a flickering stereo. We will show safety tips and testing methods. By the end, you will feel confident checking the car stereo fuse location in your own car.
Step 1: Gather Tools and Safety Tips
Before you start, gather a few tools. Keep safety first. A little prep saves time and prevents damage.
Visual guide about Find Your Car Stereo Fuse Location Fast and Easily
Image source: i5.walmartimages.com
Tools You’ll Need
- Owner’s manual: Best place to find the exact car stereo fuse location.
- Fuse puller or needle-nose pliers: For pulling fuses safely.
- Multimeter or test light: To test for continuity or power.
- Replacement fuses: Same amperage as the blown fuse.
- Flashlight: To see in dark fuse boxes.
Safety Tips
- Turn off the ignition and remove the key before touching fuses.
- Disconnect the negative battery terminal for added safety on some vehicles.
- Work on a flat, stable surface. Keep loose clothing and jewelry away.
- Use the correct fuse amperage. Never use higher-rated fuses.
Step 2: Where to Look for the Fuse Box
The first step to find the car stereo fuse location is to find the fuse box. Most cars have more than one box. Each box may have many fuses for different systems. Below are common locations to check.

Visual guide about Find Your Car Stereo Fuse Location Fast and Easily
Image source: cdn11.bigcommerce.com
Common Fuse Box Locations
- Under the dash (driver side): A common spot behind a plastic panel or kick panel.
- Glove box: Some cars house a fuse box behind the glove compartment door.
- Engine compartment: A larger fuse/relay box near the battery or firewall.
- Trunk or cargo area: Often near the spare tire or side panels in some models.
- Under seats or under center console: Less common, but used in some vehicles.
When you find a fuse box, open the cover. Many covers have a fuse diagram. This diagram helps you pinpoint the car stereo fuse location. If the cover lacks a diagram, check the owner’s manual next.
Step 3: Use the Owner’s Manual and Fuse Diagram
The owner’s manual and fuse diagram are the fastest way to find the exact car stereo fuse location. The manual lists fuse numbers, amperage, and functions.
Visual guide about Find Your Car Stereo Fuse Location Fast and Easily
Image source: howstereo.com
How to Read the Fuse Diagram
- Find the fuse box label or diagram. It shows fuse numbers and rows.
- Locate the item labeled “Radio,” “Audio,” “Antenna,” or “Audio Amp.”
- Note the fuse number and the amperage (e.g., 10A, 15A).
- Check all fuse boxes. The radio fuse might be in more than one box (one for memory, one for power).
Many cars use two fuses for the stereo: one for constant power (memory) and one for switched power (ignition). The amplifier may have its own fuse. Use the manual to identify them all so you check the correct fuses when you test.
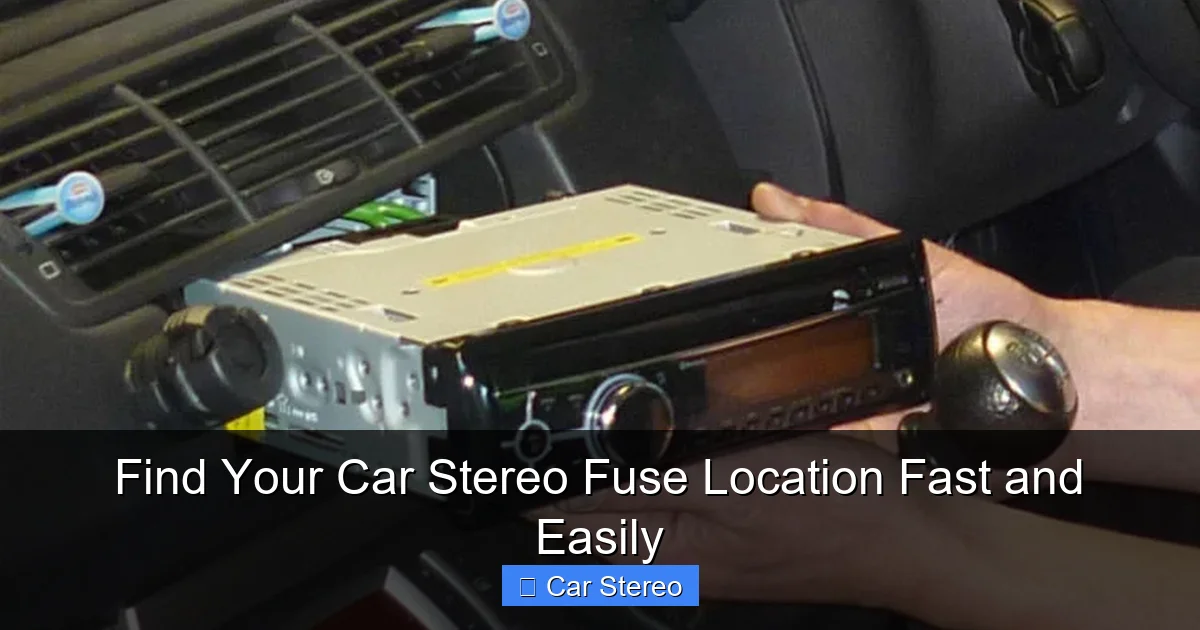
Step 4: Find the Car Stereo Fuse Location — Step-by-Step
Now you will locate the exact fuse. Follow these steps in order. Take your time. Keep the manual close by.
Step 4.1: Open the Fuse Box
- Park the car, turn the key off, and set the parking brake.
- Pop the dash panel or glove box to open the fuse box cover.
- Use a flashlight if needed. Keep the cover safe for reassembly.
Step 4.2: Identify the Radio Fuse
- Look for labels like “RADIO,” “AUDIO,” or “ACC.”
- Check for fuses labeled “IGN” or “BATT” that may feed the stereo.
- Write down the fuse positions and amperage for both memory and switched fuses.
Step 4.3: Remove the Fuse
- Use a fuse puller or pliers. Grip the fuse and pull straight out.
- Handle the fuse gently to avoid breaking it.
- Place the fuse on a clean surface to inspect it.
At this point, you have the fuse in hand and the car stereo fuse location identified. Next, test the fuse to see if it is blown.
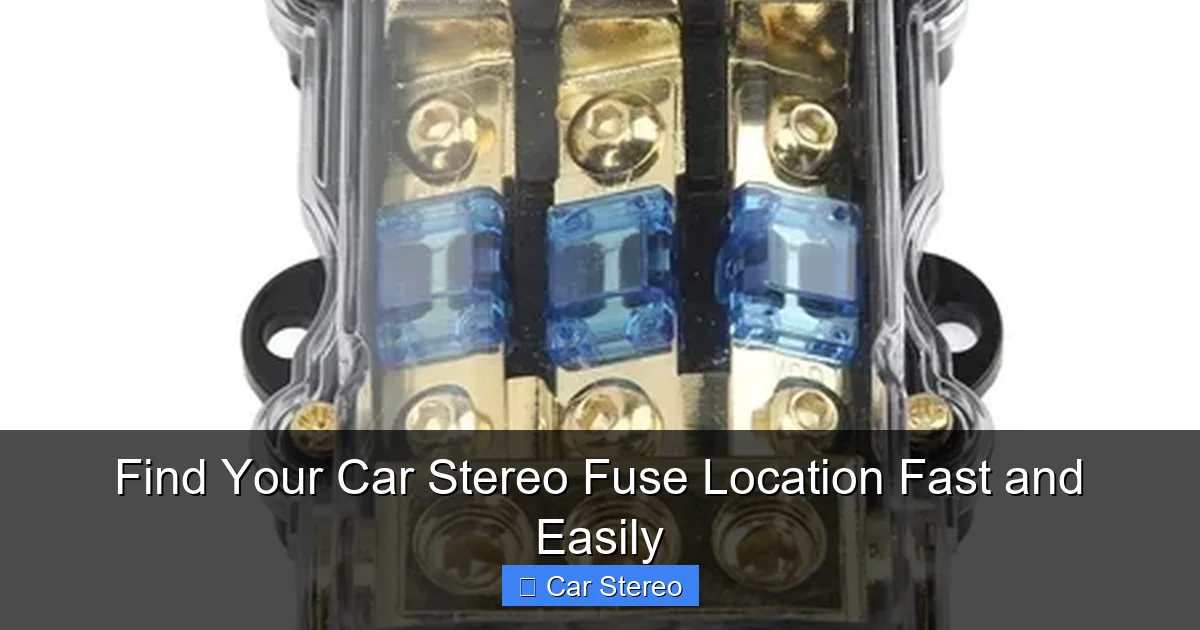
Step 5: How to Test the Fuse
Testing is simple. A visual check is quick, but an electrical test is best. Use a multimeter or a test light for a sure result.
Visual Inspection
- Hold the fuse up to light. Look at the metal strip inside.
- If the strip is broken or black, the fuse is blown.
- Some fuses show a small break that is hard to see. Test if unsure.
Testing with a Multimeter
- Set the multimeter to continuity or resistance (ohms).
- Touch the probes to the fuse ends. A reading of near zero ohms or a beep means the fuse is good.
- No continuity means the fuse is blown and needs replacement.
Testing with a Test Light
- Turn the ignition to accessory or ON (do not start engine).
- Touch the test light to both sides of the fuse slot or the fuse ends.
- If the light glows on both sides, the fuse is good. If it glows on one side only, a power feed or wiring issue exists.
Testing helps confirm the car stereo fuse location and whether the fuse itself is the problem. If the fuse is fine, the issue may be wiring, the head unit, or an accessory fuse.
Step 6: Replace a Blown Fuse
If the fuse is blown, replacing it is fast. Use the correct amperage. Never use foil, a higher amp, or a mismatched fuse. This can cause damage or fire.
Choosing the Right Replacement
- Match the amperage exactly (10A, 15A, 20A, etc.).
- Match the fuse type (mini, standard, maxi, blade, glass). Use the manual if unsure.
- Keep a small kit of spare fuses in the car for emergencies.
How to Replace
- Turn the ignition off.
- Insert the new fuse into the same slot you removed the old one from.
- Push it in firmly but do not force it.
- Close the fuse box and test the stereo.
If the new fuse blows immediately when you turn the audio on, do not keep replacing it. A short or a defect in the stereo could be causing the problem. This is a cue to stop and troubleshoot further.
Step 7: Check Inline Fuses and Amplifier Fuses
Some stereos use inline or amplifier fuses that sit on the power wire near the head unit or amp. These are not always in the main fuse box. Check these locations too when searching for the car stereo fuse location.
Where Inline Fuses Live
- Near the head unit behind the dash.
- On the power cable under the hood near the battery.
- At the amplifier location in the trunk or cargo area.
Always inspect inline fuses and amp fuses when the main fuse checks clear. A blown inline fuse will kill the stereo even if the main fuse is good.
Practical Tips and Examples
Here are practical tips to speed things up. These examples match many common cars, but always check your manual for specifics.
- Honda, Toyota, Nissan: Radio fuses often sit in a dash fuse box or under the hood. Many of these models use one fuse for memory and one for ignition.
- Ford, Chevy, Dodge: Fuse boxes may be under the dash and in the engine bay. Look for “RADIO” or “AUDIO AMP” labels.
- Aftermarket stereos: Check the stereo harness for inline fuses. The head unit may also have a small glass fuse inside the wiring harness.
Example: If your radio dies when you remove the key, the switched fuse is the likely culprit. If the clock or presets die, the memory (constant) fuse is likely blown. Use these clues to locate the right fuse quickly.
Troubleshooting: When the Fuse Isn’t the Problem
If fuses are fine but the stereo still fails, try these checks before replacing the head unit or calling a shop.
- No power at the fuse slot: Check battery voltage and wiring to the fuse box. A blown trunk or engine-bay main fuse could cut power.
- Power on one side only: The ignition or accessory feed may be broken. Check wiring and the ignition switch.
- Fuses blow repeatedly: There is likely a short circuit or a defective stereo. Stop and have a pro trace the circuit.
- Fuses OK but no sound: Check speaker wires, amplifier remote turn-on wire, and ground connections.
- Aftermarket harness issues: Make sure the stereo harness is wired correctly. A swapped power and accessory wire can cause issues.
Use a wiring diagram and a multimeter to trace power and ground. A slow, methodical approach finds problems faster than guessing. Always document what you test and the results. It helps if you ask a mechanic for help later.
When to Call a Professional
Some problems need a pro. Call a shop if:
- Fuses blow right after replacement.
- There is smoke, burning smell, or melted wires.
- Wiring damage from rodents or accidents is visible.
- You lack tools or confidence to trace electrical faults.
A qualified technician can use a wiring diagram, load test, and specialized tools to find shorts and faults. It is safer and often cheaper than replacing parts blindly.
Maintenance and Prevention Tips
Keep your stereo and fuses in good shape with these simple steps.
- Carry a small fuse kit with common amperages for your vehicle.
- Inspect fuses when you do routine checks on the car.
- Keep the battery and grounds clean and tight to prevent power surges.
- Use quality fuses and parts from auto stores or OEM suppliers.
- Secure wiring to avoid chafing and shorts under the dash or in the trunk.
Conclusion
Finding the car stereo fuse location is a simple task with a clear plan. Start with the owner’s manual and fuse diagram. Check common locations like under the dash, glove box, engine bay, or trunk. Use a visual check, a test light, or a multimeter to test fuses. Replace blown fuses with the correct amperage and check inline or amp fuses too. If fuses keep blowing, stop and get professional help. With this guide, you can find and fix most radio power issues quickly and safely.
🎥 Related Video: music system fuse location #shorts #shortsfeed #hyundai #automobile #carparts #mechanic
📺 Azaz_Techmaster
music system fuse location #shorts #shortsfeed #hyundai #automobile #carparts #mechanic.