
Clear coat for car headlights protects the plastic lens from UV rays, scratches, and yellowing. These products come as spray-on coatings or brush-on liquids formulated to bond with polycarbonate headlight lenses and restore clarity. We look for coatings that dry clear, resist haze, and last through road wear and sun exposure.
Choosing the right clear coat means checking durability, ease of application, and resistance to UV and abrasion. Durability and UV protection are the most important factors because they determine how long the restored clarity will last. We tested several products to find clear coats that balance lasting protection with simple application, so you can pick one that fits your needs and skill level.
Contents
Best Clear Coats for Car Headlights
Below is our full list of the best clear coats for car headlights. We tested options that protect, restore clarity, and resist UV damage so you can pick the right product for your needs. Our choices focus on durability, ease of use, and value.
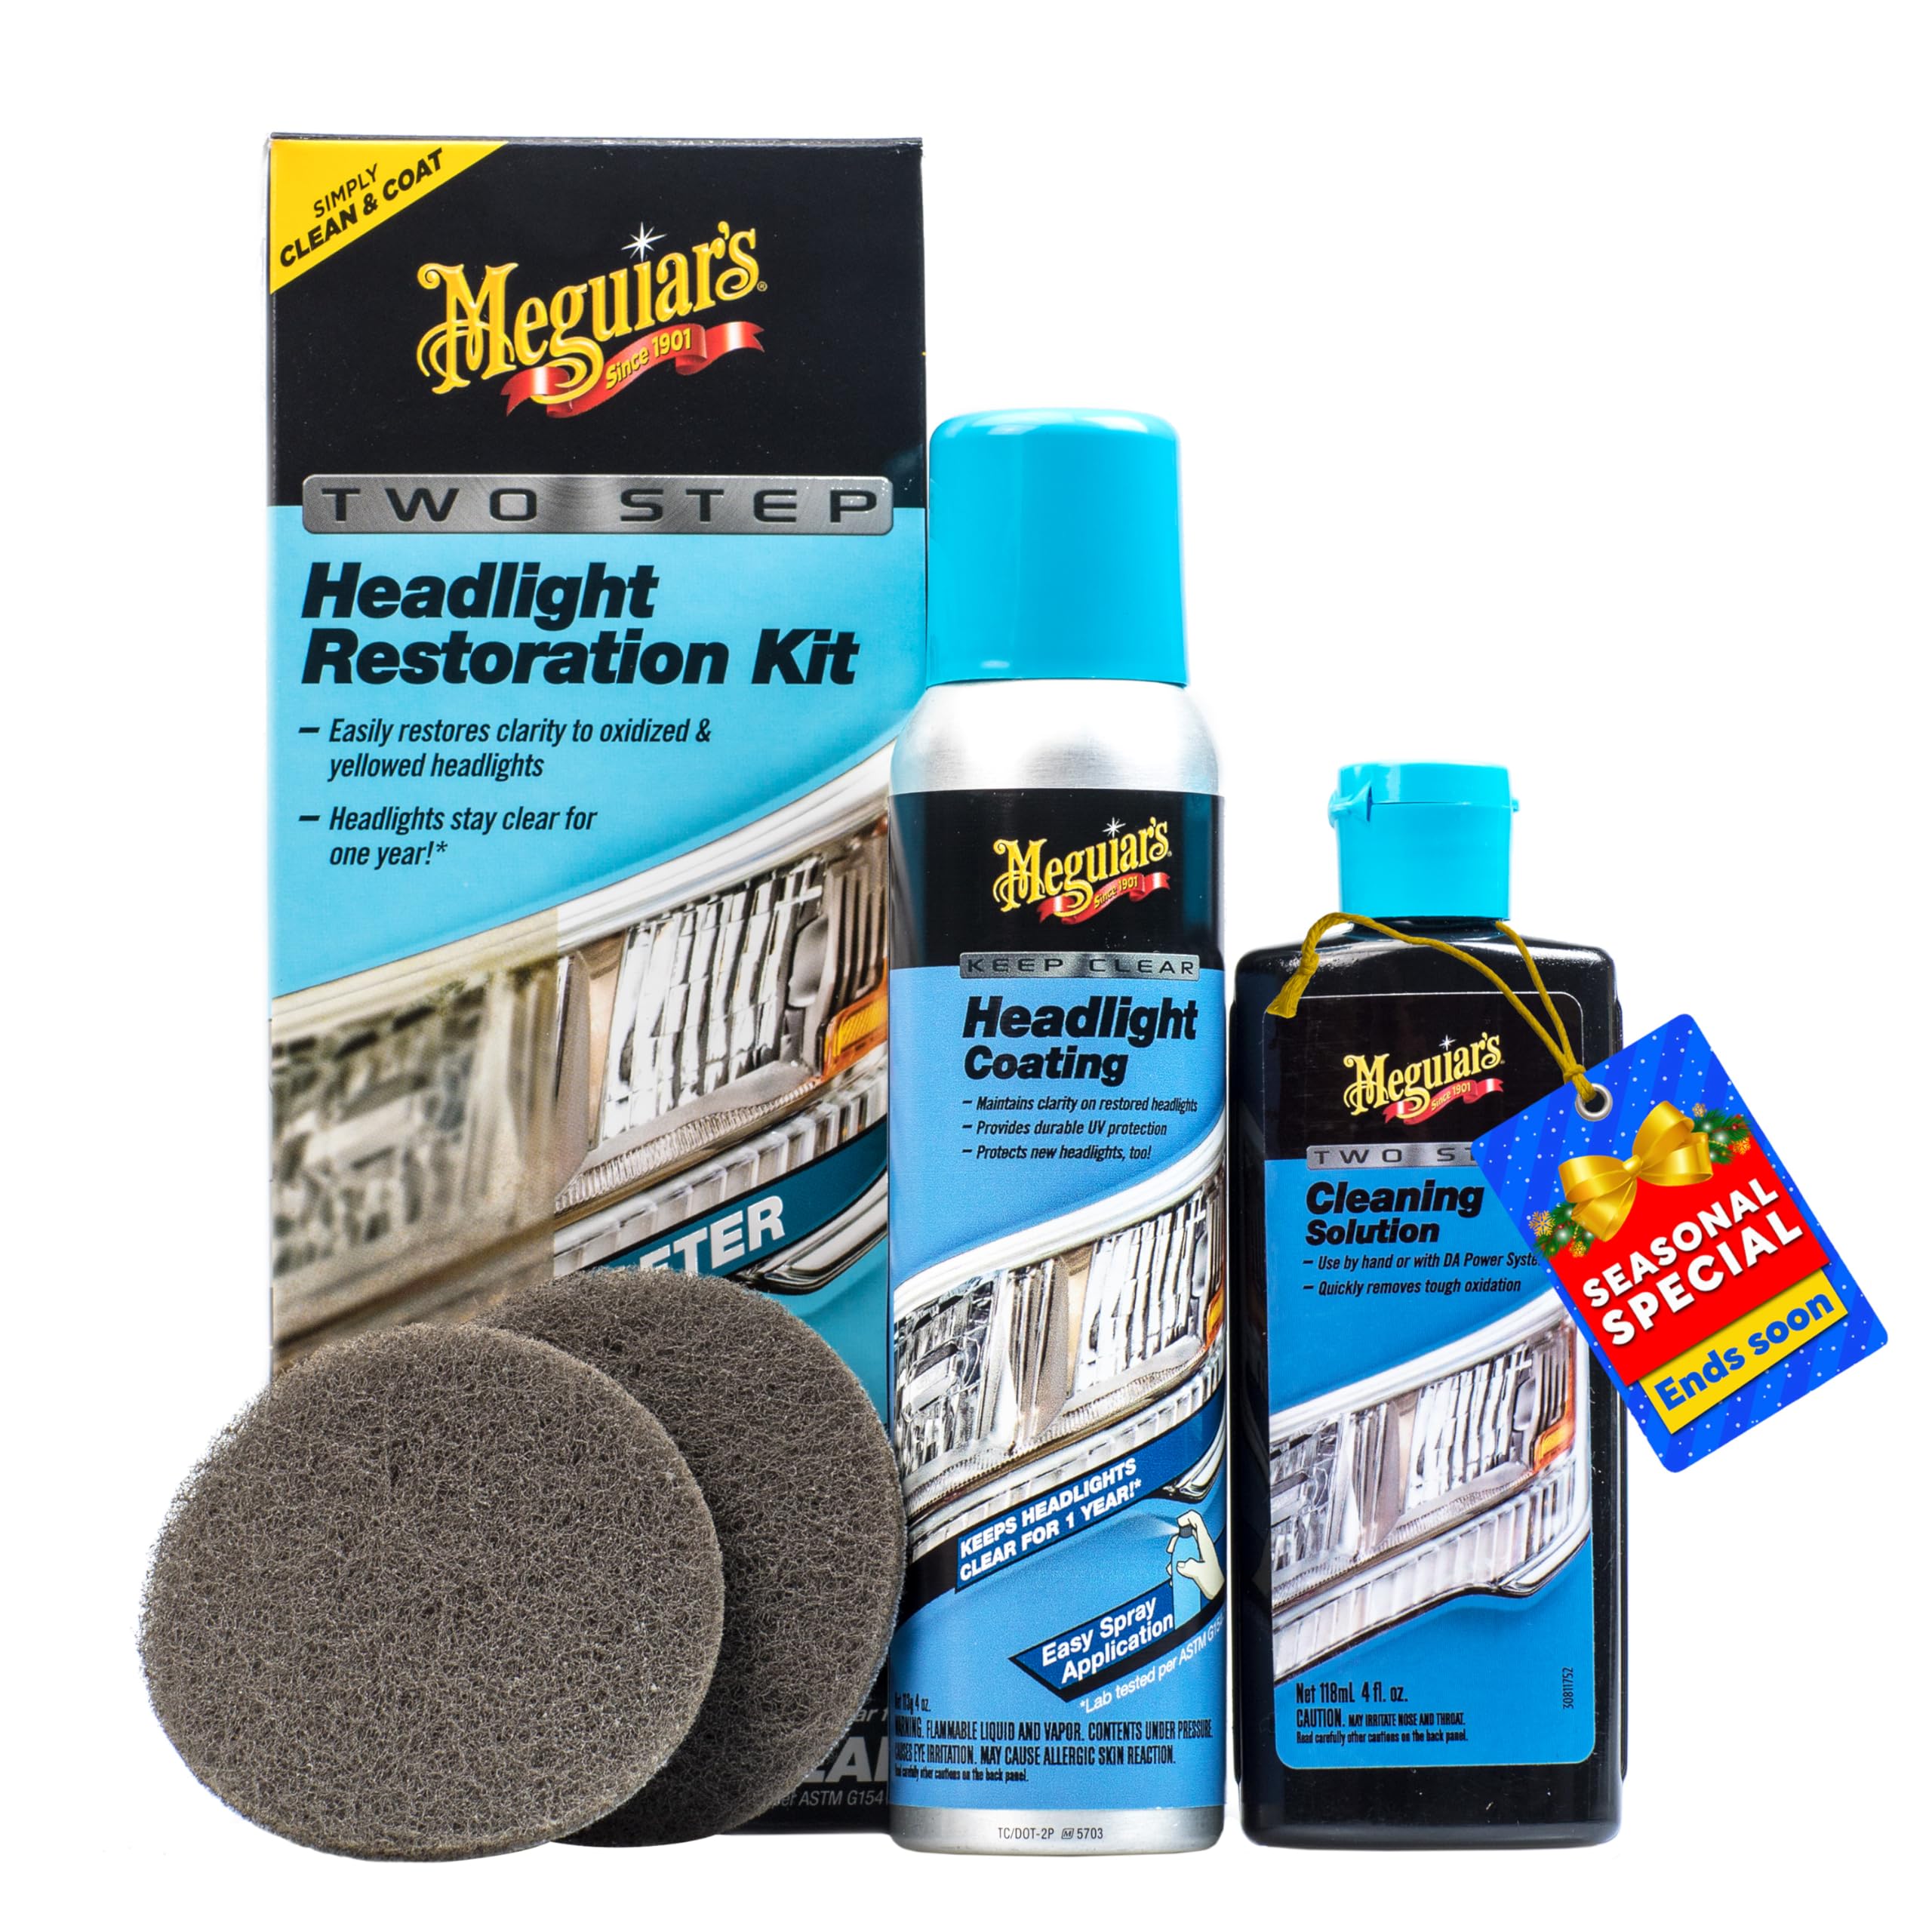
Meguiar’s Keep Clear
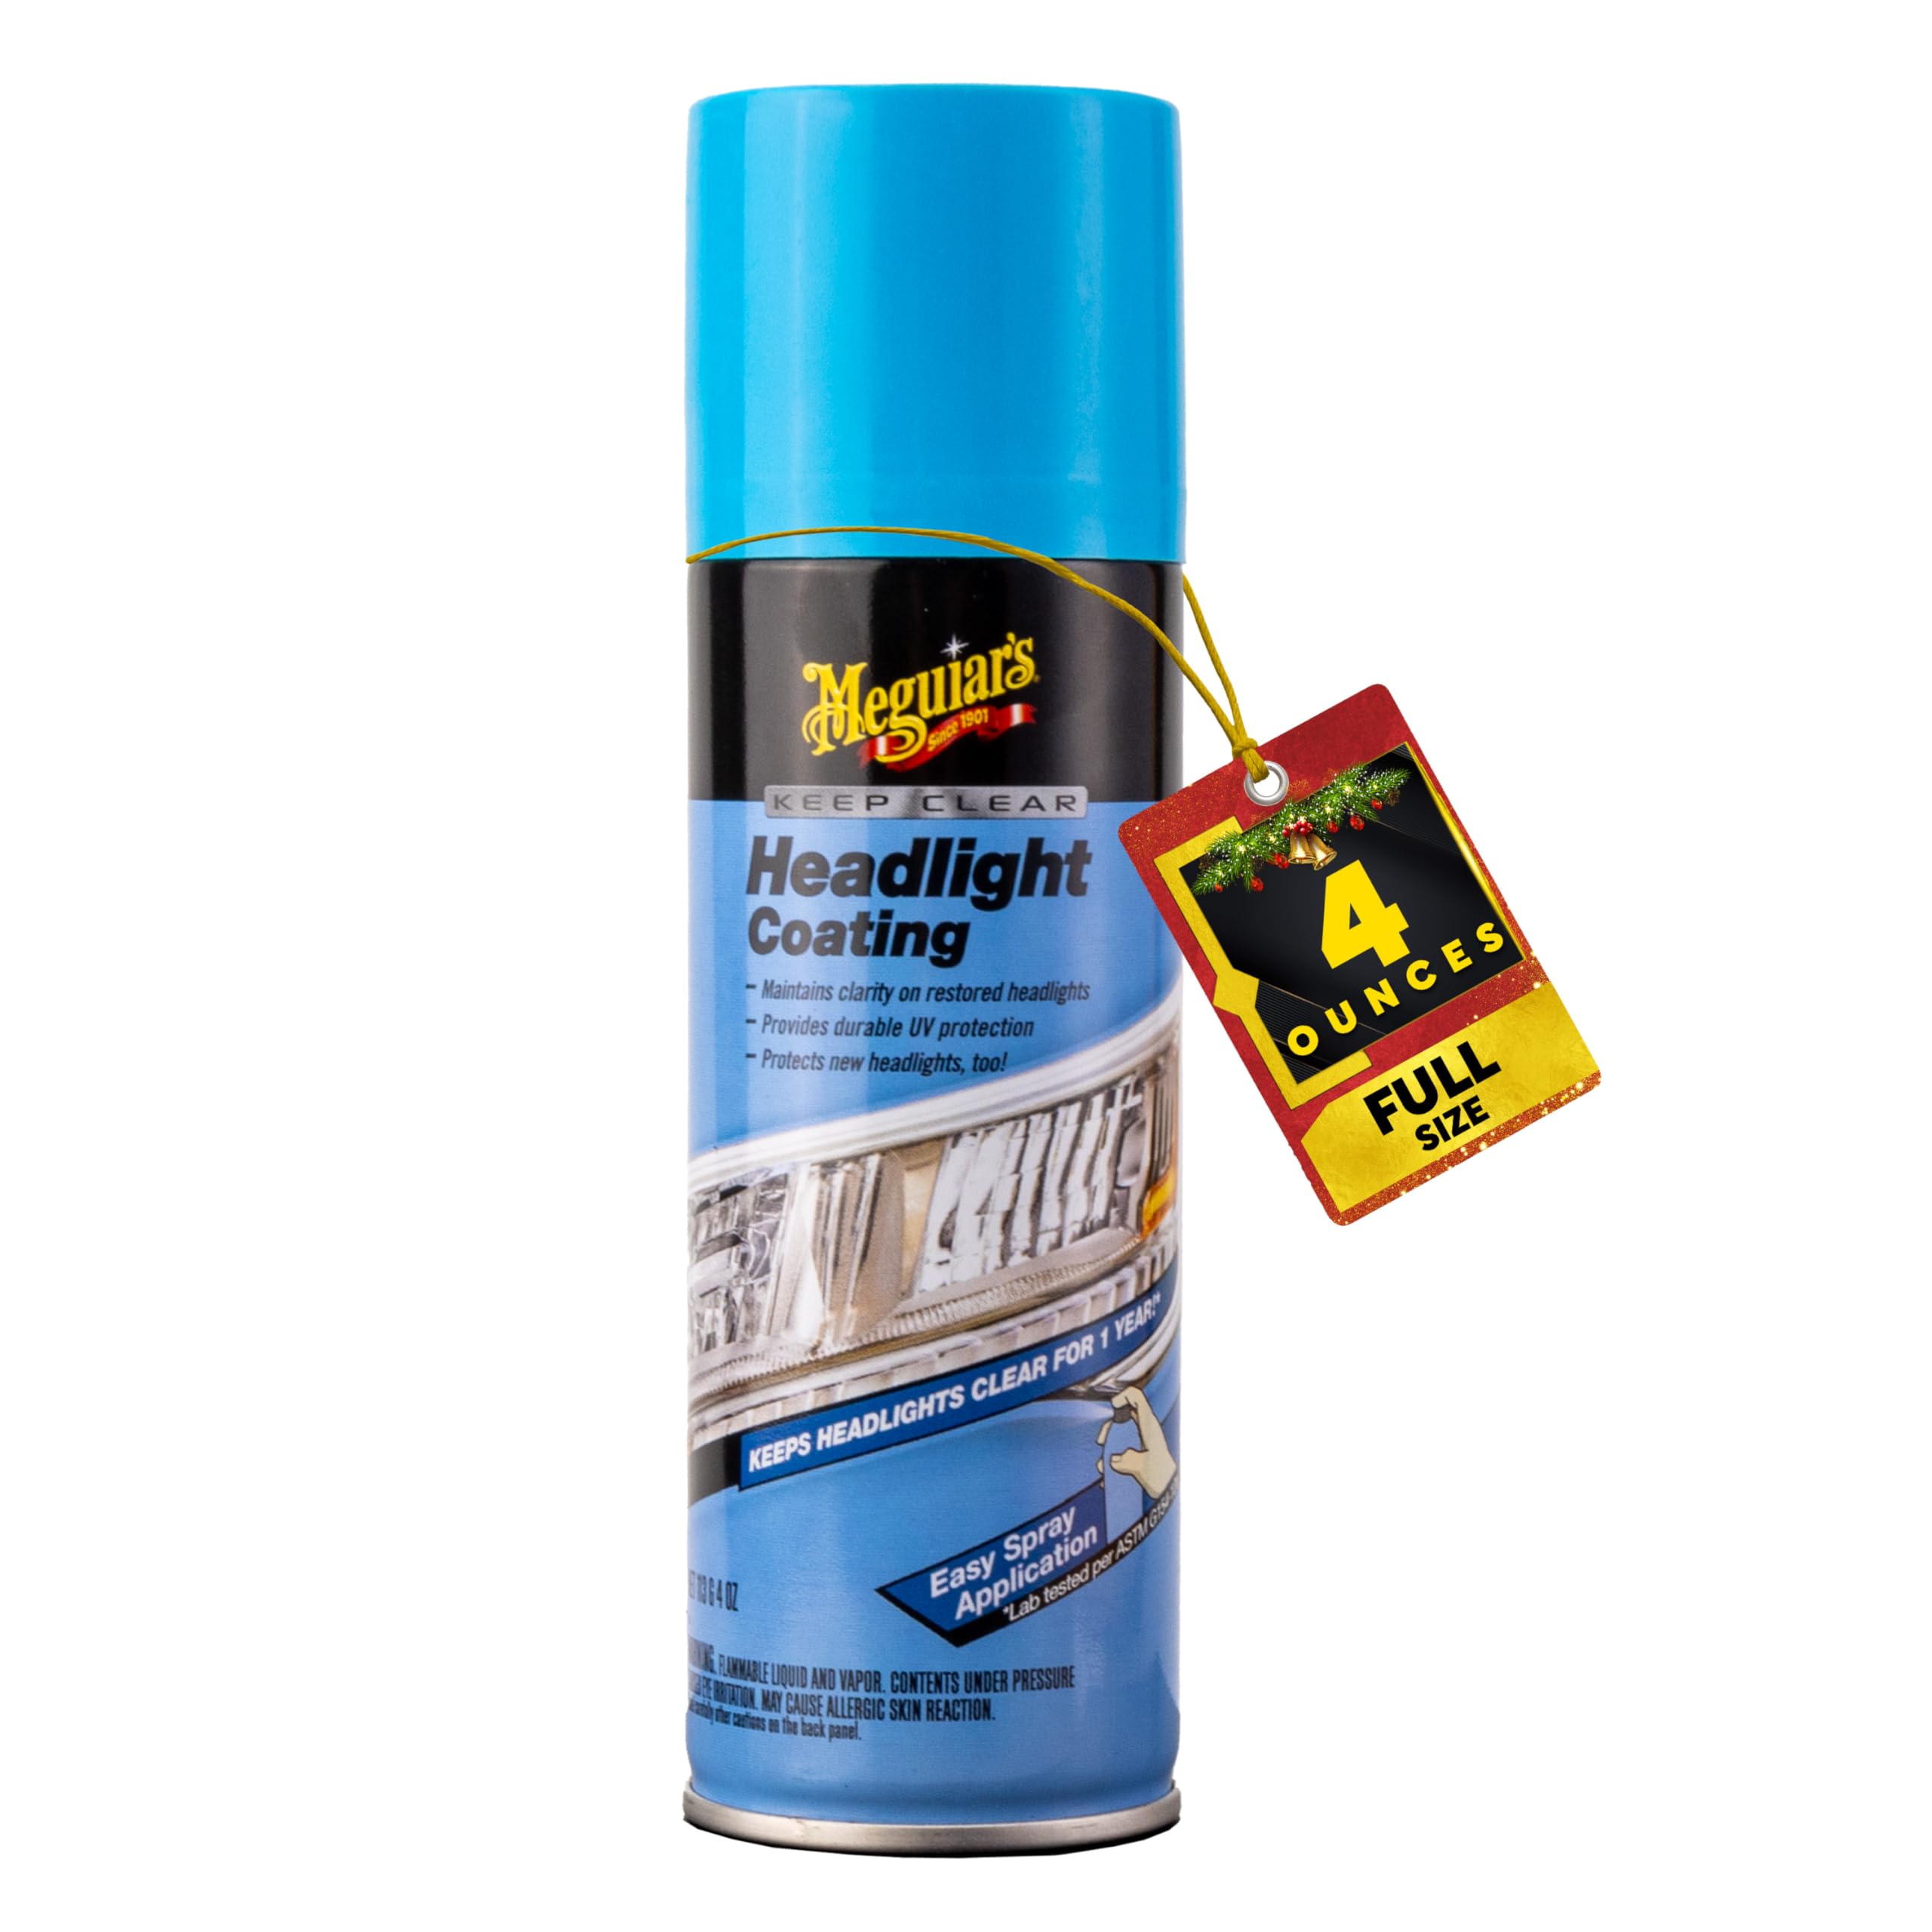
We recommend this if you want an easy spray-on clear coat that keeps restored headlights looking good for months and blocks UV damage.
Pros
- Applies fast with the aerosol and levels out well.
- Gives a clear, low-gloss finish that looks like new.
- Adds UV protection to slow yellowing.
Cons
- Won’t fix badly pitted or heavily scratched lenses by itself.
- Coverage can feel thin — follow directions and mask nearby paint.
- Some users see wear before the claimed year on tough roads.
We used this after sanding and polishing a couple of fogged headlights. The spray went on even and dried quickly. It left a smooth, consistent layer that reduced glare and made the lights look refreshed.
After a few weeks of driving, the protection held up through rain and car washes. Small rock chips and deep scratches still showed through, so it’s best as a topcoat after a proper restore, not a substitute for sanding and polish.
Application is straightforward but requires prep. Mask off trim and paint, clean thoroughly, and use light, even passes. We found one thin, uniform coat worked best rather than heavy layering.
Try it when you want a quick, professional-looking finish that adds UV protection and keeps headlights clear longer.
Cerakote Headlight Kit
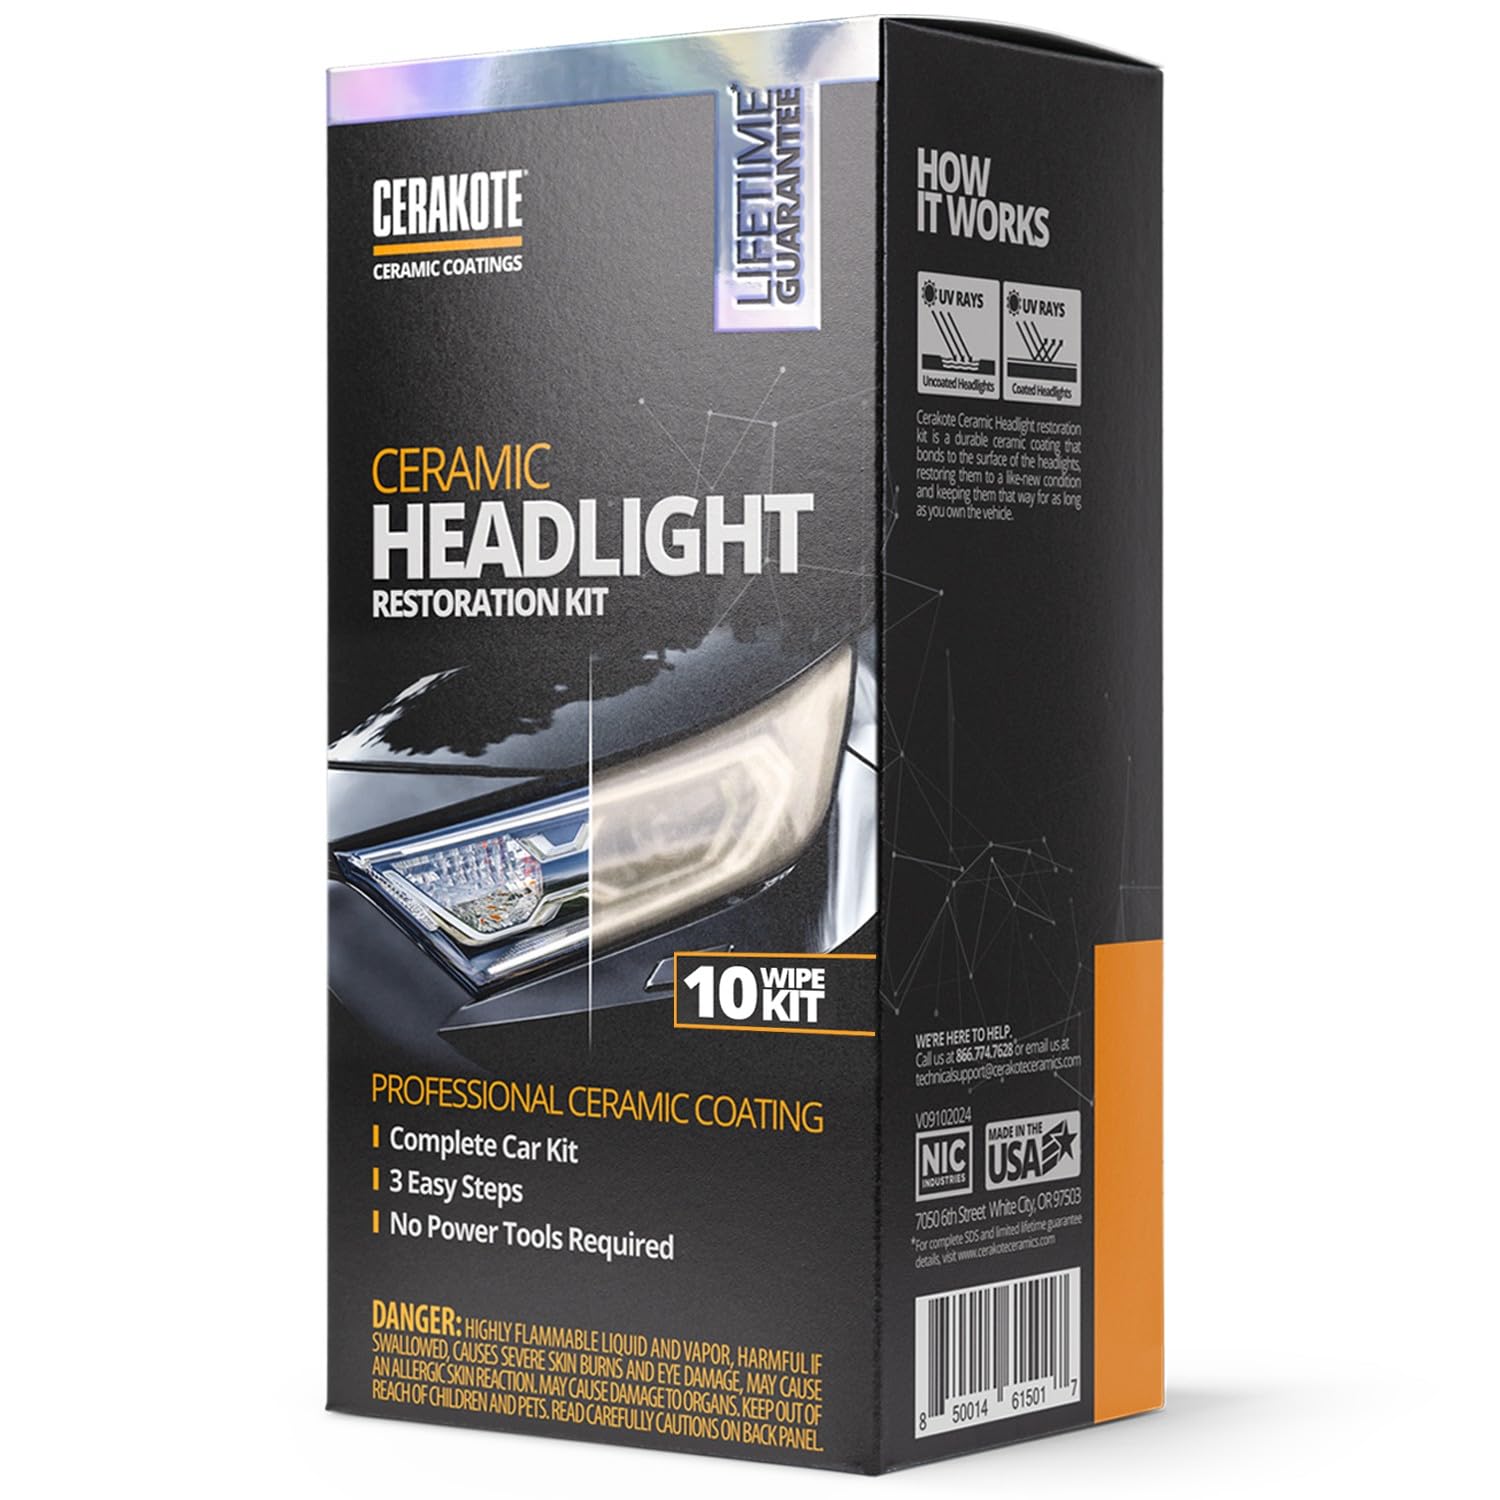
We recommend this kit if you want a simple, long-lasting ceramic clear coat that really restored our headlights and cut UV yellowing.
Pros
- Coating feels durable and bonded well to the lens.
- All-in-one kit — wipes and sanding included, no power tools needed.
- Fast process; we finished one car in about 30–45 minutes.
Cons
- Sandpaper in the kit may be too fine for heavy oxidation.
- You must tape and prep carefully to avoid overspray or mess.
- Results depend on how much sanding you do; deep yellowing may need extra work.
We used the wipes and the ceramic coating on a pair of cloudy headlights and got clear, glossy lenses afterward. The step-by-step wipes made it easy to see progress, and the final finish held up to hand-wetting and sunlight the first few weeks.
The sanding pad that comes with the kit worked for light haze, but we had to bring our own 1500 grit to tackle deep yellowing. That added a few minutes but gave a much smoother result before applying the coating.
Application felt forgiving. No drills or polishers reduced the risk of accidental paint damage. We still recommend taping around the lights and giving the coating full time to cure for best protection.
3M Ultra Headlight Restoration Kit

We recommend this kit if you want a durable, drill‑assisted restore that actually clears yellowed plastic without replacing the lens.
Pros
- Works quickly with a drill and gives clear results.
- Includes sanding discs, tape, and protectant — no extra buys.
- Trizact abrasives remove haze without scratching the plastic badly.
Cons
- Takes time and patience to sand evenly for best results.
- Requires a drill for fastest work; hand sanding is slower.
- Protection can fade after a year or two on very sun‑baked cars.
We used this kit on an older SUV with heavily yellowed lenses. The drill discs cut through the fog in stages and the polishing step brought back good clarity. Masking tape kept paint safe when we bucked up against tight edges.
The instructions are straightforward and the discs fit a standard drill pad. We liked how the grit progression moved from coarse to fine — it removed cloudiness without leaving deep scratches. The included wax protectant left a decent finish, though we plan to reapply annually on cars parked outside.
Final touch: the whole job felt like a real repair rather than a temporary fix. If you want cleaner headlights and don’t mind a little elbow grease and a drill, this kit saved us the cost of lens replacement.
3M Headlight Clear Wipes
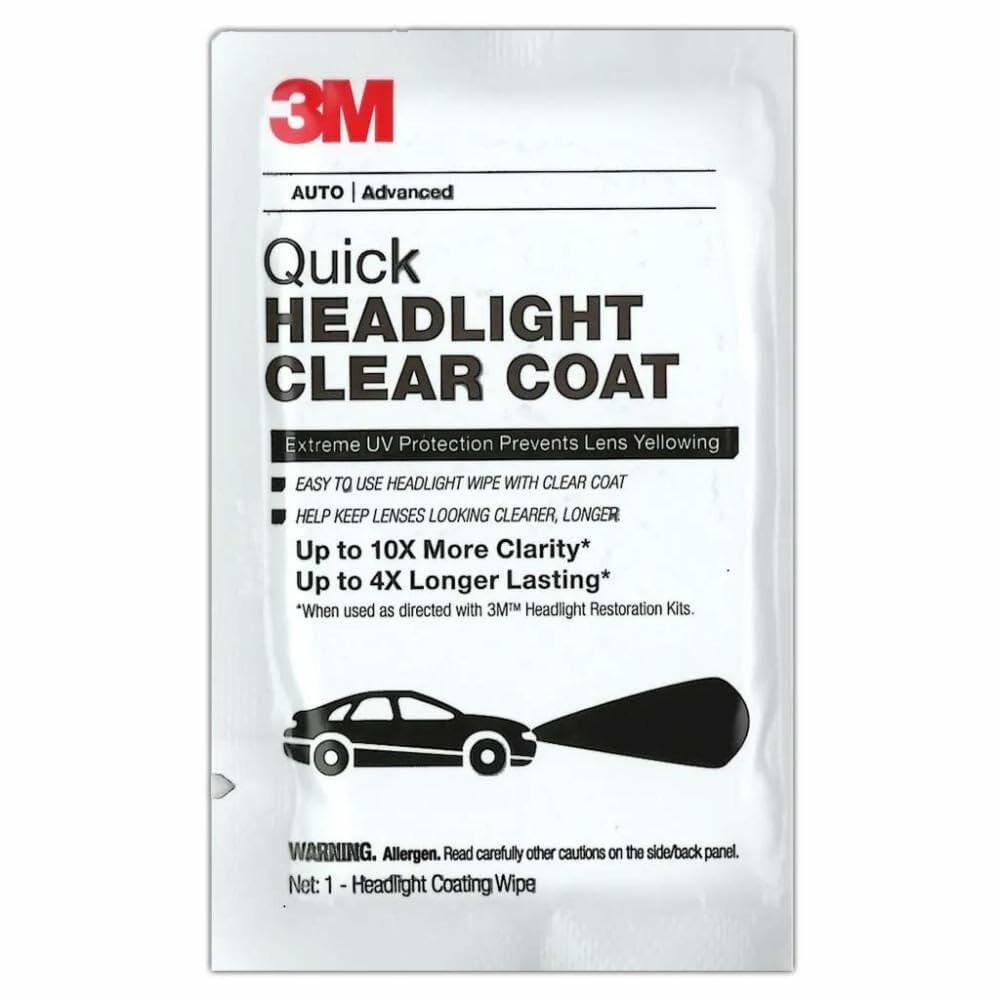
We recommend this if you want a quick, durable clear coat after restoring slightly yellowed headlights.
Pros
- Fast and simple wipe-on application
- Leaves a UV-resistant finish that lasts longer than no coat
- Includes abrasive disc for light prep
Cons
- Only two coated wipes per box, so supply is limited
- Not for heavily oxidized lenses without more prep
- Can show brush-like streaks if applied unevenly
We used the wipes after sanding and polishing a pair of headlights. The Trizact disc took care of light haze quickly, and the wipe spread evenly when we wiped in a single pass. It dried fast and the lenses looked clearer and less yellow.
After a week of driving, the finish held up well against road grime and sun exposure. Applying too many passes caused minor streaks, so we learned to avoid going over the same spot twice. The wipe format makes it easy to control coverage but means you should plan how many headlights you will treat.
Overall, this felt like a reliable step after restoration for extending clarity. It won’t replace a full kit for badly oxidized headlights, but for maintenance or newly restored lenses it saved us time and kept headlights clearer longer.
Sylvania UV Block Clear Coat
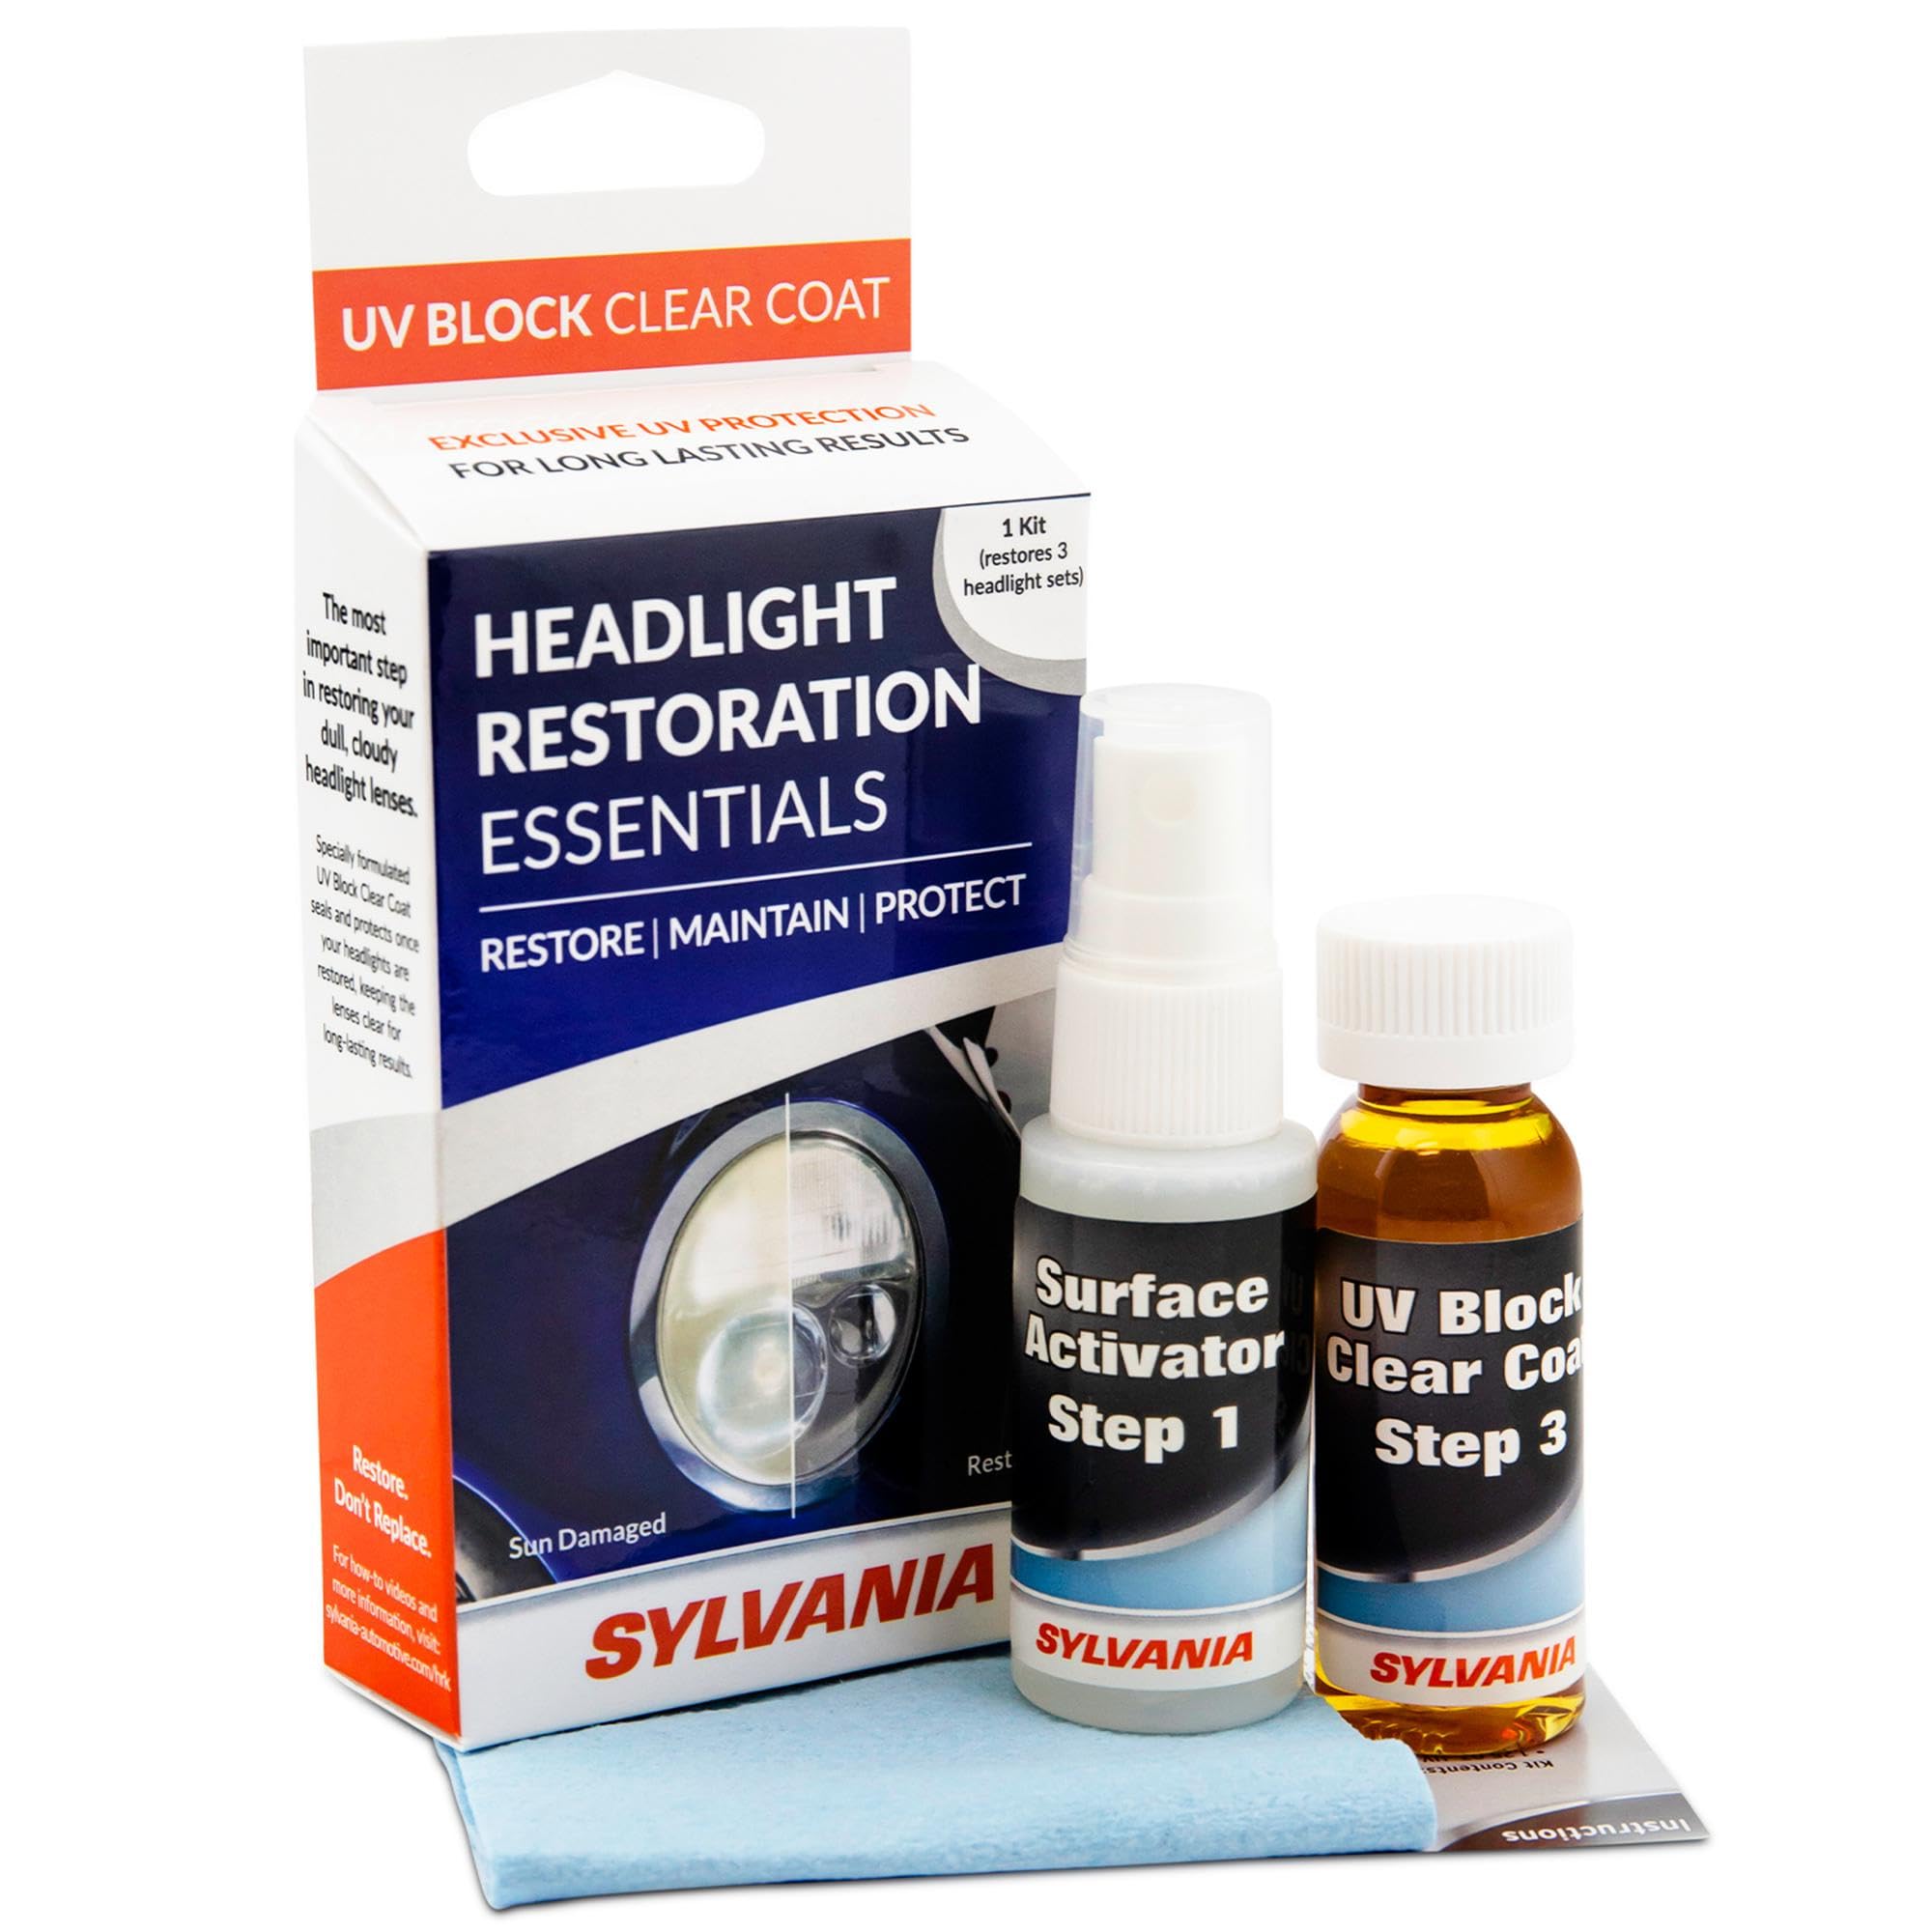
We recommend this if you want an easy, long-lasting UV barrier after restoring cloudy headlights.
Pros
- Adds strong UV protection that slows yellowing.
- Easy to apply with the included cloth.
- Feels durable; results last longer than no coating.
Cons
- Small kit size — may only do one car.
- Application needs care or you get streaks.
- Not a full restoration kit; you need sanding/polish first.
We used the Sylvania clear coat right after sanding and polishing my car’s headlights. The applicator makes it simple to spread, and the surface felt smoother almost immediately. After it dried, the lenses looked clearer and had less glare at night.
The small bottle is handy but runs out fast. We found it covered both headlights on one small car with careful application, but larger or heavily damaged lenses might need more. Taping around the trim helped avoid drips and made the finish neater.
Long-term, the UV protection has kept the lenses from re-yellowing as quickly as before. We recommend pairing this with proper sanding and the surface activator included for best results. If you want an easy, effective top coat to protect restored headlights, this is worth buying.
Buy Sylvania UV Block Clear Coat on Amazon
3M Headlight Restore & Protect Kit

We recommend this kit if you want a reliable, DIY way to clear cloudy plastic headlights without buying new lenses.
Pros
- Works well on light-to-moderate yellowing.
- Includes sanding discs and clear coat wipes for a finished look.
- Easy to follow; we finished a pair in about 30–40 minutes.
Cons
- May not fix very deep scratches or extreme fogging.
- Supplies can be just enough for one pair of large headlights.
- Clear coat longevity varies with prep and driving conditions.
We used the kit on two older cars and saw a clear, noticeable change after sanding and polishing. The Trizact discs cut through the haze without feeling too aggressive, and the foam pad made it simple to keep an even pressure.
Applying the Quick Headlight Clear Coat Wipes felt fast and left a satin finish. In one case the protection lasted well; in another, it faded sooner than we hoped, so surface prep matters a lot.
Overall, this kit saved us time and money versus replacing lenses, and it works best if your headlights are cloudy rather than deeply pitted. If you want a single, solid kit from a known brand, this one is a practical pick.
FOLLOWIN Clear Coat 1oz
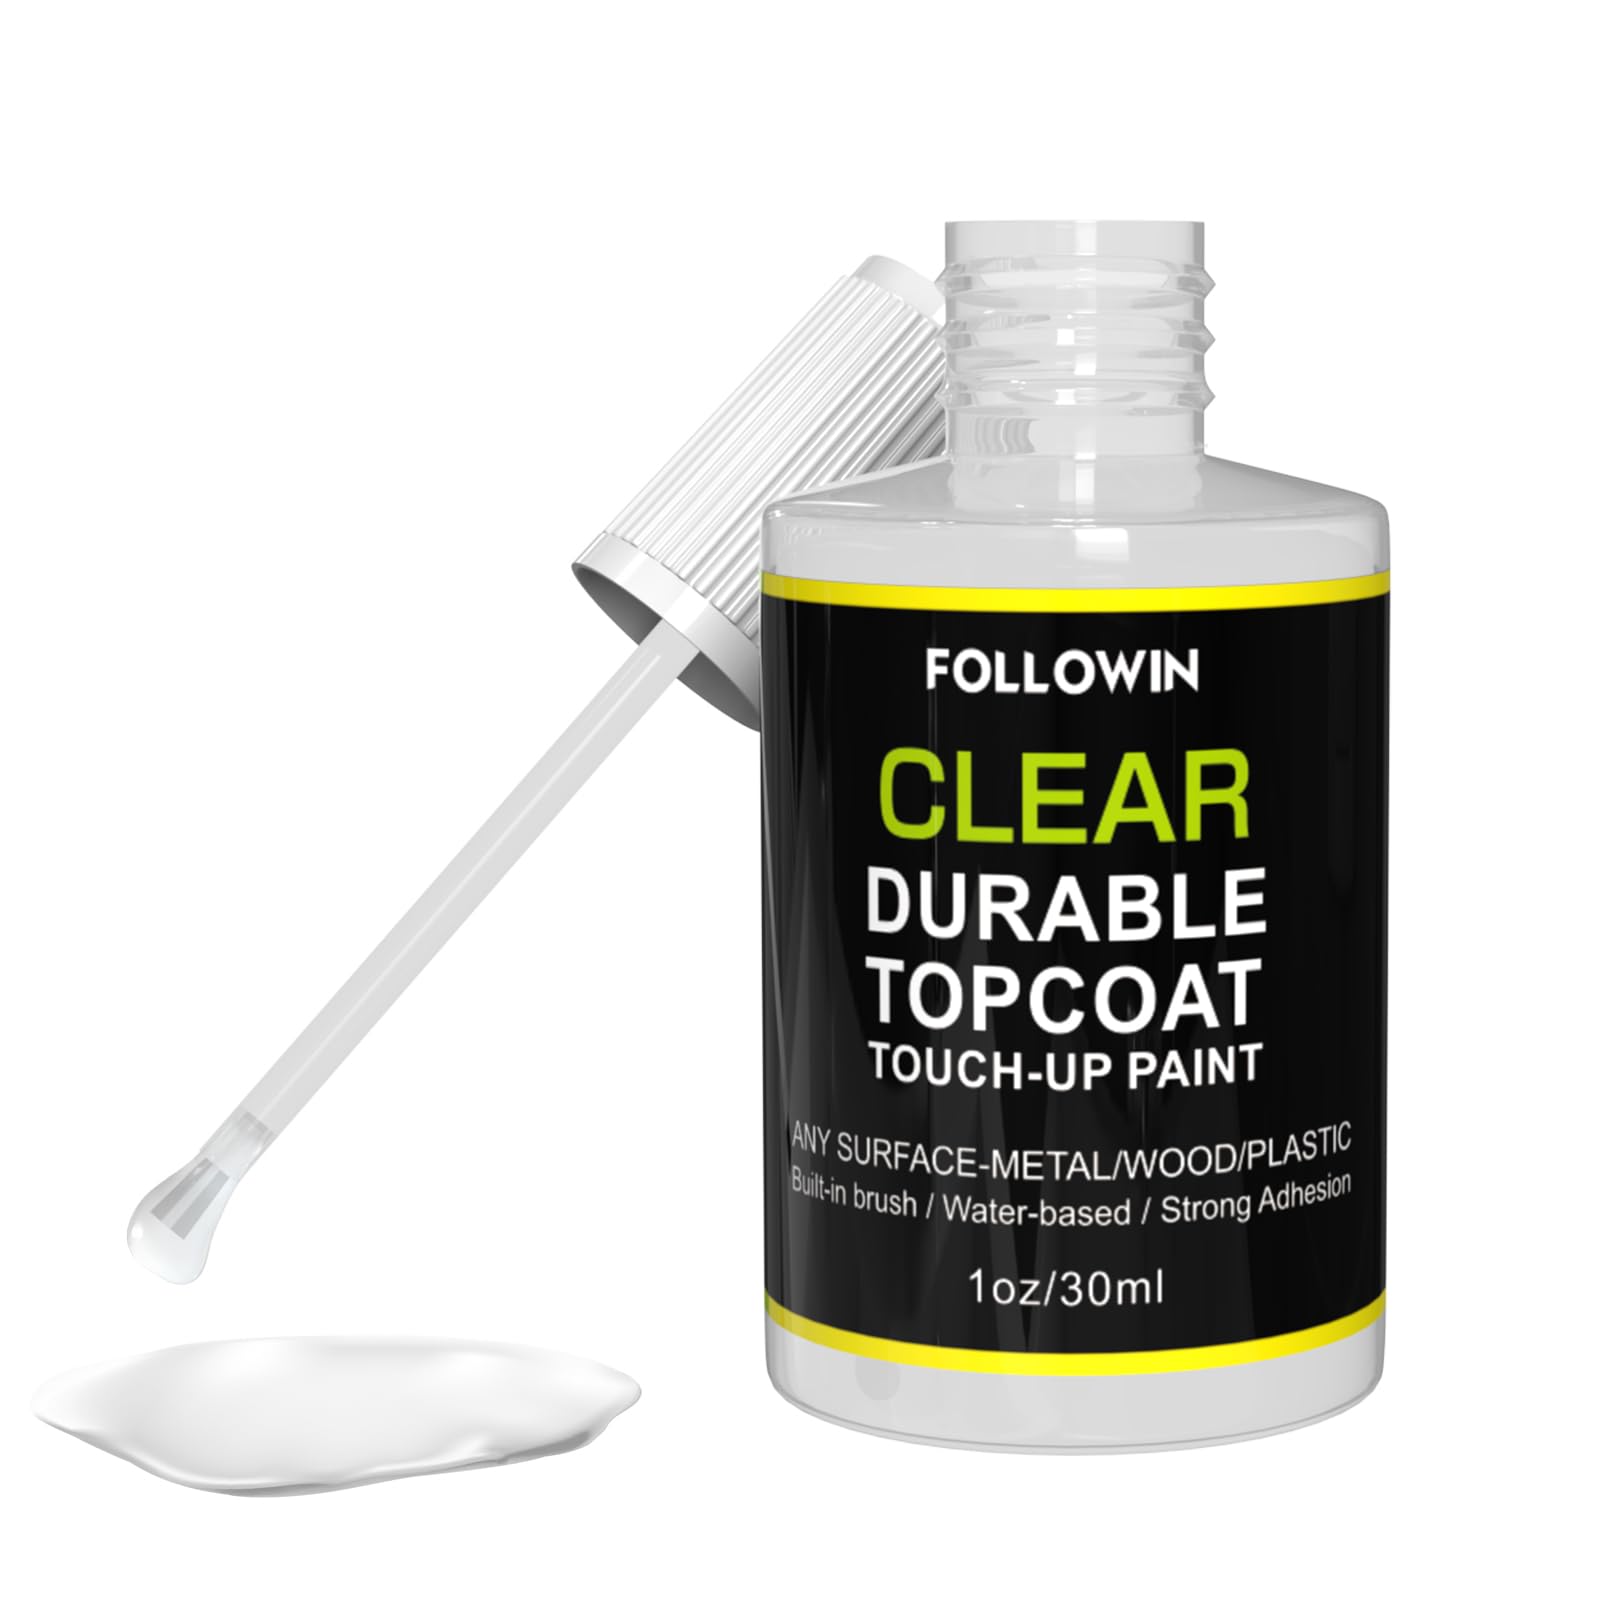
We recommend this for light repairs and shine touch-ups because it gives quick gloss and decent protection without fuss.
Pros
- Easy brush-on application saves time.
- Leaves a clear, glossy finish that hides small imperfections.
- Good UV and weather resistance for everyday driving.
Cons
- Not very thick — needs careful layering for deep damage.
- Small bottle may not cover larger areas.
- Gloss level varies by surface and prep.
We used this on headlight edges and small painted chips. The built-in brush made it fast to work with, and it dried hard in about an hour. It gave a clear shine that made the areas look newer.
Surface prep mattered a lot. When we sanded and cleaned first, the coat leveled out and held up to light washing. On rough or badly faded spots it needed several thin layers to look right.
For headlights, it protects against UV and mild chemicals and adds a glossy finish that blends well. If you need a heavy-duty repair or large coverage, choose a larger, thicker product instead.
Meguiar’s Two Step Headlight Kit
We recommend this kit if you want a quick, easy headlight refresh that often restores clarity and adds short-term protection.
Pros
- Simple two-step process we finished by hand without tools.
- Leaves a clear, polished look on most lenses.
- Includes coating that can slow re-oxidation for months.
Cons
- Results can vary; some lenses cloud again sooner than expected.
- The included applicator feels flimsy compared with pads we prefer.
- Protection may not match a full sanding and professional seal.
We used the kit on an older car with yellowed lenses and got clear, bright results within 30 minutes. The cleaner cuts through grime and oxidation fast, and the coating sprays on evenly when you keep a steady hand.
Application felt straightforward. Rubbing with the pad requires some elbow grease, but no drill or sanding tools. After the coating dried the lights looked much clearer and the beam pattern improved.
Long-term performance differed by vehicle. On some cars the clarity held for many months; on others it faded faster. For heavily pitted or deeply oxidized lenses, we still recommend sanding and a stronger seal for the longest life.
Formula 1 Headlight Restorer & Sealant (8 oz.)

We recommend this product if you want a quick, no-sanding polish that improves clarity and adds a short-term seal.
Pros
- Easy one-step use — no sanding or tools needed.
- Works fast on light to moderate haze.
- Feels like it adds some protection against UV and grime.
Cons
- Not a cure for heavy oxidation — may need repeat or sanding first.
- Results don’t always match “like-new” claims on very old lenses.
- Shorter lasting than multi-step kits or coatings.
We used this on a couple of older cars with milky headlights and found it very simple. A few circular wipes and cloth folds removed surface haze on one car in minutes. The other car had deep yellowing and needed a second pass and more elbow grease.
The polish smells faintly citrus and spreads smoothly without dripping. Buffing comes off clean with a microfiber towel and the lights looked noticeably clearer at night. Expect a visible gain in brightness, though not the factory-new finish on heavily pitted lenses.
If you want a fast maintenance fix or to improve visibility before a trip, this is a good option. For badly oxidized or scratched lenses, plan to follow up with sanding or a heavier restoration kit for longer-lasting results.
Chemical Guys Headlight Restore & Protect
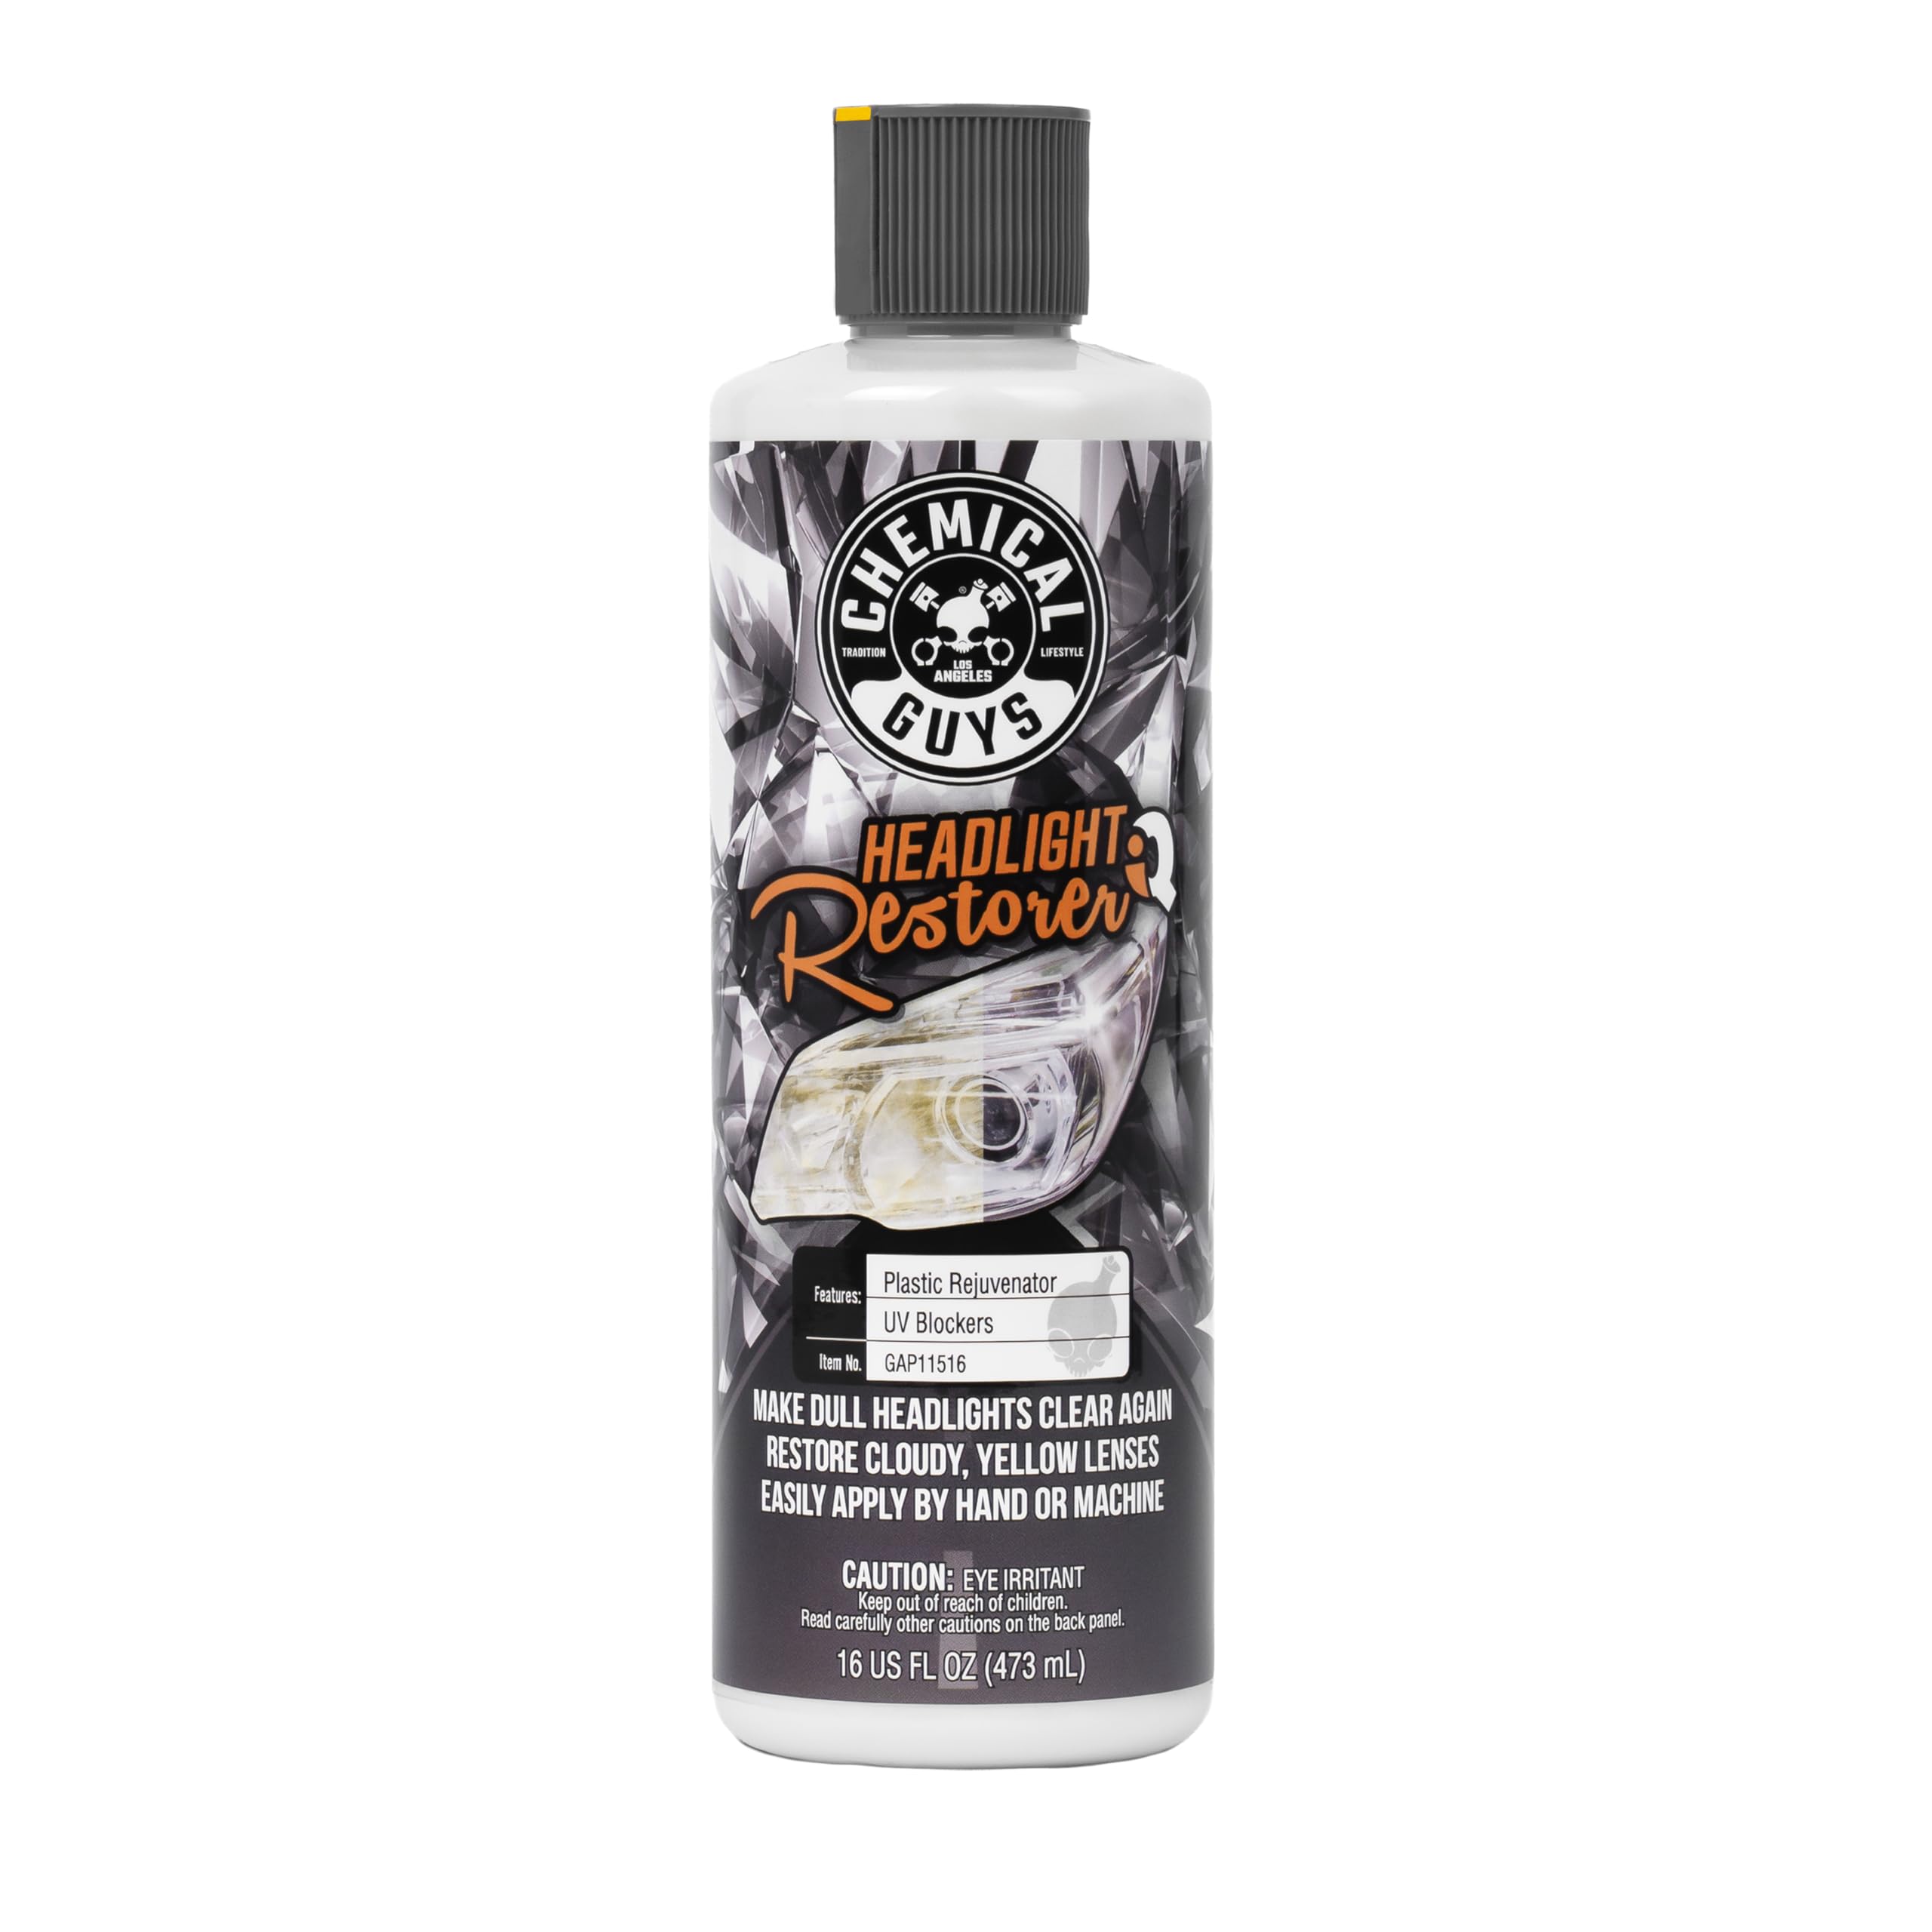
We recommend this if you want a fast, easy way to remove haze and add protection without heavy sanding.
Pros
- Restores clarity quickly with minimal effort.
- Leaves a protective layer that slows re-oxidation.
- Works by hand or with a DA polisher.
Cons
- Light scratches may need extra polishing first.
- Results depend on how degraded the lens already is.
- Tube packaging can be hard to control when applying.
We used this on two cars and a motorcycle lens. It cut through yellowing fast and buffed to a clear finish that looked much better than before. Application felt like using a dense paste — it spreads easily and buffs off without gummy residue.
On one very cloudy headlight we first had to use a dedicated polish for deeper scratches. After that step, this product sealed and brightened the lens well. The protective coat held up to rain and car washes for months on our test vehicles.
The formula applies by hand or with a foam pad on a dual-action polisher, which gives flexibility for DIYers or pros. We noticed the best results when we followed the directions and worked in small sections, then wiped thoroughly to reveal the final clarity.
Buying Guide
We start by checking what surface the clear coat will go on and how much prep it needs. Look for products that list compatibility with plastic polycarbonate, since many headlights use that material. The label should also state if it needs sanding, primer, or a single-step application.
We want a clear coat with UV protection and resistance to yellowing. UV blockers extend life and keep clarity. Look for claims about abrasion resistance and chemical resistance so the finish holds up to road salts and cleaners.
We check application method and drying time next. Spray cans are easy for small jobs, while two-part kits may give tougher, longer-lasting results. Fast-drying formulas let us finish sooner, but allow adequate cure time for best durability.
We compare coverage and yield to find value. Coverage is often listed in square feet per can or kit. Estimate how much we need based on both headlights and any extra panels we might restore.
We examine safety and instructions before buying. Choose products with clear safety data sheets and follow respirator and ventilation advice. For prep and technique tips, the EPA and an automotive paint supply guide are useful resources.
Editor’s Choice
We picked products that protect headlights and are easy to use. Our top picks resist UV, dry clear, and stick well to plastic lenses.
We favored clear coats with simple application methods. Spray formulas that offer even coverage scored higher because they reduce streaking and save time.
We checked durability in real conditions. Products that held up to sun and road grime for months earned stronger recommendations from us.
Key features we looked for:
- UV protection — prevents yellowing.
- Adhesion — avoids peeling or flaking.
- Finish — clear, non-hazy result.
- Ease of use — simple steps and quick drying.
Our best overall choice balanced all four features. It gave a smooth, long-lasting finish after two light coats. It also cleaned up with standard tools and required no special primers.
For DIY users on a budget, we recommend a reliable short-term option. It won’t last as long but still improves clarity and blocks UV for several months.
For long-term restoration jobs, we chose a higher-end ceramic clear coat. It costs more, but it lasts longer and resists chemicals and abrasion better than basic clear coats.
Comparisons & Alternatives
We compare clear coat, headlight restoration kits, and lens covers to help choose the right option.
| Option | Cost range | Durability | Ease of use | When to choose |
|---|---|---|---|---|
| Clear coat spray | $10–$30 | 6–18 months | Moderate; needs prep | Choose clear coat for a quick, smooth finish and better UV protection than polish. |
| Restoration kit (sanding + sealant) | $15–$40 | 12–36 months | Moderate to advanced; multiple steps | Choose a kit when the lens is heavily oxidized and you want longer-lasting results. |
| Replace lens or use covers | $50–$300+ | 3–10+ years | Easy (covers) to complex (replacement) | Choose replacement or covers for cracked lenses or when you want a long-term fix. |
| DIY polish only | $5–$20 | 1–6 months | Easy | Choose polish for very mild haze or as a temporary low-cost fix. |
We list pros and cons to make choices clearer.
- Clear coat pros: fast, adds UV protection, affordable.
- Clear coat cons: wears faster than full restoration, needs careful prep.
We also note similar-priced alternatives.
- A mid-range restoration kit often costs about the same as clear coat plus supplies.
- When to choose: we pick clear coat for speed and UV protection; we pick a restoration kit when we need durability and deeper repair.
FAQS
What does clear coat do for headlights?
We protect the plastic from UV rays, dirt, and light scratches. This keeps the lens clearer and helps the light output stay strong.
When should we reapply clear coat?
We typically reapply every 1–3 years depending on exposure and product type. If the lens shows yellowing or surface hazing, it signals reapplication.
Can we use car paint clear coat on headlights?
Some automotive clear coats work, but we recommend products made for plastics or headlights. Those formulas bond better and resist UV damage.
Do we need to sand before applying?
Yes, light sanding removes old oxidized layers and gives the new coat a better grip. We start with a fine grit and finish smoother for even coverage.
How long does the clear coat take to cure?
Most dry to the touch in 30–60 minutes and fully cure in 24–72 hours. Humidity and temperature affect curing time.
Is DIY application reliable?
We can get good results with proper prep, tools, and patience. Professional work lasts longer, but DIY is cost-effective for many cars.
What safety steps do we take?
We use gloves, eye protection, and a mask. We work in a well-ventilated area and follow product instructions.
Conclusion
We can protect headlights effectively with the right clear coat and prep work. Choosing a UV-resistant, automotive-grade product and following surface cleaning and sanding steps gives the best results.
We should apply thin, even coats and allow proper drying time between layers. This reduces runs, peeling, and uneven gloss.
If damage is severe or the lens is cracked, replacement is safer than repair. Clear coat helps with yellowing and light scatter, but it cannot fix structural damage.
We recommend keeping a maintenance schedule. Washing, waxing, and using a UV protectant every few months extends clarity and performance.
For DIY projects, follow manufacturer instructions and work in a dust-free area. For long-lasting results, consider professional application when in doubt.