
Upgrade Your Ride with the Best ISO Connector Car Stereo shows you how to pick, wire, and install an iso connector car stereo with clear steps. This guide is simple, practical, and made for DIYers who want reliable sound and clean wiring.
Contents
- 1 Key Takeaways
- 2 Introduction
- 3 What is an ISO Connector and Why It Matters
- 4 Tools and Parts You’ll Need
- 5 Step-by-Step: How to Install an ISO Connector Car Stereo
- 6 Common ISO Connector Car Stereo Wiring Color Codes and Pinout
- 7 Tips for Choosing the Best ISO Connector Car Stereo
- 8 Practical Tips and Examples
- 9 Troubleshooting: Common Problems and Fixes
- 10 Safety and Best Practices
- 11 Real-World Example: Replacing a Factory Unit with an ISO Head Unit
- 12 Conclusion
- 13 Author
Key Takeaways
- Point 1: An iso connector car stereo simplifies head unit swaps by standardizing power and speaker wiring.
- Point 2: Preparation is key: gather tools, read manuals, and map wires before you cut or splice.
- Point 3: Use the correct ISO harness or adapter to keep factory features and amps working.
- Point 4: Test power and speaker connections before final mounting to avoid rework.
- Point 5: Common issues like no power or poor sound usually trace to fuse, ground, or wrong pins on the ISO connector.
- Point 6: A clean ISO connector car stereo install saves time and improves reliability.
Introduction
If you want better sound or modern features, swapping a stereo is a top upgrade. This guide teaches you how to install an iso connector car stereo. You will learn what an ISO connector is. You will learn how to pick the right parts. You will learn step-by-step wiring and testing. The steps are simple. The language is plain. You will be ready to finish the job with confidence.
What is an ISO Connector and Why It Matters
The iso connector car stereo is a standard plug used in many cars and aftermarket head units. It groups power, ground, speaker outputs, and accessory wires into two plugs. This makes swaps easier. It also cuts wiring errors. If your car uses ISO or your new head unit includes an ISO harness, installation is fast and tidy.

Visual guide about Upgrade Your Ride with the Best ISO Connector Car Stereo
Image source: m.media-amazon.com
ISO Connector Basics
An ISO connector usually has two parts: one for power and one for speakers. The power plug handles constant 12V, switched 12V (ignition), accessory, and ground. The speaker plug handles the four speaker channels. Many adapters use the same ISO pin layout. So a harness that matches that layout lets you avoid cutting factory wires.
Why Use an ISO Connector Car Stereo
Using an iso connector car stereo harness saves time. It protects factory wiring. It helps when you want to return the car to stock. It also makes troubleshooting easier. If something fails, you can check the connector pins without hunting in the dash.
Tools and Parts You’ll Need
Before you start, gather these items. Good tools make the job quick and safe.

Visual guide about Upgrade Your Ride with the Best ISO Connector Car Stereo
Image source: i.pinimg.com
- New head unit with ISO connector or ISO harness
- ISO wiring harness adapter that fits your car
- Dash removal tools (plastic trim tools)
- Screwdrivers (Phillips and flat)
- Wire strippers and crimpers
- Butt connectors or soldering kit and heat shrink
- Multimeter for testing voltage and ground
- Electrical tape or heat shrink tubing
- Zip ties to tidy wiring
Choosing the Right Parts
Choose a head unit that lists ISO compatibility. If the unit uses a different harness, get an ISO adapter. For factory amps or steering wheel controls, get the proper retainers or CAN bus adapters. These keep features working. They protect resale value.
Step-by-Step: How to Install an ISO Connector Car Stereo
Follow these steps. Work slowly. Keep screws and trim in a safe place. Use short, clear steps and test as you go.
Visual guide about Upgrade Your Ride with the Best ISO Connector Car Stereo
Image source: m.media-amazon.com
Step 1 — Prepare Your Car
Park on level ground. Turn off the engine. Remove the key. Disconnect the negative battery terminal to prevent shorts. This avoids blown fuses and sparks. Keep a small tray for screws. Remove anything blocking the dash. Use plastic trim tools to lessen damage to panels.
Step 2 — Remove the Old Head Unit
Pry off the trim around the unit. Unscrew any mounting bolts. Pull the head unit gently. You will see the factory harness. Some cars use OEM connectors. Some use ISO. Note how the old unit was mounted. Take photos. They help when you install the new unit.
Step 3 — Identify the ISO Wiring or Get an Adapter
Look at the plugs behind the head unit. If you see the square two-plug ISO set, great. If not, you will use an adapter. A good approach is to match the car connector to an ISO harness adapter. The adapter converts factory pins to the ISO layout. This keeps factory wiring intact.
Step 4 — Match Wire Functions
Before connecting, identify wires. The main wires are:
- Constant 12V (+12V battery)
- Switched 12V (ACC/ignition)
- Ground (chassis)
- Remote turn-on (for amps)
- Left and right front and rear speaker wires
Use your multimeter to confirm 12V and ground. Check the car manual or an online wiring diagram if unsure. Label wires with tape. This reduces mistakes when you attach the ISO harness.
Step 5 — Connect the ISO Harness
Plug the ISO connector from the new head unit into the adapter or the car ISO socket. If you must splice wires, match colors and functions. Most ISO color codes follow a pattern, but always verify. Use butt connectors or solder for solid joins. Cover with heat shrink. Secure each wire neatly. A snug, clean connection prevents noise and failures.
Step 6 — Secure Special Connections
If your car has a factory amp, steering wheel controls, or a CAN bus, install any required interface now. Many cars need a module to translate old signals to the new head unit. Plug the interface into the ISO harness if available. Follow the module maker’s instructions for wiring and programming.
Step 7 — Test Before You Mount
Reconnect the battery negative. Turn the key to ACC. Check that the head unit powers up. Test radio, Bluetooth, USB, and any features. Play audio to check all four speakers. Test the antenna output. Confirm steering wheel controls and phone functions. Fix any issues before you slide the unit into the dash.
Step 8 — Mount the Head Unit and Reassemble
When tests are good, slide the head unit into the dash cage. Secure with screws. Reinstall trim panels. Make sure wires are routed so they do not rub or get pinched. Use zip ties to tidy the harness. Replace any panels and trim you removed earlier.
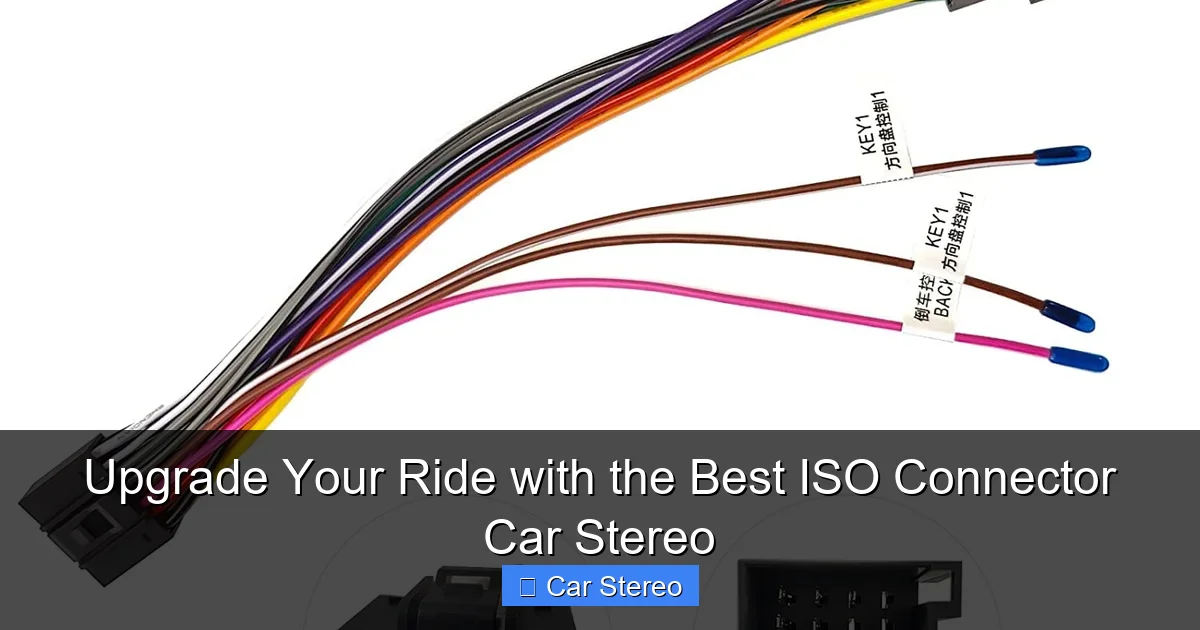
Common ISO Connector Car Stereo Wiring Color Codes and Pinout
Here are common ISO colors and pins. Many head units follow this layout. But always verify with manuals.
- Power plug: Yellow = constant 12V / memory
- Red = switched 12V / ignition
- Black = ground
- Blue = remote turn-on / amp turn-on
- Orange/white = illumination/dimmer
- Speaker plug: White/white-black = front left +/−
- Grey/grey-black = front right +/−
- Green/green-black = rear left +/−
- Purple/purple-black = rear right +/−
Not every unit uses these exact colors. Confirm before you join wires. Using the wrong pin can blow speakers or the unit.
Tips for Choosing the Best ISO Connector Car Stereo
Picking the right unit makes the install easier. Here are tips that help you choose a good match.
- Match physical size. Single-DIN or double-DIN must fit the dash cavity.
- Check ISO support. If it has ISO plugs, wiring is simpler.
- Get the right harness. Buy an ISO adapter made for your car model when needed.
- Retain features. Look for steering wheel control adapters and amplifier retainers if you need them.
- Plan upgrades. If you want a sub or amp, make sure the head unit has remote turn-on and preamp outputs.
Practical Tips and Examples
Here are practical tips and real examples to help you avoid common pitfalls.
- Tip: Use a wiring harness that snaps into your car’s OEM plug. This keeps factory wiring intact and makes future changes easy.
- Example: You buy a head unit with an ISO plug. Your older car has an OEM connector. You buy an OEM-to-ISO adapter and plug the new unit in. No splicing, no fuss.
- Tip: Label the battery and ignition wires before disconnecting. It saves time during reconnection.
- Example: You need steering wheel control logic. Buy a steering control interface that plugs into the ISO harness. Program it to match your car model. The factory buttons work again.
Using these tips keeps your install clean. It also keeps the cost down and reduces errors with the iso connector car stereo.
Troubleshooting: Common Problems and Fixes
If something goes wrong, check these common issues. They cover most faults with an iso connector car stereo install.
No Power
Symptoms: Head unit stays dead. Check the battery and fuses. Use a multimeter to test the constant 12V on the yellow wire and switched 12V on the red wire. Confirm ground on the black wire. If fuses are OK but no power, check the ISO pins for corrosion or bent pins.
No Sound
Symptoms: Unit works but no audio. Verify speaker wires and speaker output pins on the ISO connector. Make sure speakers are connected and in good condition. If you hear sound from some speakers only, check wiring polarity. Reverse one wire in a pair if the speaker is out-of-phase.
Only One Channel Works
Symptoms: Front or rear silent. Check the speaker plug. Ensure all four speaker wires are connected. Check the speaker outputs on the head unit. Swap speakers to test the speaker itself. If you have an external amp, check the remote turn-on and preamp connections.
Bluetooth or USB Not Working
Symptoms: Phone won’t pair or charge. Check whether the head unit requires a separate USB power or data connection. Some USB ports only supply power. Make sure the head unit firmware is up to date. Reset the unit and try pairing again.
Noise or Interference
Symptoms: Buzzing or humming. This often comes from a bad ground or noisy power source. Ensure the head unit ground is solid and attached to bare metal. Route antenna and audio cables away from power wires. Use shielded RCA cables to reduce hum.
Factory Amp or CAN Bus Issues
Symptoms: No sound even though head unit runs. Some cars use factory amplifiers and require a turn-on signal or serial data. Use a compatible amplifier adapter or CAN bus interface. These modules translate factory signals to the ISO harness. They are key to a working iso connector car stereo in many modern cars.
Safety and Best Practices
- Disconnect the battery before you cut or splice wires.
- Use proper insulation on all joints. Heat shrink is best.
- Keep wiring neat to avoid pinching when reassembling the dash.
- Never force connectors. If a plug does not seat, inspect pins first.
- Test functions before final assembly to save time if you need to fix wiring.
Real-World Example: Replacing a Factory Unit with an ISO Head Unit
Anna has a 2008 sedan. She wants Apple CarPlay. Her factory radio uses an OEM connector. She buys a new head unit with ISO plugs and an OEM-to-ISO adapter matched to her model. She also buys a steering wheel control adapter. She follows the steps above. She tests power, connects the ISO harness, programs the steering control module, and mounts the head unit. The install takes her about two hours. The system works with no cut wires left behind. This is a simple example of using an iso connector car stereo to modernize a car.
Conclusion
Installing an iso connector car stereo is a smart DIY upgrade. It adds features and sound while keeping the dash tidy. With the right tools, a correct harness, and careful testing, you can finish the job in a few hours. Use the tips and troubleshooting steps above to avoid common mistakes. Take your time. Label wires and test before final mounting. A clean ISO harness install will improve sound and make future work easier. Enjoy your new audio and the clarity that comes from a solid iso connector car stereo setup.
🎥 Related Video: samcon car stereo wiring
📺 Chamunda electronic technical